How to Waterproof Your Basement for Under $500: A DIY Guide
Did you know that your roof can collect 1,500 gallons of water during just one inch of rainfall? The volume of water from one inch of rainfall is equivalent to filling an average swimming pool.
However, with proper drainage systems, your gutters can effectively channel approximately 600 gallons of water per square foot away from your Foundation. Fortunately, inexpensive basement waterproofing solutions exist that can protect your home from this potential deluge.
From applying waterproof sealants to installing interior drainage systems, we can help you safeguard your basement without breaking the bank. Many effective waterproofing solutions, like crack injections and vapor barriers, can be completed as DIY projects in a few days.
Ready to learn how to keep your basement dry for under $500? Let’s explore these budget-friendly waterproofing techniques that you can implement yourself!
Assessing Your Basement’s Waterproofing Needs
Properly assessing your basement’s specific needs before investing in waterproofing solutions will save you money and prevent unnecessary work. A thorough evaluation helps identify precisely where moisture enters and what affordable solutions will work best for your situation.
Identifying the cheapest way to waterproof your specific basement
The most cost-effective approach to basement waterproofing typically starts from the inside. Interior waterproofing generally costs significantly less than exterior methods that require excavation. For many homeowners, tackling visible wall cracks with waterproof sealants or epoxy provides immediate results without breaking the bank.
Additionally, simple maintenance tasks can substantially reduce water intrusion. Cleaning gutters regularly costs nothing yet effectively prevents water from sheeting over your roof and soaking the soil around your Foundation. This complimentary maintenance task can dramatically reduce moisture problems.
Consider crack injections with expanding polyurethane if you’ve noticed water seepage through foundation cracks. While professional basement waterproofing contractors typically charge several hundred dollars for this service, it’s significantly cheaper than extensive waterproofing systems.
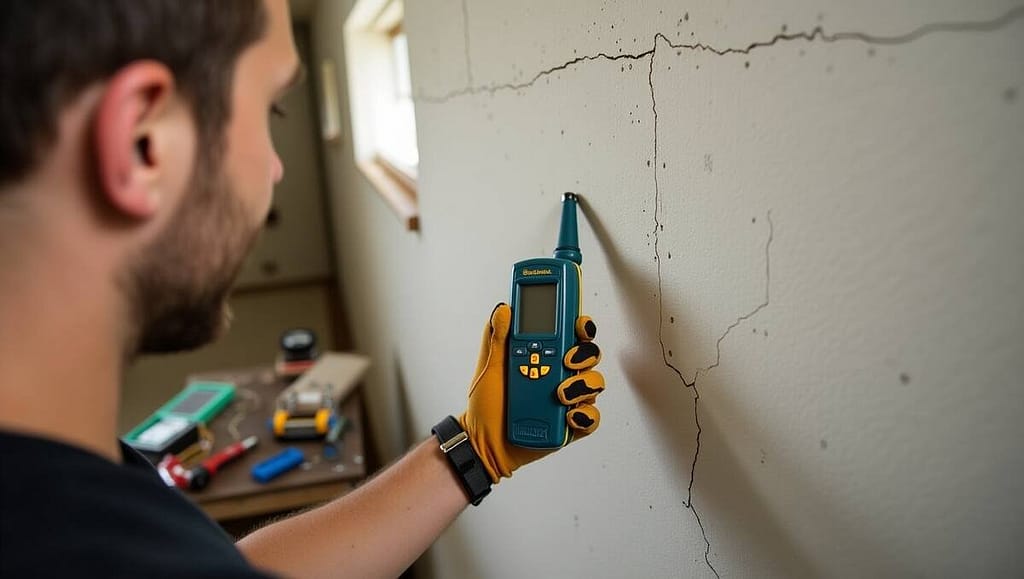
DIY moisture testing methods
Reliable moisture assessment doesn’t require expensive equipment. Start with a thorough visual inspection after heavy rainfall when issues are most visible. Look for water stains, discoloration, or efflorescence (white, powdery residue) on walls and floors.
For more precise measurements, consider these affordable testing methods:
- Moisture meters provide quick, non-destructive readings that help pinpoint problem areas without damaging walls.
- Hygrometers – These measure humidity levels in the air, helping identify potential condensation issues before they cause damage.
- Simple touch test – Feel for damp or soft spots on walls and floors during your inspection.
Also, pay attention to musty odors, peeling paint, or wallpaper – clear indicators of moisture problems.
Creating a waterproofing priority list
Based on your assessment, establish a prioritized waterproofing plan that addresses the most critical issues first:
Start with zero-cost solutions like cleaning gutters and redirecting downspouts at least 10 feet from your Foundation. Next, use affordable sealants to address any visible cracks or leaks in the foundation walls.
Consequently, if condensation is your primary concern, consider affordable improvements like extending downspouts, applying waterproofing paint, or installing a dehumidifier.
Finally, evaluate whether more extensive solutions like interior drainage systems or sump pumps are necessary. Identifying the root cause of moisture problems before implementing solutions ensures that every dollar spent contributes to a lasting solution rather than a temporary fix.
Budget-Friendly Prevention: The First Line of Defense
Preventing water from reaching the Foundation is the most economical way to dry the basement. The first line of defense against basement moisture doesn’t require expensive professional services or specialized equipment. Instead, focusing on these budget-friendly preventative measures can effectively protect your basement without straining your wallet.
Low-cost landscaping solutions
Proper landscaping around your home’s foundation is crucial – similar to how strategic interior design creates balance in a space, grading your yard correctly creates harmony in water flow.. Creating a graded slope that directs water away from the Foundation is fundamental to any inexpensive basement waterproofing plan. Consider installing a dry creek with gravel around your home to route water away from the Foundation for even better protection.
River rock barriers provide another affordable option that prevents moisture buildup while maintaining visual appeal. When using mulch near your home, always maintain 4-6 inches of space between the mulch and your Foundation to keep the Foundation dry. This simple adjustment can significantly alleviate manageable basement moisture issues.
Expert landscapers can also create grass and valleys that redirect water away from trouble spots, helping to relieve hydrostatic pressure that may originate deep within your yard.
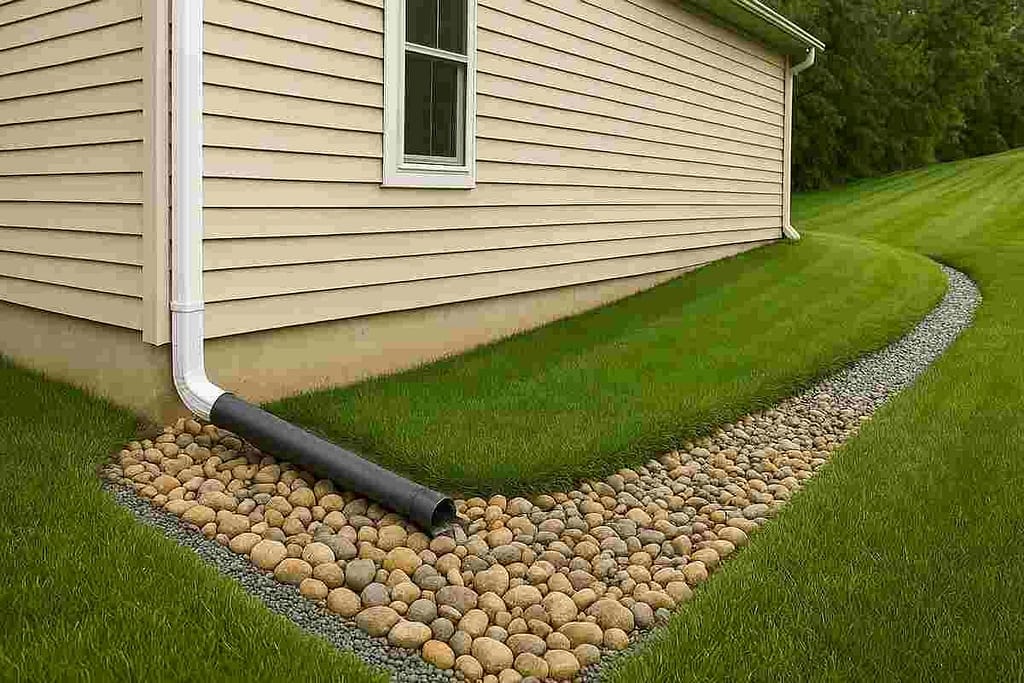
Affordable gutter improvements
Proper gutter maintenance is the most cost-effective waterproofing strategy available. Clean gutters are essential for directing approximately 600 gallons of water per square foot of roof during a one-inch rainfall away from your Foundation.
Extending downspouts at least 10 feet from the Foundation dramatically reduces basement leakage frequency. One homeowner reported that basement leaking decreased from 15-20 times annually to 3-4 occurrences yearly after extending their downspouts. These extensions can be installed at a reasonable cost, whether they run to daylight or terminate in a bubbler pot.
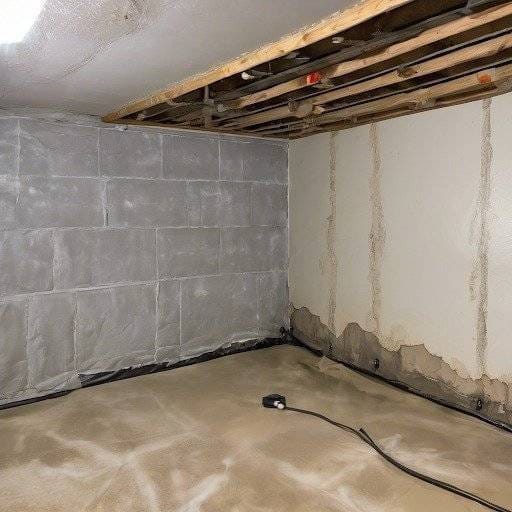
DIY vapor barriers
Installing a vapor barrier in your basement is a practical DIY project that improves moisture control and energy efficiency. Typically made of polyurethane sheeting at least 6 millimeters thick, vapor barriers cost approximately $0.50 to $0.70 per square foot.
These barriers prevent moisture penetration while simultaneously keeping basements insulated and warm. They can be installed on floors, ceilings, and walls to create a tight envelope around the space. For walls, vapor barriers should be installed before the studs and insulation should be placed directly over the frame.
Beyond preventing water damage, vapor barriers provide crucial protection against mold and mildew, which can cause long-term health problems and create unsafe living conditions. Though not strictly necessary, this affordable solution pays for itself through reduced energy bills and prevents moisture damage.
Cost-Effective Repair Solutions for Existing Water Damage
Once water damage occurs in a basement, addressing it promptly prevents further deterioration and costly repairs. Fortunately, several inexpensive basement waterproofing solutions can effectively repair moisture issues without breaking the bank.
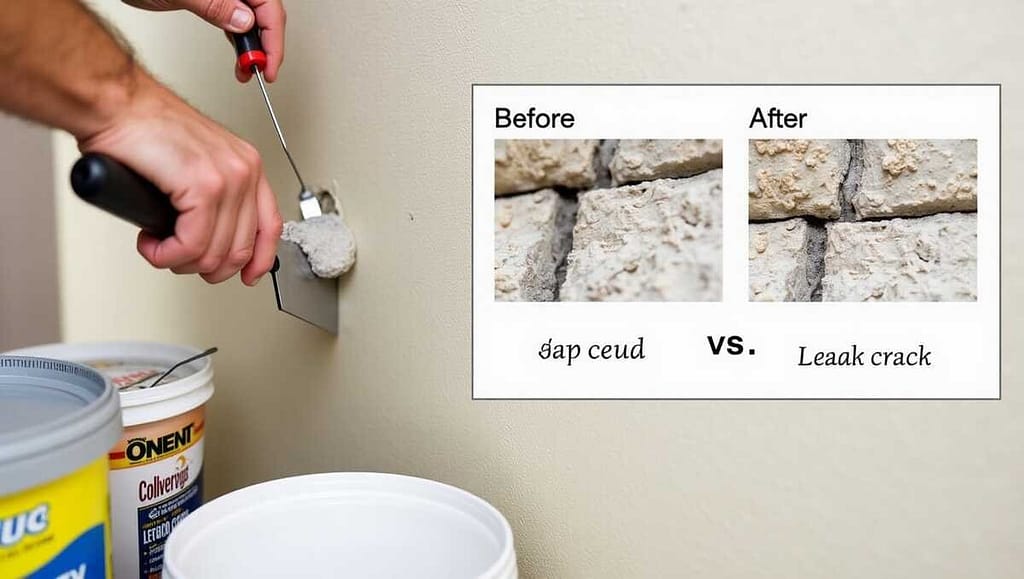
Patching Foundation cracks on a budget
Foundation cracks provide the perfect entry point for water, but they’re often the easiest and most affordable to fix. Concrete patch mixes and hydraulic cement offer budget-friendly solutions, typically costing between $10-20 per bucket. These vinyl concrete patches dry in under 24 hours and effectively prevent small cracks from growing larger.
For cracks near plumbing pipes, remember that proper sealing requires attention to both the foundation and pipe connections – the same way reducer fittings ensure leak-proof plumbing systems.
For water dribbling through cracks or gaps around plumbing pipes, hydraulic cement or polyurethane caulk provides an effective solution for approximately $10. Nevertheless, it’s important to note that cement sealing should be considered a quick fix rather than a permanent solution.
Affordable options for wall sealing
Waterproof paints and sealants create an effective moisture barrier on interior basement walls. These products are relatively inexpensive and available at most home improvement stores. Before application, thoroughly clean the wall, seal around joints, and patch imperfections.
A quality penetrating concrete sealer works well for foundations with less than 4% moisture content. Alternatively, foundations with higher moisture content require a moisture vapor barrier. Waiting until the walls are completely dry before applying any sealant prevents future moisture problems.
Inexpensive floor waterproofing techniques
Waterproof coatings applied to concrete surfaces minimize future water damage. Furthermore, consider installing a French drain system to prevent water pooling when basement floors require substantial repair.
Flood-damaged floors often require replacement, as materials like carpet retain moisture and promote mold growth. Similarly, water-damaged drywall requires removal—generally to a height of 4 feet if flood levels are below 2.5 feet or 8 feet if water levels are higher.
Although professional basement waterproofing services provide comprehensive solutions, DIY approaches like crack injections, waterproof paints, and simple drainage improvements offer significant protection without the hefty price tag. According to experts, the most effective approach balances cost with the severity of your water problems.
Best Waterproofing Methods for Long-Term Protection
Long-term basement waterproofing solutions represent valuable investments that protect your home and wallet from recurring water damage. Installing these lasting systems now prevents expensive repairs later, making them cost-effective despite higher initial costs compared to temporary fixes.
Homeowners should evaluate waterproofing options like they would compare gas vs electric water heaters – considering both installation costs and long-term performance.
Comparing waterproofing chemicals for basements
Not all waterproofing products offer equal protection or longevity. When selecting materials for your inexpensive basement waterproofing project, consider these options:
- Cementitious waterproofing is relatively inexpensive and easy to apply, making it popular for DIY projects. However, it’s less durable when exposed to harsh weather or high water pressure.
- Liquid synthetic membranes: Pre-mixed solutions like polyurethane that can be painted directly onto foundation walls. These are typically the most straightforward coatings to apply.
- Waterproof paint is the least expensive option, at $1-$6 per square foot. It creates a moisture barrier but serves best as a supplementary measure rather than a complete solution.
- Vapor barriers: Costing approximately $0.50-$0.70 per square foot, these polyethylene sheets prevent moisture penetration while improving energy efficiency.
DIY drainage solutions that last
Interior drainage systems effectively manage water that enters the basement without requiring professional installation. French drains, installed along the perimeter of the basement floor, collect water and direct it to a sump pump or floor drain.
For poured concrete walls, foundation wrap provides a practical pathway for water flow into your drainage system. This rigid plastic material features rows of dimples that create space for water movement behind it.
Moreover, installing an interior drainage system costs between $40 and $100 per square foot—substantially less than exterior waterproofing methods that involve excavation.
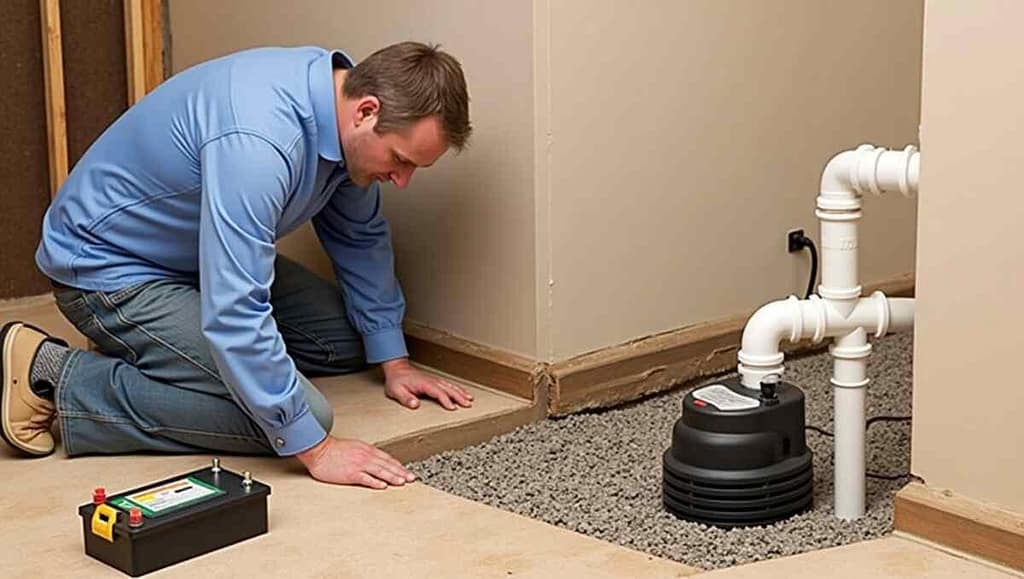
Budget-friendly sump pump installation
A properly installed sump pump prevents basement flooding and costs between $300-$600 for tools and materials if you handle the installation yourself. For the best long-term protection:
- Choose a submersible pump for finished basements as they operate more quietly than pedestal models despite costing slightly more.
- Select pumps with a vertical float switch, as professionals consider these more reliable than pedestal or standard float switch pumps.
- Install your basin in an unfinished basement area for easy access and maintenance.
- Consider a backup battery system if power outages are common in your area.
Compared to cleaning up after flood damage, sump pumps are relatively inexpensive and provide invaluable protection against water that can cause mold and affect foundation integrity over time.
FAQs
What is the cheapest way to waterproof a basement?
The most affordable methods include:
- Cleaning gutters & extending downspouts (free-$50)
- Applying waterproof paint (1−6/sq ft)
- Using hydraulic cement for cracks (10−20/bucket)
- Installing DIY vapor barriers (0.50−0.70/sq ft)
What is the cheapest method of waterproofing?
Interior solutions like sealants and vapour barriers are the most budget-friendly. Prioritize:
- Redirecting water with landscaping/gutter extensions
- Sealing cracks with vinyl concrete patches
- Applying waterproof coatings before costly drainage systems
What is the best waterproofing method for a basement?
For long-term protection, combine:
✔️ Interior drainage (French drains: 40−100/sq ft)
✔️ Sump pump (300−600 DIY)
✔️ Foundation wrap for poured concrete walls
✔️ Professional-grade sealants for active leaks
What is the best waterproofing chemical for basements?
Depends on your needs:
- Cementitious coatings: Cheap & easy for DIY (10−20 coverage)
- Liquid membranes: Best for DIY durability (polyurethane)
- Penetrating sealers: Ideal for <4% moisture walls
- Hydraulic cement: Fast fix for active leaks
Conclusion
Protecting your basement from water damage doesn’t require expensive professional services or complicated solutions. Through careful assessment and strategic DIY approaches – similar to those recommended by the EPA’s Home Waterproofing Guidelines – homeowners can effectively waterproof their basements while staying within a $500 budget. Simple steps like proper gutter maintenance, affordable sealants, and smart drainage solutions make a significant difference in keeping basements dry.
Most importantly, addressing water issues early prevents costly repairs later. Basic prevention methods, such as extending downspouts and applying waterproof coatings, provide immediate protection. With proper moisture testing and regular maintenance, these affordable solutions create a robust defense against water damage. Remember – whether waterproofing your basement or renovating a small bathroom while living there, proper planning prevents costly mistakes. Whether using hydraulic cement for crack repairs, installing vapor barriers, or setting up an essential drainage system, these budget-friendly approaches deliver lasting results. Taking action now saves money while protecting your home’s Foundation and creating a healthier living environment for years.