Building luxury homes is a highly specialized and lucrative sector of the construction industry. With bespoke designs, premium materials, and a discerning clientele, luxury home builders command impressive earnings. But how much do they actually make? Let’s explore the various factors influencing their income, including profit margins, regional differences, and project-specific earnings.
Discover how much luxury home builders make, including average profit margins, regional earnings, and key factors impacting their income in the construction industry.
Average Profit Margins for Home Builders
Luxury home builders typically enjoy higher profit margins compared to general contractors. On average:
Gross Profit Margins: 15% to 25% per project.
Net Profit Margins: 6% to 9%, depending on overhead costs and regional market conditions.
These figures represent industry averages, but individual builders may exceed these margins with efficient project management and strong client relationships.
Regional Earnings: A Comparative View
How Much Do Builders Make in Australia?
In Australia, home builders—including those specializing in luxury homes—can earn between AUD 20,000 and AUD 100,000 per project. The profit margin varies based on factors such as location, market demand, and the scale of the build.
Earnings in Canada
Canadian luxury home builders earn an average gross profit of 10% to 20% per project. For a typical luxury home priced at CAD 2 million, this translates to a gross profit of CAD 200,000 to CAD 400,000.
Custom Home Builders in Texas
In Texas, custom home builders, including luxury specialists, often report profit margins of 10% to 25%. A high-end project costing $1.5 million could yield a profit of $150,000 to $375,000, depending on the complexity and client preferences.
Factors Influencing Builder Earnings
1. Project Size and Complexity
Larger homes with intricate designs and premium materials naturally increase the profit potential. Builders can charge higher fees for unique architectural features and high-end finishes.
2. Market Demand and Location
Regions with booming real estate markets, such as California, New York, and Texas, allow builders to command higher prices due to increased demand for luxury housing.
3. Efficient Management and Cost Control
Builders who minimize material waste, negotiate favorable contracts with subcontractors, and streamline construction processes can significantly boost their net profits.
4. Client Preferences and Upgrades
Luxury clients often request customizations and upgrades, such as smart home systems and premium appliances, which add to the overall project value and profit margins.
5. Impact of Economic Trends
Economic conditions, such as rising material costs and labor shortages, also affect builder earnings. Builders who adapt to market changes and leverage cost-saving technologies tend to fare better.
How Builders Make Money
1. Per Project Earnings
Luxury home builders typically earn 15% to 25% of a project’s total cost. For example:
A $2 million project might yield $300,000 to $500,000 in gross profit.
2. Monthly Income
Builders who manage multiple projects simultaneously can earn substantial monthly incomes. For instance:
Completing five $1.5 million homes annually with a 20% profit margin could result in $1.5 million in gross profit.
3. Hourly Rates
While luxury home builders don’t typically charge hourly rates, their effective earnings can exceed $200 per hour when factoring in project management, coordination, and oversight tasks.
4. Diversified Income Streams
Some builders increase their earnings by offering additional services, such as interior design consultation or landscape planning, which further enhance the client experience and boost profitability.
FAQs About Luxury Home Builders’ Earnings
1. What is the Average Profit Margin for a House?
The average profit margin for a luxury home is between 15% and 25%, higher than standard home construction projects.
2. How Much Money Does a Builder Make Per House?
Luxury home builders typically earn $150,000 to $500,000 per project, depending on size and scope.
3. How Much Do Custom Home Builders Make in Texas?
Custom home builders in Texas often report annual earnings ranging from $500,000 to over $1 million, particularly in high-demand areas like Austin and Dallas.
4. What Affects Builders’ Profit Margins?
Profit margins depend on factors like material costs, labor efficiency, market demand, and project complexity.
5. How Do Builders Ensure Long-Term Profitability?
By investing in marketing, adopting construction technology, and maintaining strong client relationships, builders can sustain and grow their profit margins.
The Future of Builder Profit Margins
Home Builder Profit Margin in 2025
The average profit margins for home builders are expected to stabilize or slightly increase by 2025. Economic trends, rising material costs, and innovations in construction technology will likely influence this trajectory. Builders investing in marketing, client engagement, and advanced tools can maintain or improve their profitability.
Trends Shaping the Industry
Green Building: Sustainable materials and energy-efficient designs are becoming more popular, allowing builders to charge a premium for eco-friendly homes.
Smart Home Integration: Builders who offer advanced home automation systems see increased demand and higher profits.
Luxury Upgrades: Features like infinity pools, wine cellars, and home theaters add significant value to projects, enhancing earnings.
Challenges Facing Luxury Home Builders
1. Rising Material Costs
The cost of raw materials like lumber and steel has surged in recent years, squeezing profit margins.
2. Labor Shortages
Finding skilled laborers for high-end projects is a growing challenge. Competitive wages and training programs can help builders attract top talent.
3. Regulatory Hurdles
Luxury home builders often face stricter zoning laws and building codes, which can delay projects and increase costs. Navigating these challenges requires expertise and careful planning.
Conclusion
Luxury home builders operate in a lucrative niche, with earnings that reflect their expertise and the high-end services they provide. From profit margins of 15% to 25% to regional variations in income, their financial success depends on factors like project size, location, and efficient management. For aspiring builders or clients, understanding these dynamics offers valuable insights into the luxury home construction market.
As trends like green building and smart home integration continue to shape the industry, builders who adapt and innovate are poised for continued success.
Discover why a reducer fitting is essential in plumbing systems. Learn about its types, uses, and benefits for maintaining efficient water flow and pressure. Explore why use a reducer fitting on a plumbing system for seamless transitions.
A reducer fitting is a vital component in plumbing systems, allowing seamless transitions between pipes of varying diameters. Its primary role is to ensure proper water flow, pressure management, and compatibility between different pipe sizes. Whether you’re a homeowner or a plumbing professional, understanding the importance of reducer fittings can lead to more efficient and reliable plumbing systems.
Reducer fittings are not only functional but also crucial for maintaining system integrity. By reducing pipe sizes strategically, they help manage pressure, minimize turbulence, and ensure that all system components work harmoniously. Let’s explore the significance, types, and applications of reducer fittings in detail.
What Are the Different Types of Pipe Reducers?
Pipe reducers come in two main types:
Concentric Reducers
Symmetrical design with aligned centerlines.
Ideal for vertical pipelines to maintain smooth fluid flow and minimize turbulence.
Eccentric Reducers
Offset design with misaligned centerlines.
Best for horizontal pipelines to prevent air pockets or liquid accumulation.
Additionally, reducers can vary by material, such as stainless steel, PVC, or carbon steel, catering to different plumbing requirements. Understanding these types helps in selecting the right reducer for specific applications, ensuring optimal system performance.
What Is the Purpose of a Reducer in Plumbing?
Reducers serve multiple purposes in plumbing systems:
Connecting Pipes of Different Sizes: Reducers provide a secure and leak-free connection between pipes with varying diameters.
Managing Water Flow: By adjusting pipe sizes, reducers help regulate water flow and pressure throughout the system.
Enhancing System Efficiency: They optimize plumbing designs, ensuring efficient performance and reducing the risk of blockages.
These fittings are essential in both residential and industrial plumbing, where adaptability to different pipe sizes is often necessary. Without reducers, plumbing systems would face frequent disruptions due to pressure imbalances or flow inconsistencies.
How Do Concentric and Eccentric Reducers Differ From One Another?
Their application and design are where they differ most:
Concentric Reducers:
Align pipes at the center.
Commonly used in vertical pipelines to ensure symmetrical flow.
Eccentric Reducers:
Feature an offset alignment.
Preferred for horizontal pipelines to avoid air pockets or liquid pooling.
Choosing between these two depends on the pipeline’s orientation and the type of fluid being transported. For instance, eccentric reducers are better for pipelines carrying mixed fluids or gases to prevent unwanted accumulation.
Why Are Reducers Used in Plumbing Systems?
Reducers play a critical role in maintaining the integrity of plumbing systems:
Preventing Pressure Drops: They ensure consistent water pressure by smoothly transitioning pipe sizes.
Adapting to Fixtures: Reducers allow larger pipes to connect with smaller appliances, such as faucets or valves.
Regulating Flow Dynamics: They manage flow rates, especially in systems with varying demands.
By serving as a bridge between pipes of different sizes, reducers make complex plumbing designs practical and efficient. They also enhance system safety by minimizing risks associated with pressure surges or flow disruptions.
Why Use Reducers for Control Valves?
Reducers enhance the functionality of control valves by:
Achieving Precise Flow Control: They adapt pipe sizes to fit valve dimensions, ensuring efficient operation.
Minimizing Pressure Loss: Properly sized reducers help maintain consistent pressure around valves.
Control valves often need precise flow conditions to function effectively. Using reducers ensures that these conditions are met without compromising the overall system’s efficiency.
Types of Reducers in Piping
Here’s a detailed look at the two main types:
Concentric Reducer
Provides an even, conical transition between pipes.
Suitable for vertical systems and pump discharge lines.
Eccentric Reducer
Maintains one side horizontally aligned.
Ideal for horizontal pipelines to prevent gas or liquid entrapment.
Both types serve unique purposes, making them indispensable in modern plumbing and piping systems. Their usage ensures the longevity and reliability of pipelines in diverse applications.
Eccentric Reducer Installation
Installing an eccentric reducer requires attention to orientation:
Flat Side Up: Prevents air accumulation in liquid pipelines.
Flat Side Down: Avoids liquid pooling in gas systems.
In addition to preventing possible problems like cavitation or pressure loss, proper installation guarantees the best possible system performance. An improper alignment may result in inefficiency or possibly pipeline damage.
Why Use a Concentric Reducer in Pump Suction?
Concentric reducers are often used in pump suction systems because:
They maintain uniform flow into the pump, preventing turbulence.
Their symmetrical design reduces the risk of cavitation, ensuring efficient pump operation.
These features make concentric reducers ideal for systems where uninterrupted and balanced flow is crucial, such as in industrial water supply networks.
Eccentric Reducer Uses
Eccentric reducers are essential for:
Horizontal Pipelines: Preventing air or liquid pockets.
Industrial Applications: Managing flow in systems carrying viscous fluids or slurries.
Their offset design ensures that pipelines remain free from blockages, even in demanding conditions. This is particularly valuable in industries like oil and gas, where flow consistency is critical.
Why Use a Reducer Fitting on a Plumbing System?
Using a reducer fitting in plumbing ensures:
Adaptation between varying pipe sizes.
Proper water pressure and flow rates.
Long-term system efficiency and reliability.
This versatility makes reducers a key component in both new installations and retrofits, where adjustments to existing systems are often necessary.
Pipe Reducer Size Chart
Selecting the correct size is crucial for compatibility and efficiency. Pipe reducer size charts, typically based on standards like ASME, help determine the dimensions required for specific applications. These charts ensure that reducers meet the design and operational needs of the plumbing system.
Additional Considerations for Plumbing Efficiency
Reducers play a role in optimizing the entire plumbing system. By choosing the appropriate type and material, users can avoid costly issues such as pipe damage, leakage, or reduced system lifespan. Regular maintenance and inspection ensure that reducers continue to perform effectively over time.
Conclusion
Reducer fittings are indispensable in plumbing systems for ensuring smooth transitions between pipes of varying sizes. By understanding their types, purposes, and applications, you can optimize water flow, pressure, and overall system performance. Whether it’s a concentric or eccentric reducer, these fittings are key to building efficient and reliable plumbing networks. Embrace their versatility and enhance your plumbing solutions today.
Reducer fittings demonstrate their value across various industries, from residential setups to complex industrial systems. Their ability to adapt, regulate, and optimize fluid dynamics makes them an essential part of modern plumbing.
Take the time to select and maintain the right reducer fittings for your system’s unique needs, and enjoy long-term efficiency and reliability.
Pest control treatments are an essential step in managing infestations in homes and businesses. While these treatments are highly effective, understanding how long it takes for pests to die and what to expect afterward is crucial for achieving the best results. This article answers common questions about pest control treatments, providing insights into timelines, safety, and best practices to maintain a pest-free environment.
Discover how long after pest control do bugs die, what to expect post-treatment, and tips for maintaining safety and effectiveness. Learn all you need to know about pest control timelines.
Is Pest Control Safe Indoors?
Yes, when carried out by certified professionals, professional pest control treatments are usually safe. The threats to people and pets are reduced by the design of modern pest control devices. Here are some safety tips:
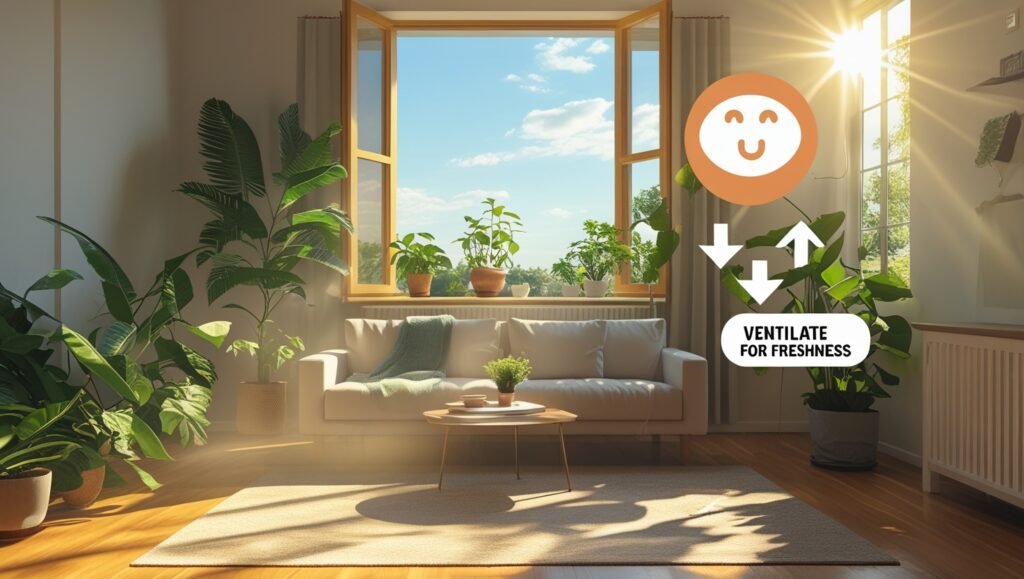
Ventilate the area: Open windows and doors to ensure proper airflow after treatment.
Wait for the treatment to dry: Most products require a few hours to settle and dry completely.
Follow expert guidance: Always stick to the instructions given by your pest control professional.
Things Not to Do Following Sprays for Pest Control
To maximize the effectiveness of pest control treatments, avoid the following:
Cleaning immediately: Avoid mopping or wiping treated surfaces for at least a week to allow the pesticides to remain effective.
Disturbing treated areas: Keep children and pets away from treated zones.
Using DIY sprays: Combining professional treatments with over-the-counter products can dilute their effectiveness.
After applying insecticide, how long do you have to stay in your room?
The majority of pest control businesses advise avoiding treated areas for two to four hours. The chemicals will dry and settle as a result. The duration of absence could be as long as 24 to 48 hours for more aggressive treatments like fumigation.
How Much Time Does the Smell of Pest Control Last?
The scent of various pest control products varies depending on the chemicals utilized. While some products are odorless, others could have an odor that lingers for a few days. Proper ventilation can help get rid of any remaining smells faster.
How Long Does It Take for Bugs to Go Away After Treatment?
Pest control treatments start working immediately, but complete eradication can take time:
Ants and cockroaches: May take 2-6 weeks to see significant results.
Spiders: Reduction in activity is noticeable within 4 weeks.
Fleas and bedbugs: Full effectiveness may take 3-6 weeks, with potential follow-up treatments.
How Much Time Does Effective Pest Control Take?
The kind of pest and the extent of the infestation determine how effective a pest control treatment is. Some pests die in a matter of hours, while others need several weeks to see the full effects of the treatment on their colonies or nests.
How Much Time Does a Bug Need to Die?
The time it takes for bugs to die after coming into contact with pesticides varies:
Fast-acting sprays: Kill within minutes to hours.
Residual treatments: May take days as the pests carry the chemicals back to their nests.
Is It Normal to See Dead Bugs After Treatment?
Yes, it is common to see dead bugs for several days or even weeks after treatment. This indicates that the pesticides are working as intended.
How Long After Pest Control Do Bugs Die Indoors?
Bugs indoors can start dying within a few hours of treatment. However, the complete eradication process can extend over weeks as pests encounter residual pesticides. Understanding how long after pest control do bugs die is key to setting realistic expectations.
How long may I stay inside once the pests have been removed?
After two to four hours, it is safe to return to treated regions for the majority of treatments. Always heed the precise instructions given by your pest control specialist.
After pest control, is it safe to remain inside the house?
Yes, it is okay to stay in your house following pest control treatments once the chemicals have dried. Ensure proper ventilation and avoid touching treated surfaces.
How Long Does Pest Control Last for Cockroaches?
Pest control for cockroaches typically provides protection for 30-90 days.
How long can pets safely be around pesticides?
Pets should be kept away from treated areas for 2-4 hours or until the chemicals have dried completely. For treatments with stronger chemicals, consult your pest control provider for specific recommendations.
How long is it safe for humans to breathe after using pesticides?
People shouldn’t return to treated areas for at least two to four hours. Wait times for more involved procedures, including fumigation, might reach 24 to 48 hours.
How Long After Pest Control Do Fleas Die?
Fleas may continue to be active for up to 3 weeks after treatment as their eggs hatch.
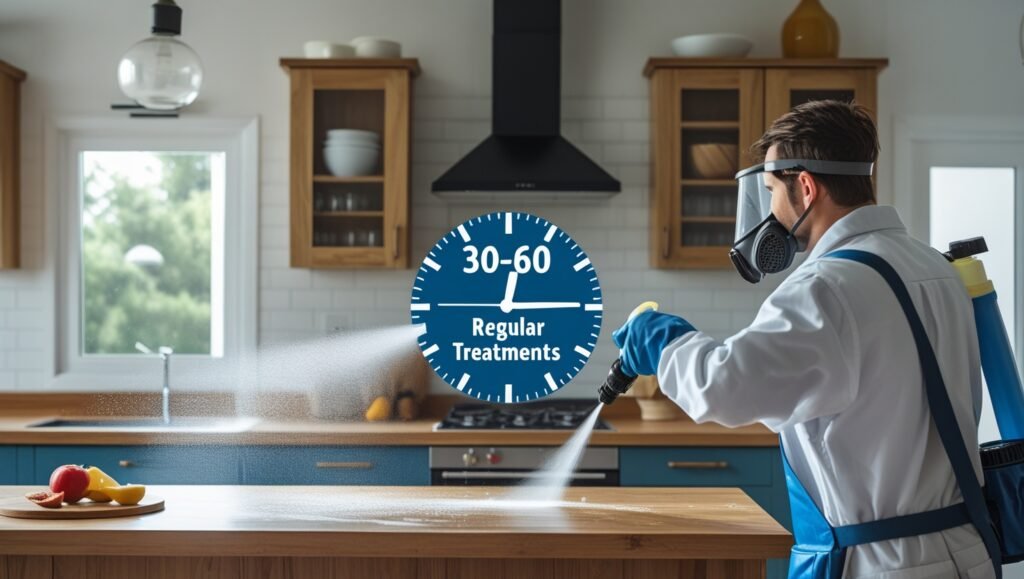
How Long Does Pest Control Take to Spray?
The size of the property and the extent of the infestation determine how long a pest control spray session lasts. Generally speaking:
Regular treatments take 30 to 60 minutes.
Infestations that are severe: 1-3 hours or longer.
What to Expect After Pest Control Treatments
Understanding the process of pest control treatment can help manage expectations. After treatment, some pests may seem more active as they are driven out of hiding. Over the next few weeks, pest activity will decrease as the chemicals take effect.
Tips for Maintaining a Pest-Free Home
To ensure long-term effectiveness, follow these maintenance tips:
Maintain hygiene: Clean and organize your living areas on a regular basis.
Watch for fresh infestations: Pay close attention to any indications of pest activity and take quick action to resolve them.
Make an appointment for routine treatments: Maintain a pest-free environment by collaborating with a professional pest control company.
Conclusion
Pest control treatments are an effective way to eliminate infestations, but they require patience and proper follow-up. Understanding how long after pest control do bugs die and adhering to post-treatment guidelines can ensure a safer and more effective process. Consult with your pest control provider for personalized advice and keep your home pest-free for the long term.
By staying informed and proactive, you can enjoy a healthier, pest-free environment for years to come.
Building a home is a complex process that requires attention to every detail, including the types and quantities of nails used. From framing walls to roofing, nails play an integral role in ensuring the stability and durability of a house. So, how many nails do you need to build a home? Let’s break it down.
Wondering how many nails do you need to build a home? Discover the types, quantities, and applications of nails for framing, roofing, and more in this comprehensive guide.
How Many Nails Are Needed to Build a Home?
On average, constructing an average-sized home requires approximately 20,000 nails. Homes with intricate designs or larger square footage will naturally require more nails. These nails are not a one-size-fits-all solution—different parts of the house require specific types and sizes of nails.
Types of Nails Used in Home Construction
1. Framing Nails
Framing nails are essential for constructing the skeletal framework of a home. Typically, 16d nails (3.5 inches in length) are used for 2×4 framing. On average, you’ll need about 8 nails per wall stud, translating to thousands of framing nails for an entire house.
2. Roofing Nails
Nails for roofing Fasten roofing materials, such as shingles, to the building. For a standard-sized roof, you may need around 320 nails per square (100 square feet) of shingles. This means a 2,000-square-foot roof could require over 6,000 nails.
3. Sheathing Nails
Sheathing nails are used to attach plywood or OSB sheets to the framing. These nails are spaced approximately 6 inches apart along the edges and 12 inches apart in the field. A standard 4×8 sheet of plywood can require around 60 nails.
4. Flooring Nails
For plywood flooring, expect to use around 40 nails per sheet. Hardwood floors typically require specialized flooring nails spaced every 8 inches along each board.
5. Finishing Nails
Finishing nails are smaller and used for interior trim work, such as baseboards and crown molding. These nails are often less numerous but are critical for aesthetic finishes.
6. Specialty Nails
Other nails, like masonry nails for concrete or brad nails for lightweight trim, are used sparingly but are essential for specific tasks.
Calculating Nail Quantities
1. Framing Nail Calculator
To estimate the number of framing nails needed:
Determine the wall studs’ total linear feet.
Multiply by the average nails per stud (usually 8).
2. Roofing Nail Calculator
For roofing nails:
Determine the roof’s total square footage.
Divide by Hundred to get the number of squares.
Multiply by 320 nails per square.
3. Plywood Flooring Nails
For plywood sheets:
Multiply the number of sheets by 40 nails per sheet.
Common Nail Sizes and Uses
16d Nails (3.5 inches):
Used for framing.
Roofing Nails (1.75 – 3 inches):
Used for shingles.
Finishing Nails (1 – 2.5 inches):
Used for trim work.
Additional Considerations
How Many Nails per Wall Stud?
Each wall stud typically requires 8 nails: 4 for the top plate and 4 for the bottom plate. This ensures a secure connection between structural elements.
How Many Nails for a Roof?
About 320 nails are needed for every square of shingles in roofing. Multiply this by the total number of squares to determine the total nail count.
Estimating Nails for Plywood Flooring
Plywood flooring requires about 40 nails per sheet. Calculate the number of sheets required for your floor area to estimate the total nails needed.
Specialty Nail Applications
1. Masonry Nails
Used to fasten wood to concrete or brick, masonry nails are essential for creating a solid connection in challenging materials.
2. Brad Nails
Brad nails are perfect for delicate trim work, ensuring minimal splitting and a clean finish.
3. Deck Nails
Galvanized deck nails are resistant to rust and are commonly used for securing outdoor structures.
4. Duplex Nails
Ideal for temporary construction, duplex nails are easy to remove and are often used in scaffolding or temporary framing.
FAQs About Nails in Home Construction
1. Are 3-inch nails good enough for framing?
Yes, 3-inch nails can be used for framing, but 3.5-inch (16d) nails are more common to ensure a secure connection.
2. How many framing nails per square foot?
On average, framing requires about 1.5 nails per square foot of the total structure.
3. How to estimate nails for formworks?
For formworks, calculate the total square footage and multiply by the average number of nails required per square foot, typically around 40-50 nails.
4. What is the cost of nails for building a home?
Depending on the type and quantity, the total cost for nails can range between $750 and $1,000 for an average-sized home.
Conclusion
Building a home involves meticulous planning, and nails are a critical part of the process. Whether you’re estimating framing nails or determining how many nails do you need to build a home, understanding the specific requirements for each part of the house ensures structural integrity and efficiency.
With around 20,000 nails required for an average-sized home, proper estimation and selection of the right nails for each task are essential for a successful build.
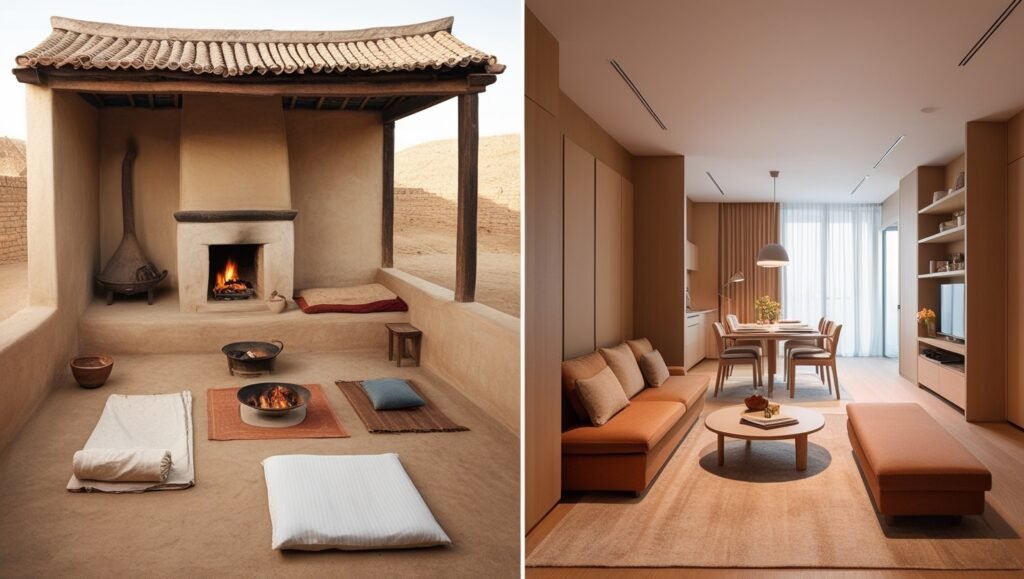
The Similarities Between a Modern House and an Ancient Home 2025
Modern houses and ancient homes may appear to be worlds apart, but they share surprising similarities despite differences in materials, techniques, and styles. From their shared purpose to the integration of cultural values, exploring these commonalities provides insight into how humanity’s architectural needs have evolved over centuries while retaining fundamental principles.
Discover the striking similarities between a modern house and an ancient home, highlighting shared purposes, cultural connections, and design principles that transcend time.
Purpose: Providing Shelter and Protection
At their core, both a modern house and an ancient home serve the same fundamental purpose—shelter and protection. Ancient homes, built using materials like mud, wood, and stone, shielded inhabitants from harsh weather and predators. Similarly, modern homes use advanced materials such as reinforced concrete and insulated walls to provide a safe haven.
While the technologies differ, the primary objective remains the same: creating a secure space where individuals and families can thrive.
Use of Natural Materials
Ancient builders used a lot of natural, locally obtained resources. For example, mudbrick was a staple in ancient Mesopotamia, while timber and thatch were common in Scandinavia. Today, modern architects are revisiting these traditions with a focus on sustainability.
Natural materials like bamboo, reclaimed wood, and stone are increasingly integrated into contemporary designs to reduce environmental impact and add aesthetic value.
Focus on Comfort and Livability
Comfort has always been a priority in home design. Ancient homes featured layouts that maximized utility, with dedicated areas for cooking, sleeping, and communal activities. Modern houses take this a step further by incorporating advanced technologies like HVAC systems, ergonomic furniture, and smart home devices.
Yet, the shared goal of creating a comfortable, functional living space connects homes of both eras.
Sustainability and Energy Efficiency
Ancient homes were inherently sustainable due to the use of local resources and passive design principles. Features like thick adobe walls for insulation and strategically placed openings for ventilation were common. Modern homes adopt similar strategies, such as energy-efficient windows, solar panels, and green roofs, inspired by ancient practices.
These efforts reflect a universal desire to harmonize living spaces with the environment.
Social and Cultural Spaces
Homes have always been central to social and cultural activities. In ancient times, communal spaces like Roman atriums and medieval great halls were designed for gatherings. Modern houses emphasize similar areas, such as open-concept living rooms and kitchens, fostering interaction among family and friends.
The cultural significance of homes remains timeless, reflecting individual and societal values.
Integration with the Environment
Both modern and ancient homes show an awareness of their natural surroundings. Ancient builders often constructed homes that blended seamlessly with their environment, such as cliff dwellings in Mesa Verde or stilt houses in Southeast Asia.
Contemporary architecture similarly integrates biophilic design elements like indoor gardens, large windows, and natural lighting to create harmony between the built and natural worlds.
Privacy and Security
Ancient homes used features like high walls, courtyards, and heavy doors to ensure privacy and security. Similarly, modern houses employ gated communities, surveillance systems, and soundproofing to meet these same needs. Despite technological advancements, the pursuit of personal safety and tranquility remains consistent.
Decorative Elements and Cultural Identity
Decoration has always played a significant role in homes. Ancient houses often showcased frescoes, mosaics, and carvings that reflected cultural narratives. Modern homes continue this tradition through personalized decor, art pieces, and design elements that echo individual tastes and heritage. The desire to make a home uniquely one’s own is a timeless aspect of human living.
Multi-Functional Spaces
Ancient homes often combined multiple functions within a single space due to limited resources. For instance, a single room might serve as a kitchen, dining area, and sleeping quarters. Modern homes have embraced this concept with open-floor designs and multi-purpose furniture, especially in urban environments where space is at a premium.
Long-Lasting Durability
Durability has always been a key consideration in construction. Ancient homes, such as the stone structures of Pompeii, were built to withstand time. Modern houses aim for similar longevity through the use of durable materials like reinforced concrete and weather-resistant coatings.
This shared emphasis on creating enduring structures highlights humanity’s commitment to resilience.
Differences Between Ancient and Modern Homes
While similarities abound, it’s also essential to consider the differences:
Materials: Ancient homes used natural resources exclusively, while modern houses incorporate synthetic and engineered materials.
Design: Traditional homes often had smaller, enclosed spaces, whereas modern homes prioritize open layouts.
Energy Efficiency: Modern homes leverage advanced technologies like solar panels and insulation, while ancient homes relied on passive techniques.
Customization: Modern homes offer extensive customization options, from smart systems to bespoke designs, unlike the standardized nature of ancient structures.
Conclusion
The similarities between a modern house and an ancient home reveal a fascinating continuity in architectural goals and human needs. From shelter and comfort to sustainability and social interaction, these enduring principles demonstrate that while styles and technologies may evolve, the essence of what makes a house a home remains unchanged.
We can better appreciate the creativity and adaptability of human creation throughout history by comprehending these analogies.
FAQs
What is the difference between ancient and modern homes? Ancient homes relied on local materials and simple layouts, while modern homes use advanced technologies and prioritize customization.
What are some things that combine between ancient architecture and modern architecture? Both emphasize shelter, sustainability, and social spaces, integrating cultural and environmental considerations.
How do modern homes reflect ancient practices? Modern homes adopt passive design principles, use natural materials, and prioritize energy efficiency, drawing inspiration from ancient techniques.
What is the purpose of a modern house and an ancient home? Both aim to provide a safe, comfortable space for living, reflecting the timeless human need for shelter and connection.
How to Clean Painted Kitchen Cupboards: A Complete Guide
Keeping your painted kitchen cupboards clean and looking their best is essential for maintaining their charm and durability. However, the paint finish may be harmed by improper cleaning methods. This guide explains how to clean painted kitchen cupboards effectively, using straightforward and safe methods.
Learn how to clean painted kitchen cupboards the right way. Discover the best solutions and techniques to keep your cupboards clean, shiny, and protected.
Which item works best for cleaning painted cabinets?
The ideal cleaning solution for painted cabinets is a mix of mild dish soap and warm water. Dish soap gently removes grease and grime while protecting the paint. Here’s how to use it:
Prepare the Solution:
Add a few drops of dish soap to warm water in a bucket.
Wipe Gently:
Soak a soft microfiber cloth in the solution, wring it out, and clean the cupboards lightly.
For tougher stains, you can create a baking soda paste by mixing one tablespoon of baking soda with a little water. Implement this paste to the stain, scrub wisely, and wipe clean everything.
How Do You Clean Cabinets Without Removing Paint?
To avoid damaging the paint while cleaning, follow these simple steps:
Use a Gentle Cleaner:
A mild soap solution works best for routine cleaning.
Spot-Test:
Test any cleaner on a small, hidden area before using it on the whole cabinet to ensure it doesn’t harm the finish.
Skip Abrasives:
Avoid scrubbing pads or brushes that can scratch the paint.
By taking these precautions, you’ll maintain the painted surface without causing damage.
What Is the Best Degreaser for Painted Kitchen Cabinets?
Grease buildup can be tough to remove. For this, a gentle degreaser or DIY solution can work wonders. Consider these options:
Store-Bought Degreaser:
Products like Krud Kutter are effective and safe for painted surfaces.
DIY Degreaser:
Combine one tablespoon each of dish soap, baking soda, and warm water in a cup.
Use a gentle cloth to apply either solution, then leave it on stubborn areas for a few minutes. Rinse thoroughly and dry to avoid streaks or residue.
What Is the Best Cleaner for Painted Wood?
For painted wood cupboards, choose gentle, non-abrasive cleaners to keep the paint intact. Here are your best options:
Dish Soap and Water:
A mild soap solution is ideal for everyday cleaning.
Vinegar Solution:
Dilute vinegar with equal parts water for a safe grease remover. Avoid using vinegar on glossy finishes.
Paint-Safe Commercial Cleaners:
Look for cleaners labeled as safe for painted wood.
You can also add a small amount of olive oil or polish for a natural shine, ensuring the product is suitable for painted surfaces.
How Do You Clean Sticky Painted Kitchen Cabinets?
Sticky spots often result from grease or grime buildup. Here’s how to clean them:
Mix a Solution:
Combine 1 cup of warm water, 1 tablespoon of dish soap, and 1 tablespoon of baking soda.
Scrub Gently:
Dip a microfiber cloth into the solution and clean sticky areas with circular motions.
For stubborn sticky spots, try using a small amount of rubbing alcohol on a cloth, but always test it first to ensure it’s safe for the paint.
Tips for Maintaining Painted Kitchen Cupboards
Routine care can keep your painted cupboards looking fresh and reduce the need for heavy cleaning. Follow these tips:
Wipe Up Spills Quickly:
Clean up spills immediately to prevent stains.
Dust Regularly:
Use a microfiber cloth to remove dust before it accumulates.
Avoid Excessive Moisture:
Use a damp cloth instead of soaking the surface, and dry cabinets thoroughly after cleaning.
Use Cabinet Liners:
Protect the insides of cupboards with liners to prevent wear and tear.
Improve Ventilation:
Use an exhaust fan while cooking to minimize grease buildup on cupboard surfaces.
Inspect Often:
Check for chips or peeling paint and address issues promptly.
What to Avoid When Cleaning Painted Cupboards
To preserve the paint and avoid damage, steer clear of these common cleaning mistakes:
Harsh Chemicals:
Avoid bleach, ammonia, or other strong chemicals that can strip paint.
Abrasive Tools:
Don’t use steel wool or rough scrubbers that can scratch the finish.
Excessive Scrubbing:
Always clean gently to protect the paint.
Leaving Moisture:
Ensure cabinets are dry after cleaning to prevent water damage.
Overpowering Scents:
Strong-smelling cleaners can linger and affect the kitchen’s ambiance. Opt for mild scents.
Common Questions About Cleaning Painted Cabinets
Can I Use Vinegar to Clean Painted Cabinets?
Vinegar is effective for grease removal but should be diluted with water to avoid damaging the paint.
How Often Should I Clean My Painted Cabinets?
Daily: As spills and splatters occur, clean them up..
Weekly: Dust and clean lightly to remove fingerprints and grime.
Monthly: Deep clean to tackle grease and buildup.
Eco-Friendly Cleaning Solutions
For those who prefer natural cleaning methods, try these eco-friendly options:
Baking Soda Paste:
Mix baking soda with water to create a gentle abrasive for stubborn stains.
Citrus-Based Cleaners:
Use biodegradable citrus cleaners for safe grease removal.
Castile Soap:
A plant-based soap that’s mild and effective for painted surfaces.
These solutions are safe for your cupboards and the environment, making them great for everyday use.
Preventing Damage to Painted Cabinets
Taking preventive steps can help maintain your cupboards’ appearance and durability:
Avoid Overloading:
Keep cabinets organized to prevent strain on hinges and paint.
Control Temperature and Humidity:
Maintain a consistent environment to avoid cracking or warping.
Fix Chips Quickly:
Repair chips or scratches as soon as possible to prevent further damage.
Use Protective Pads:
Attach felt pads to cabinet doors and drawers to minimize impact.
Limit Sunlight: Protect cupboards from direct sunlight to prevent fading.
Conclusion
Understanding how to clean painted kitchen cupboards helps you maintain their beauty and functionality for years. Stick to gentle cleaning methods, avoid abrasive tools, and clean regularly to keep cupboards looking their best.
With proper care and regular maintenance, painted cupboards can continue to enhance your kitchen’s style and charm. Make cleaning a part of your routine, and enjoy a spotless, inviting kitchen space for the long term.
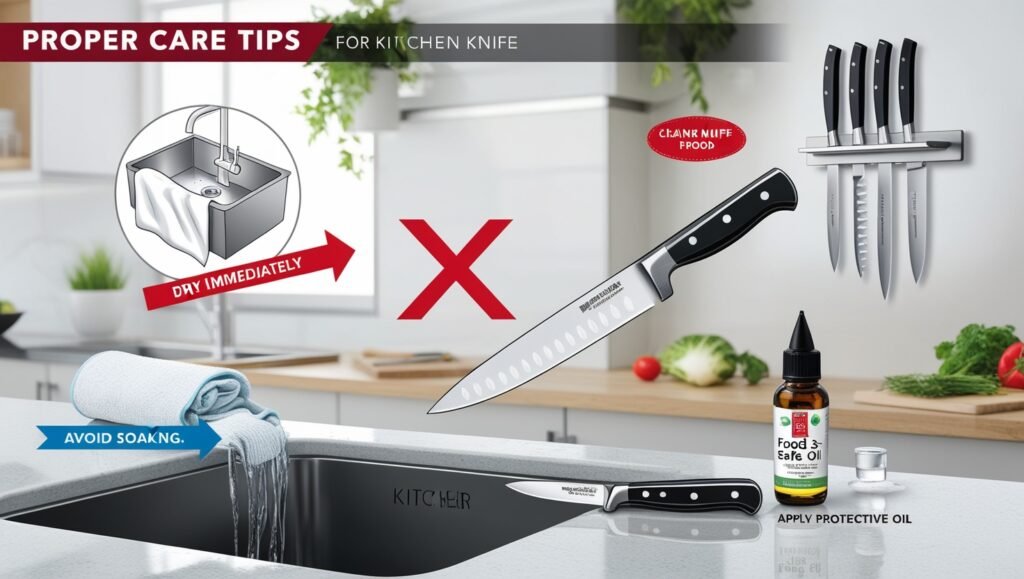
How Long Can a Kitchen Knife Be Wet: Important Care Tips
Kitchen knives are indispensable tools in every kitchen. However, maintaining their quality and longevity requires proper care, especially when it comes to managing moisture. One common question is: how long can a kitchen knife be wet? This article provides insights and practical tips to ensure your knives remain in excellent condition.
Learn how long a kitchen knife can be wet and the best practices to prevent rust and damage. Keep your knives sharp, safe, and long-lasting with these essential care tips.
Is It Bad to Leave Knives Wet?
Yes, leaving knives wet can be detrimental to their condition. Extended contact with moisture can cause:
Rust Formation: Even stainless steel knives can develop rust if left wet for too long. Water accelerates oxidation, weakening the blade.
Handle Damage: Wooden or resin handles are particularly vulnerable to water, which can cause warping or cracking.
Bacterial Growth: Moisture creates an ideal environment for bacteria, compromising food safety.
Knives should always be dried immediately after washing to prevent these issues.
Is It Bad to Let Knives Soak in Water?
Yes, soaking knives in water is one of the worst practices. Extended soaking can:
Damage Handles: Wooden and glued handles are prone to separation and cracking.
Weaken Blades: Continuous water exposure can lead to microscopic metal loss and dullness.
Shorten Lifespan: Both blade and handle degrade faster when soaked.
Soaking knives not only risks physical damage but also poses a safety hazard when reaching into soapy water.
Is It Bad to Let Knives Air Dry?
Allowing knives to air dry may seem harmless, but it’s not ideal. Air drying:
Encourages Rust: Residual water can linger, especially in crevices, leading to rust.
Dulls Blades: The edge may become dulled with time due to exposure to air and moisture.
To avoid these issues, always dry your knife immediately after washing using a clean, soft towel.
How Long Can a Kitchen Knife Be Wet?
Ideally, a kitchen knife should not remain wet for more than 2-3 minutes. Beyond this, the risk of rust, dullness, and handle damage increases.
Overnight Wetness
Leaving a knife wet overnight can cause significant damage, including:
Deep rust spots.
Loosened handles.
Compromised blade integrity.
The longer a knife stays wet, the harder it becomes to restore its original quality, potentially requiring professional sharpening or repairs.
Material Matters: Knife Types and Water Resistance
Different knife materials react differently to water exposure:
Stainless Steel
Rust Resistance: High but not rust-proof.
Maintenance: Dry immediately and store in a dry place.
Carbon Steel
Rust Prone: Rusts quickly when wet.
Care Tips: Oil the blade after drying to prevent oxidation.
Ceramic
Rust-Free: Immune to rust but can chip easily.
Care Tips: Handle with care and avoid soaking.
Understanding the properties of your knife material helps you tailor its care for optimal performance.
Safe Cleaning Practices
Proper cleaning is essential to maintain the longevity of your knives. Follow these steps:
Hand Washing
Use warm water and mild soap.
Pay attention to the blade and handle junction to remove food particles.
Rinse thoroughly and dry immediately.
Dishwasher Warning
Avoid using a dishwasher. Harsh detergents and high temperatures can:
Dull the blade.
Damage the handle.
Increase the risk of rust.
Knives jostling against other utensils can also chip or nick the blade.
Drying Techniques
Proper drying techniques are crucial:
Towel Drying
Use a soft, lint-free towel.
Wipe the blade from spine to edge.
Ensure no moisture remains on the handle or blade junction.
Air Drying
Place on a drying rack with good ventilation.
Ensure complete dryness before storage.
Preventive Measures to Avoid Wet Knife Damage
Store Properly: Use magnetic strips or knife blocks to keep knives dry and safe.
Oil Regularly: Apply a thin coat of food-grade mineral oil to protect against rust.
Use Cutting Boards: Avoid cutting on hard surfaces like glass or granite that can chip the blade.
Tips for Prolonging Knife Lifespan
Clean Immediately: Wash your knife right after use to avoid food residue hardening.
Sharpen Regularly: To keep the edge of the blade sharp, use a honing rod or whetstone.
Avoid Dishwashers: Hand washing is the safest option for preserving both blade and handle.
By following these tips, you can ensure your knives remain functional and efficient for years.
Expert Recommendations
Professional chefs and manufacturers agree that proper care significantly extends a knife’s lifespan. Key tips include:
Dry knives immediately after washing.
Store knives in a dry, ventilated place.
To keep the edge of the blade sharp, use a honing rod or whetstone.
Some manufacturers also recommend applying a light coat of oil after each use, particularly for high-carbon steel knives.
Common Mistakes to Avoid
Leaving Knives in the Sink: This increases the risk of accidental cuts and water damage.
Using Harsh Scrubbers: These can scratch the blade and reduce its sharpness.
Improper Storage: Avoid tossing knives into drawers, where they can collide with other utensils.
Conclusion
Understanding how long a kitchen knife can be wet is vital for maintaining its performance and longevity. Avoid prolonged moisture exposure by drying knives immediately and storing them properly. With these care tips, your kitchen knives will remain sharp, rust-free, and ready for all your culinary tasks.
Proper maintenance not only protects your investment but also enhances your cooking experience, making every chop, slice, and dice smooth and efficient. Follow these guidelines to enjoy a lifetime of reliable kitchen knives.
Standard bathroom door size example — 30 inches wide and 80 inches tall — fits most U.S. homes and ensures comfort, privacy, and accessibility.
Choosing the right bathroom door size standard makes sure comfort, accessibility and safety for every household. A properly sized door allows easy movement, gives privacy and keeps the bathroom looking balanced and functional.
If you’re updating a small bathroom or making a new one, once you know the common door sizes, choosing becomes simple.
Here’s what you need to know about the most common bathroom door sizes in inches, feet and millimeters. It also shows frame measurements, material options and accessibility standards.
If you pick the right door width and height, homeowners can create bathrooms that are stylish, practical and that meet U.S. building rules” / “that follow U.S. code.
Why Bathroom Door Size Matters
The bathroom door size standard matters a lot in how comfortable and accessible a home feels. A door that’s too narrow can limit movement, especially for children, seniors, or anyone using mobility aids.
Wider doors improve accessibility and safety while keeping layouts efficient. Beyond space and movement, door size also affects privacy, airflow, and lighting.
The correct bathroom door width requirements help reduce humidity buildup and keep the room fresh.
So it stays comfortable and meets the rules, the right door size supports both design and daily use.
What Is the Standard Bathroom Door Size?
The standard bathroom door size in the U.S. is usually 32 inches wide and 80 inches tall. This size fits most homes and provides easy movement for daily use.
Smaller bathrooms might use 24- to 28-inch-wide doors to save space, while accessible or family bathrooms often choose 36 inches for better comfort.
Here’s a quick look at common standard bathroom door dimensions in different units:
Inches: 24, 28, 30, 32, 36
Feet: 2 – 3 ft width, 6.67 ft height
Millimeters: 610 – 914 mm width, 2032 mm height
These measurements help homeowners choose the right fit for their layout and style.
Following the bathroom door width requirements also make sure compliance with ADA compliant bathroom door standards, giving everyone easier and safer access.
Bathroom Door Dimensions in Different Units
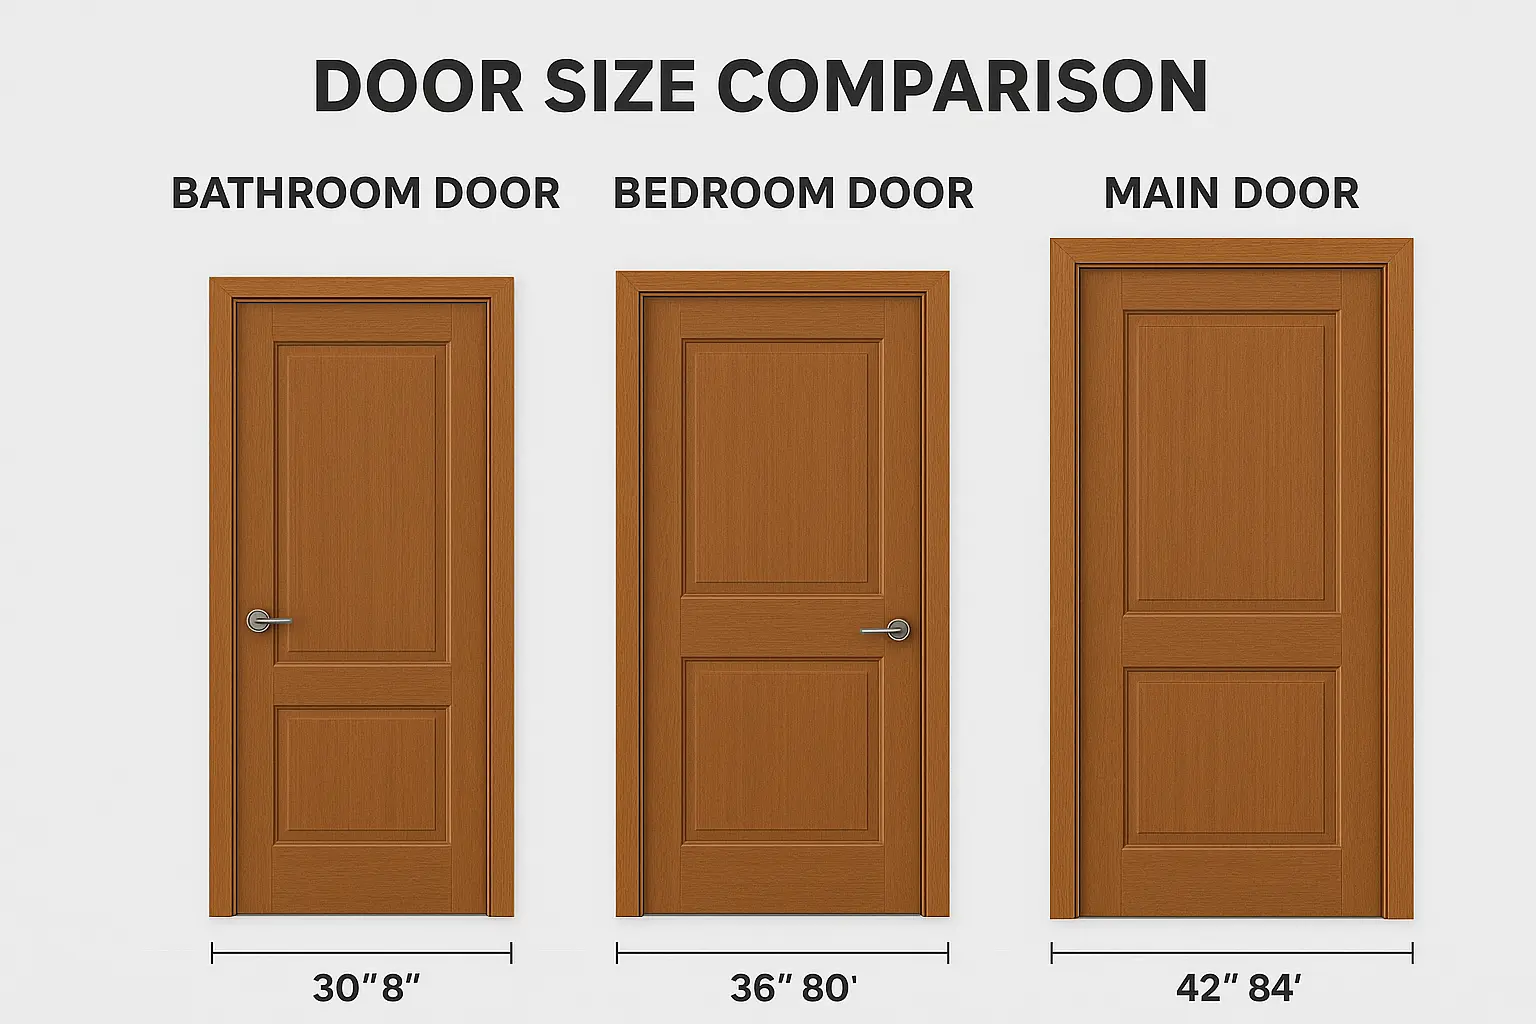
Visual comparison of standard door sizes: 30″x80″ for bathrooms, 36″x80″ for bedrooms, and 42″x84″ for main entrances.
Understanding bathroom door dimensions in various units helps when buying or measuring doors from different suppliers. Most manufacturers use inches, millimeters, or feet to describe door size.
Knowing how they compare saves time and avoids costly mistakes during installation.
Here’s a quick conversion chart for standard bathroom door size:
Measurement Unit
Common Widths
Common Height
Inches
24, 28, 30, 32, 36
80
Feet
2, 2.5, 2.67, 3
6.67
Millimeters (mm)
610, 711, 762, 813, 914
2032
Smaller doors (24–28 inches) fit compact bathrooms, while 32- to 36-inch doors are better for standard or wheelchair accessible bathroom doors.
When converting, remember that 1 inch equals 25.4 mm. Accurate bathroom door frame measurements ensure the door fits properly within its frame, improving both design and function.
Bathroom Door Size by Material Type
Bathroom doors come in several materials, and each type slightly affects the standard dimensions and durability.
The material you choose determines the door thickness, moisture resistance, and long-term maintenance needs.
1. Wooden Doors
Wooden doors offer a warm natural appeal and are typically 1.5 inches thick with widths ranging from 24 to 36 inches.
Since wood absorbs moisture, applying a waterproof sealant helps prevent swelling and warping in humid bathrooms.
2. PVC Bathroom Doors
PVC doors are lightweight and cost-effective, ideal for moisture-prone environments. The average PVC door measures 24 to 32 inches wide and 80 inches tall.
They resist water damage and are easy to maintain, making them a smart choice for busy households.
3. Fiberglass and Composite Doors
Fiberglass and composite materials provide excellent moisture resistance and insulation. The standard thickness ranges from 1.375 to 1.75 inches, fitting smoothly within a 4.5 to 5.5 inch door frame.
These doors are durable, low maintenance, and suitable for both modern and traditional bathroom designs.
When selecting materials, think about durability, cost, and the bathroom’s humidity level. The right choice keeps your space functional and reduces long-term maintenance.
Door Width and Height Standards Explained
Standard interior door measurements, including bathroom doors, typically range from 28 to 32 inches in width and 80 inches in height.
These sizes keep things comfortable and easy to move around in most U.S. homes.
For accessible or larger bathrooms, a 36-inch width is ideal to meet ADA-compliant door requirements, so people using wheelchairs or walkers can move easily.
The door frame typically measures 4.5 to 5.5 inches thick, allowing the slab to fit and swing smoothly.
Door thickness itself ranges from 1.375 to 1.75 inches, depending on material and design.
Standard bathroom door size equivalents include 2.5 × 6.67 feet or 813 × 2032 mm, helping homeowners compare options across measurements.
Getting these dimensions right before you buy or install, to avoid poor fitting or extra costs.
Accessibility and ADA Compliance
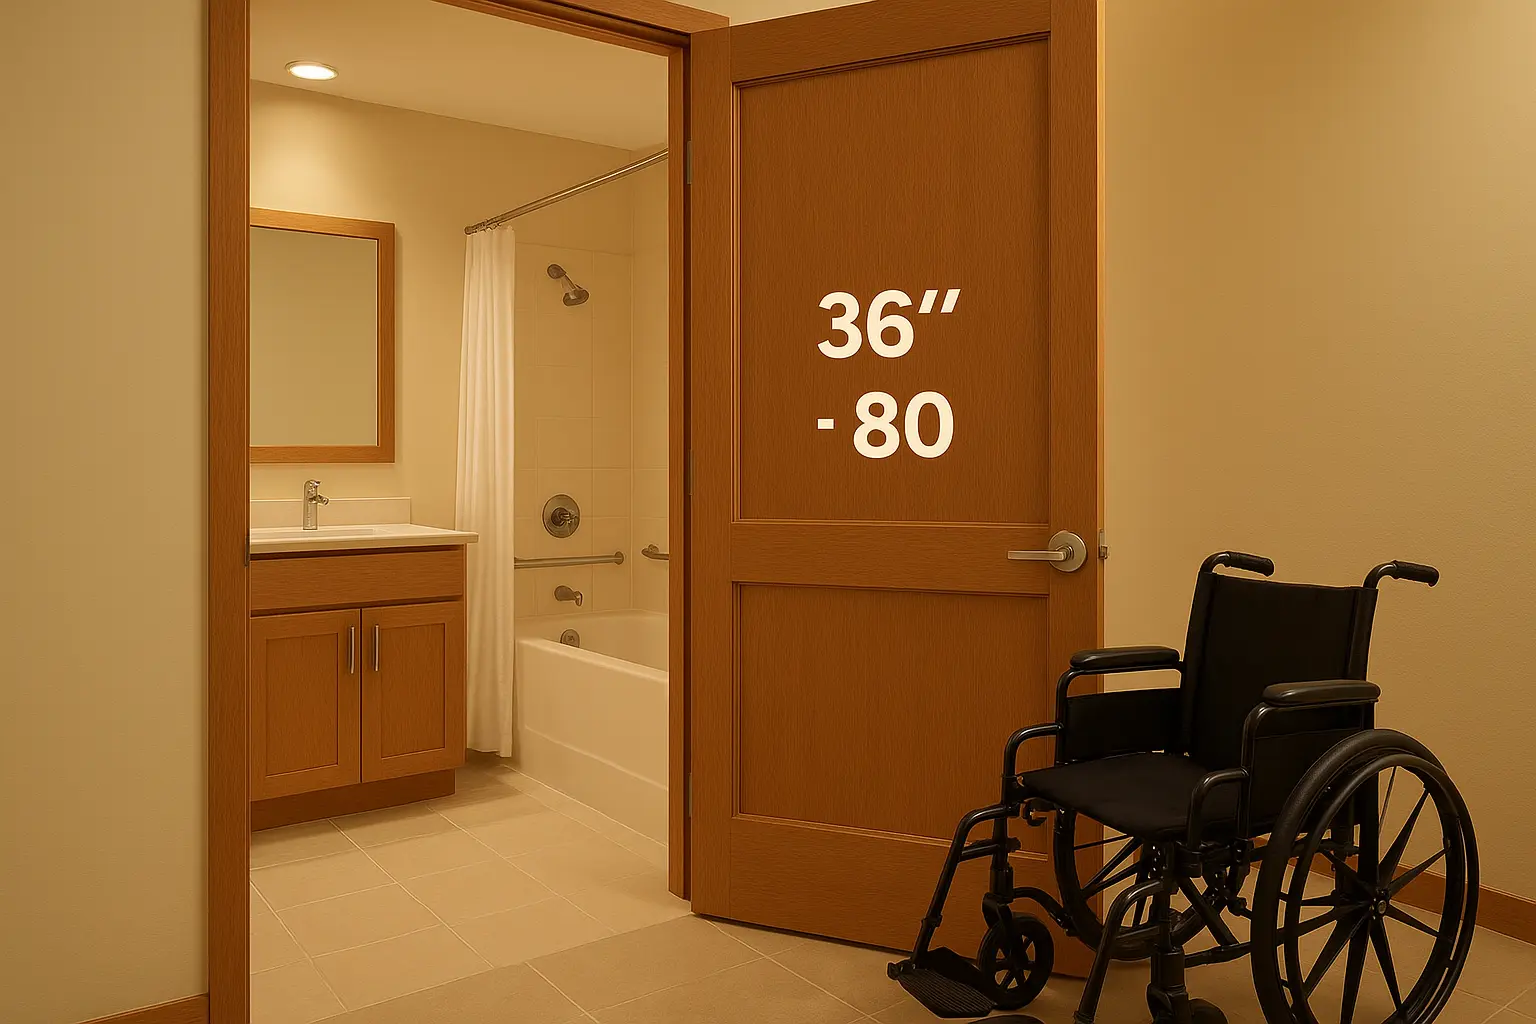
Modern 36″x80″ accessible bathroom door designed for wheelchair access, comfort, and easy movement within the space.
ADA rules cover more than just width. The idea is simple — it should be safe and easy for anyone to use.
So it’s easy for everyone to use, there should be at least 32 inches of clear opening space when the door is open at 90 degrees.
The swing direction should not block access to sinks, toilets, or grab bars. Pocket doors or sliding doors can also be practical in tight spaces.
Door handles must be mounted between 34 and 48 inches from the floor and designed for easy grip—lever handles are preferred over knobs for better accessibility.
The area around the door should have enough clear floor space (typically 60 inches in diameter) to allow wheelchair turning.
If you’re planning or remodeling, check ADA design guides or local building codes to ensure compliance.
These small details improve everyday usability and create a bathroom that’s safe and comfortable for everyone.
Compact Bathrooms: Space-Saving Door Options
Small bathrooms need doors that save space without sacrificing style or comfort.
The best bathroom door size for compact spaces is usually between 24 and 28 inches wide, helping maximize floor area while keeping the room easy to use.
Sliding and pocket doors are popular choices for tight areas. A sliding bathroom door moves along the wall, so there’s no swing space needed.
A pocket door slides into the wall itself, giving a clean, open look when not in use.
For even smaller layouts, a bi-fold door can work well since it folds inward and takes up minimal space.
When picking a design that saves space, it’s important to check door frame thickness, which is often around 4.5 inches in modern homes.
A properly sized frame keeps the door secure and make sure smooth opening and closing.
Compact doors save space and still look clean and simple.
Bathroom Door Frame Measurements
The frame really affects how the door fits and works. The standard door frame size depends on the door width and wall thickness.
In most U.S. homes, a standard interior door frame size measures between 4.5 and 5.5 inches thick, which matches typical wall construction.
Standard bathroom door dimensions are 32 × 80 inches or roughly 813 × 2032 mm when converted to metric.
For compact bathrooms, the frame might fit a 24-inch or 28-inch door.
Larger bathrooms or accessible spaces often use a 36-inch-wide door frame to meet ADA-compliant bathroom door standards.
Builders and homeowners should always check door frame measurements before installation.
A door frame that’s too narrow can cause the door to stick, while one that’s too wide may leave gaps.
Good measurements help line up the hinges and latch right for smooth operation.
If the wall is thicker or has extra layers like tile or wainscoting, a custom door frame thickness may be required.
Getting the size right saves you time during installation and improves both the look and durability of your bathroom door.
Design and Aesthetic Considerations
A bathroom door isn’t just a barrier. It’s part of the room’s personality. The right design pulls the look together and keeps it comfortable.
Color and Finish
Light tones help small bathrooms appear larger while dark finishes add contrast and a modern touch.
Matching the door color with trims or tiles creates a seamless and polished look.
Ventilation and Details
Small air gaps or louvered panels improve airflow and protect the door from moisture buildup. These details help maintain both door quality and indoor freshness.
Style and Hardware
Decorative trims, frosted glass inserts, and sleek handles enhance both the appearance and ease of use.
A well-chosen design balances privacy with style and turns a simple bathroom door into a visual highlight of the space.
Bathroom Door Safety and Building Standards
Safety is just as important as style when choosing a bathroom door size. Every door should follow basic safety codes so it lasts and works well.
In the U.S., most local codes recommend that interior bathroom doors open outward or slide to prevent blocking the path in an emergency.
The standard bathroom door dimensions—about 32 inches wide and 80 inches tall—allow easy exit if help is ever needed.
Moisture resistance is another key safety factor. Fire-rated and water-resistant doors help prevent damage from humidity and reduce the risk of mold.
Materials like fiberglass, PVC, or laminated wood are preferred because they resist swelling and warping.
Proper hardware also matters. Non-slip handles, smooth locks, and sturdy hinges keep doors functional and safe for daily use.
Installing the correct door swing direction and ensuring proper clearance help maintain both safety and comfort in compact bathrooms.
These safety rules protect your home and keep it up to code with U.S. construction regulations.
Customization and Renovation Tips
A homeowner measures the bathroom door frame to determine the correct Bathroom Door Size during renovation.
Every home is unique, and so are bathroom doors. You can update your door to fit your space and budget.
The right bathroom door size can be adjusted during renovations to improve comfort and function.
When planning a remodel, refer to a trusted bathroom renovation guide and measure the door frame thickness carefully before ordering.
A small mistake in door width or height can lead to fitting problems and extra costs.
For older homes, resizing the frame might be necessary to meet modern bathroom door dimensions or ADA-compliant standards.
Customization options include:
Handles and Locks: Choose smooth, rust-resistant hardware that fits your home’s design.
Finishes and Colors: Paint or laminate for moisture protection and style.
Door Swing or Sliding Options: Sliding and pocket doors save space in smaller bathrooms.
Materials: Replace old wood doors with PVC or fiberglass for better durability and lower maintenance.
Even simple updates like adding a new handle or refinishing the surface can make a noticeable difference.
When renovating, try to mix looks and safety so it’s both nice and sturdy.
Common Bathroom Door Sizes by Region
Bathroom door sizes vary slightly by region, but most U.S. homes use a standard 32-inch width and 80-inch height.
This size provides a good balance of comfort, accessibility, and design consistency.
In smaller homes or apartments, 24-inch or 28-inch widths are popular space-saving options.
Larger or ADA-compliant bathrooms often feature 36-inch wide doors for smoother wheelchair or stroller access. These dimensions align with most standard U.S. door frames.
Outside the U.S., measurements are usually listed in centimeters or millimeters, such as:
In regions using the metric system, widths typically range from 70 to 91 cm and heights near 200 cm. No matter the measurements, the goal is comfort and easy access for every type of bathroom layout.
Choosing the Right Bathroom Door for Your Home
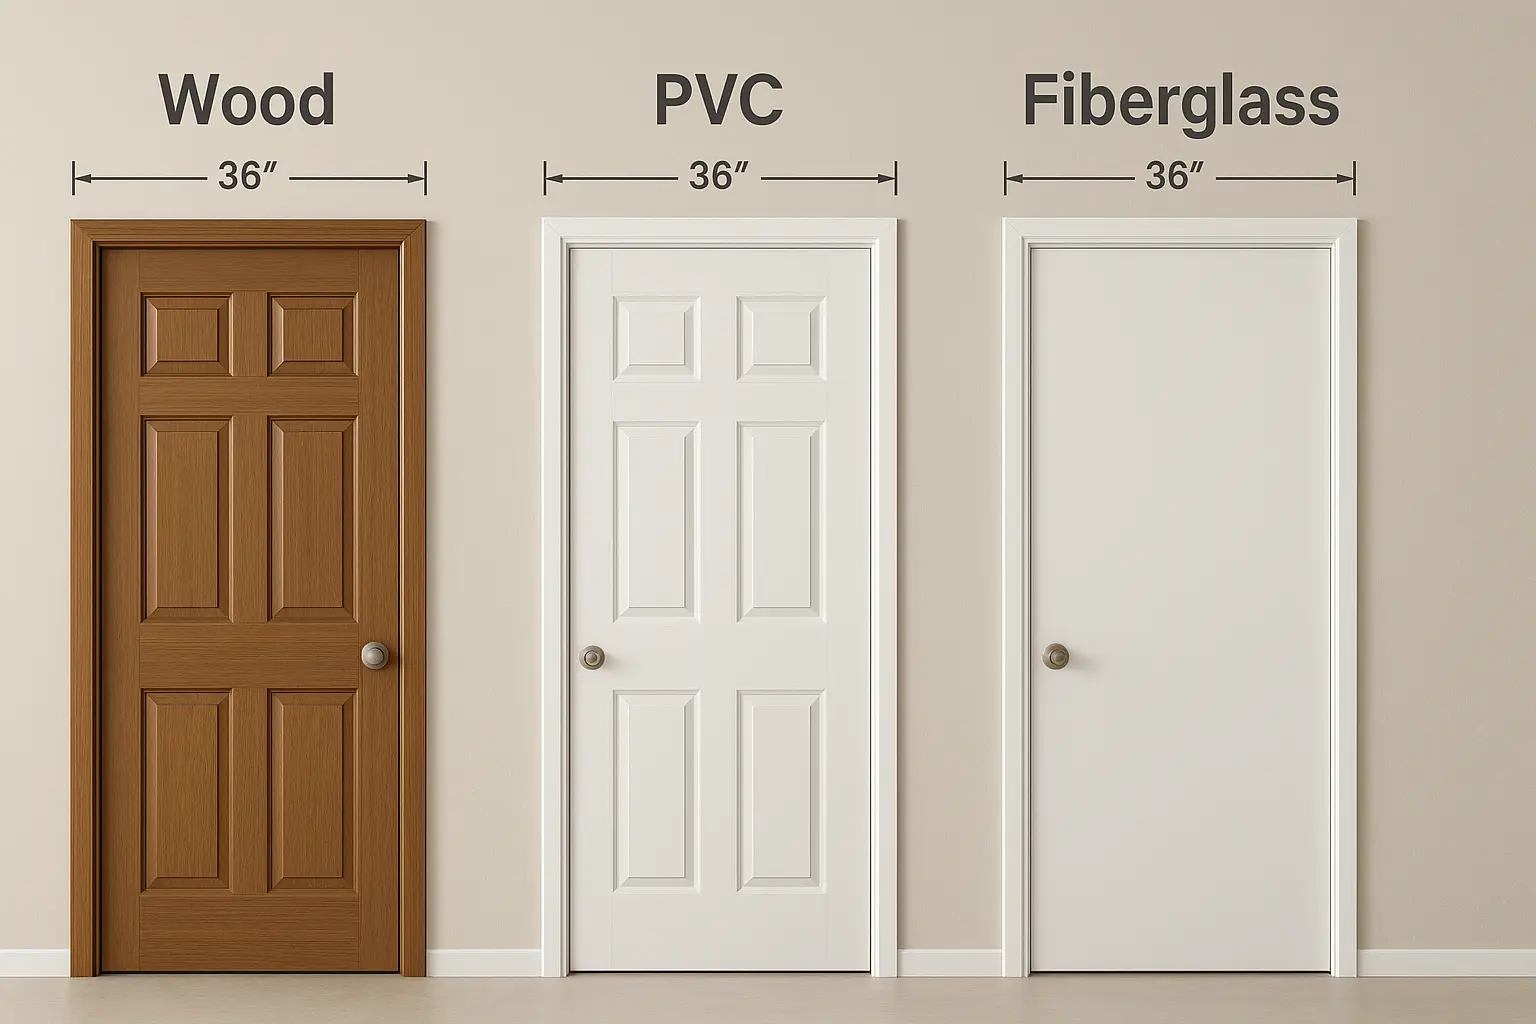
Bathroom Door Size comparison featuring wood, PVC, and fiberglass doors placed side by side to highlight material differences and standard dimensions.
Picking a bathroom door is about more than just size. The ideal bathroom door size should balance comfort, safety and style while fitting your home’s layout.
When planning, start with accurate measurements of your doorway. The standard interior door width for most U.S. homes is 28 to 32 inches while accessible bathrooms may need 36 inches.
Always measure both the door frame size and wall thickness before installation to avoid gaps or fitting issues.
Material choice also matters. PVC doors are lightweight and moisture resistant, perfect for humid areas. Wooden doors add warmth but may need more maintenance.
Fiberglass or composite designs are strong, long lasting and resist warping.
If your space is small, consider sliding or pocket doors. They save space without sacrificing privacy or appearance.
For homes with kids or seniors, wider doors improve accessibility and safety.
When budgeting, remember that standard bathroom door sizes in the U.S. are easier to find and install.
Custom sizes may cost more but can perfectly match unique layouts or design goals.
Before you finish up, double-check local codes and follow some pro tips to get a lasting fit.
The right door doesn’t just fit — it enhances how your bathroom feels and functions every day.
If you want a full bathroom renovation guide covering door styles, measurements and smart remodeling ideas, visit Redfinz.com for expert insights and inspiration.
Frequently Asked Questions
Q 1. What is the ideal bathroom door size for most homes? A: In most U.S. homes, a bathroom door size between 30 and 32 inches wide and 80 inches tall works best. It fits standard frames while allowing smooth movement and privacy.
Q 2. Are 24-inch bathroom doors still practical? A: A 24-inch bathroom door suits compact layouts or powder rooms where space is limited. It’s a good option if a larger size won’t fit, but not ideal for everyday or shared bathrooms.
Q 3. Why is ADA-compliant door width important? A: Following ADA-compliant bathroom door standards helps make your space easy for everyone to use, especially for people using wheelchairs or walkers. It also meets U.S. building codes.
Q 4. Which material lasts longest in bathroom humidity? A: Fiberglass and PVC bathroom doors resist moisture and warping better than solid wood. They’re great for high-humidity areas while still looking stylish.
Q 5. How should homeowners measure a bathroom door? A: Measure from frame to frame for width, top to bottom for height, and check the frame thickness. These three numbers help you choose the right size for smooth fitting and lasting performance.
Conclusion
Picking the right bathroom door size improves comfort, safety, and everyday use. Measure carefully, choose the right materials, and follow ADA standards for accessibility.
For more practical guides, you can checkRedfinz.com.
How Long Should You Run a Humidifier in a Bedroom in 2025?
Maintaining proper humidity levels in your home, especially in the bedroom, is essential for your health and comfort. Knowing how long to run a humidifier in a bedroom can make a big difference. A humidifier can help alleviate dry air, improve sleep, and support overall wellness. However, knowing how long should you run a humidifier in a bedroom is key to reaping its benefits without overdoing it.
Below, we’ll explore the factors that influence the optimal runtime of a humidifier and answer frequently asked questions to ensure you use your device effectively.
Is Using a Humidifier All Night Safe for Sleep?
Yes, it can be beneficial to sleep with a humidifier running all night, especially if the air in your bedroom is dry. Running a humidifier overnight can help:
Relieve nasal congestion and prevent sinus irritation.
Soothe dry skin and lips.
Improve respiratory comfort for individuals with colds or allergies.
Provide white noise, aiding better sleep for some people.
Many modern humidifiers have built-in hygrometers and automatic shut-off features, making them safer for overnight use. If you’re wondering how long to run a humidifier in a bedroom, these features can provide guidance.
When Should I Turn Off My Humidifier in My Bedroom?
You should turn off your humidifier when:
The desired humidity level (30-50%) is reached.
The room feels damp or condensation forms on windows and surfaces.
The humidifier runs out of water.
Using a hygrometer can help you monitor the room’s humidity and decide when to stop the humidifier. Over-humidification can lead to discomfort and even health concerns, so keeping an eye on the moisture levels is critical.
How long does it take to fully humidify a room?
The time needed to humidify a room depends on factors like the size of the room, the initial humidity level, and the humidifier’s capacity. On average:
Small Rooms: 30 minutes to 2 hours.
Medium to Large Rooms: 3 to 6 hours.
To expedite the process, keep doors open to improve airflow and ensure the humidifier’s output is appropriate for the room size. Larger rooms with low initial humidity levels may take longer to reach the desired range.
What Takes Place If a Humidifier Is Left on for Too Long?
Excessive humidity from a humidifier used excessively can:
Encourage mold and bacteria growth.
Increase the presence of dust mites.
Cause condensation on walls and furniture, potentially leading to damage.
Excessive moisture can also make the air feel heavy and uncomfortable, negating the benefits of using a humidifier. To prevent over-humidification, monitor the room’s humidity with a hygrometer and follow the manufacturer’s recommendations for runtime.
When you are sick, how much should you use a humidifier?
When you’re sick, using a humidifier can alleviate symptoms like nasal congestion, coughing, and throat irritation. Running it for 8-12 hours, particularly during sleep, can provide continuous relief. Ensure the humidity stays within the recommended range to avoid worsening symptoms due to excess moisture.
Consider placing the humidifier near your bed for more targeted relief, but ensure it’s positioned safely.
How Long to Run a Humidifier in Winter?
During winter, indoor air often becomes excessively dry due to heating systems, making it crucial to understand how long to run a humidifier in a bedroom for optimal comfort. Running a humidifier for 8-16 hours daily can help maintain comfortable humidity levels. Adjust the runtime based on your home’s humidity levels, monitored with a hygrometer.
In especially dry climates or during harsh winters, you may need to run the humidifier throughout the day and night. Regular monitoring ensures the environment stays comfortable without becoming overly humid.
How Long Do You Leave a Humidifier on for a Baby?
For babies, a humidifier can:
Relieve dry skin and nasal congestion.
Improve sleep quality.
Run the humidifier during naps and overnight, ensuring the humidity level stays between 30-50%. Always use a cool-mist humidifier to avoid safety risks and clean the device frequently to prevent mold and bacteria growth. Babies are particularly sensitive to their environment, so maintaining a clean and safe humidifier is essential for their health and comfort.
For what length of time is a humidifier ideal for plants?
Houseplants thrive in moderate humidity levels (40-60%). Running a humidifier for 4-6 hours daily near plants can create an optimal environment. Adjust based on your plant’s specific needs and monitor for signs of over-humidification, such as mold or mildew.
Can You Leave a Humidifier on 24/7?
While you can leave a humidifier on continuously, it’s not always necessary. Continuous use may lead to excessive humidity and increased maintenance needs. Instead, use a humidifier with a built-in humidistat to regulate humidity automatically. This ensures the device turns off once the desired humidity level is reached, saving energy and preventing over-humidification. Regularly inspect the unit for water levels and cleanliness to maintain its efficiency.
Does a Baby Need a Humidifier to Run All Night?
Yes, running a humidifier all night can benefit a baby by easing dry air discomfort and promoting better sleep. Ensure the device is cleaned regularly and positioned safely away from the crib to avoid accidents. A humidifier can also reduce the risk of colds and respiratory issues caused by dry air, making it a helpful tool for a baby’s well-being. Monitor the room’s humidity to maintain a safe and healthy environment for your child.
Sleeping With Humidifier Risks
While generally safe, improper use of a humidifier during sleep can pose risks such as:
Excessive humidity causes mold growth.
Dirty devices dispersing bacteria into the air.
Risk of burns from warm-mist humidifiers.
Mitigate these risks by maintaining cleanliness, monitoring humidity levels, and using cool-mist humidifiers. If you notice condensation forming on walls or windows, reduce the runtime or humidity settings to avoid potential problems. Proper placement, such as on a sturdy, elevated surface, further enhances safety.
How Often Should I Replace My Humidifier?
Replace your humidifier when:
It’s no longer effectively humidifying the room.
There’s visible mineral buildup that cleaning can’t remove.
Parts are damaged or malfunctioning.
Typically, replace a humidifier every 2-5 years, depending on usage and maintenance. High-quality units may last longer with proper care, but frequent use in hard-water areas may reduce their lifespan. Investing in a durable model and cleaning it regularly can extend its effectiveness.
When Should You Throw Away a Humidifier?
Dispose of a humidifier if:
Mold persists despite thorough cleaning.
It emits unusual odors or noises.
Repairs cost more than a new unit.
If the device shows signs of wear that impact its performance or safety, replacing it is the best option. Keeping an old, inefficient unit may compromise air quality and health.
Is It Okay to Have a Humidifier All Night?
Yes, running a humidifier all night is safe as long as it’s properly maintained, and the humidity levels are monitored. This ensures comfort without over-humidification. Overnight use is particularly beneficial in dry climates or during winter months when heating systems can sap moisture from the air.
Final Thoughts
Using a humidifier effectively in your bedroom can enhance your comfort and health, especially in dry conditions. This guide on how long should you run a humidifier in a bedroom ensures you maximize its benefits safely. By following proper usage guidelines, maintaining your device, and monitoring humidity levels, you can enjoy the benefits of a humidifier without the risks of overuse.
Whether you’re using it for better sleep, relief from illness, or care for your plants, understanding how long to run a humidifier in a bedroom ensures you’re maximizing its potential in a safe and efficient way.
Meta Description: Learn how long to run a humidifier in a bedroom to maintain optimal humidity levels for health, comfort, and better air quality. Discover safe and effective usage tips. Learn how long to run a humidifier in a bedroom to maintain optimal humidity levels for health and comfort. Discover tips for safe and effective use. The guide ensures better air quality and optimal runtime.
In conclusion, knowing how long should you run a humidifier in a bedroom can make a significant difference in maintaining a healthy living environment. Always consider factors like room size, humidity level, and your specific needs to decide the optimal runtime.
How Much Do Luxury Real Estate Agents Make in 2025?
Luxury real estate is one of the most lucrative niches in the property market, attracting agents who specialize in high-end properties and serve affluent clients. From multimillion-dollar homes to exclusive estates, luxury real estate agents can achieve substantial earnings.
However, success in this field requires exceptional skills, market knowledge, and networking capabilities. This article explores “how much do luxury real estate agents make,” factors influencing their income, and tips for breaking into this exclusive market.
What Kind of Real Estate Agent Is the Most Profitable?
Of all real estate specializations, luxury real estate agents are typically the most profitable. They work with high-net-worth individuals and facilitate transactions for properties priced well above market averages. The high price points result in substantial commissions, making this specialization one of the most lucrative in the industry.
Factors contributing to profitability include:
Higher Property Values: Luxury homes often sell for millions, leading to significant commission earnings.
Repeat Business: Wealthy clients frequently invest in multiple properties.
Exclusive Networks: Access to affluent buyers and sellers enhances transaction opportunities.
What Is the Highest Earning Type of Real Estate Agent?
The highest-paid real estate agents typically specialize in luxury properties. Their earnings can surpass those of residential or commercial agents due to:
Commission Rates: Luxury agents earn a percentage of the sale price, with rates ranging from 2.5% to 3% per transaction.
Exclusive Listings: Some agents handle exclusive properties with commissions reaching up to 10%.
Volume and Value: Handling fewer, high-value transactions often results in greater income.
For example, an agent selling a $10 million property at a 3% commission rate could earn $300,000 from a single transaction.
What Is the Highest a Realtor Can Make?
The earning potential for luxury real estate agents is virtually unlimited. Top-tier agents in prime markets, such as Beverly Hills, Manhattan, or Miami, can earn millions annually. Their income depends on:
Market Conditions: Active markets with high demand for luxury properties increase earning opportunities.
Experience and Reputation: Established agents with strong networks command higher fees and attract more clients.
Brokerage Splits: Agents working under favorable commission structures retain a larger share of their earnings.
Top-performing agents can earn over $1 million annually by closing multiple high-value transactions.
What Does It Take to Be a Luxury Real Estate Agent?
A luxury agent specializes in high-end real estate, catering to affluent clients. This role involves:
Networking: Building relationships with wealthy individuals and industry professionals.
Exceptional Service: Providing tailored experiences, from private showings to comprehensive market analysis.
Market Expertise: Understanding the unique features and value propositions of luxury properties.
What Does Luxury Mean in Real Estate?
In real estate, “luxury” refers to properties that offer exceptional quality, exclusivity, and unique features. These homes typically include:
Prime Locations: Situated in prestigious areas with high demand.
Architectural Excellence: Designed by renowned architects or featuring custom craftsmanship.
High-End Amenities: Features such as home theaters, wine cellars, smart home technology, and resort-style pools.
Expansive Spaces: Large square footage, often with breathtaking views or expansive grounds.
What Is the Highest Level of a Real Estate Agent?
The highest level in real estate often refers to agents specializing in luxury or ultra-luxury markets. These professionals:
Work with properties valued at $10 million or more.
Handle complex transactions involving international buyers and intricate negotiations.
Operate independently or lead teams within prestigious brokerages.
Achieving this level requires extensive experience, exceptional negotiation skills, and a robust professional network.
How Much Do Top Real Estate Agents Earn?
Top real estate agents, particularly those in luxury markets, can earn significant incomes. Factors influencing earnings include:
Market Specialization: Focusing on lucrative areas with high demand for luxury properties.
Client Relationships: Strong connections with affluent buyers and sellers lead to consistent referrals and repeat business.
For instance, an agent closing five $5 million properties at a 3% commission could earn $750,000 in a year.
How Much Do Top-Tier Real Estate Agents Make?
Top-tier luxury agents earn between $500,000 and $5 million annually, depending on market conditions and transaction volume. Their success often stems from:
Brand Affiliation: Partnering with renowned brokerages enhances credibility.
Marketing Expertise: Leveraging high-quality marketing materials to attract elite clients.
Client Loyalty: Delivering exceptional service ensures repeat business and referrals.
How to Break into Luxury Real Estate
1. Build Expertise
Gain comprehensive knowledge of luxury markets, trends, and property features. Attend seminars and earn certifications, such as the Certified Luxury Home Marketing Specialist (CLHMS).
2. Develop a High-End Network
Attend events, join exclusive organizations, and participate in community activities.
3. Leverage Technology
Use advanced marketing tools, including virtual tours, 3D walkthroughs, and AI-driven analytics, to showcase properties effectively.
4. Deliver Exceptional Service
Focus on personalized, discreet, and attentive service to meet the unique needs of luxury clients.
5. Market Strategically
Invest in premium advertising, high-quality photography, and exclusive property listings to attract elite buyers.
Conclusion
Luxury real estate offers unparalleled earning potential for agents willing to invest in their skills, networks, and marketing strategies. While the road to success in this niche can be challenging, the rewards are substantial. By understanding the nuances of the luxury market and delivering exceptional service, agents can build a thriving career and achieve remarkable financial success.
Whether you’re an aspiring agent or looking to transition into the luxury sector, “how much do luxury real estate agents make” is a question that underscores the exciting opportunities available in this prestigious field.
Additionally, knowing “how much do luxury real estate agents make” inspires many to aim for excellence in this rewarding profession.


 Yes, soaking knives in water is one of the worst practices. Extended soaking can: