Wednesday, March 18, 2026

Why Interior Design Is Interesting Mintpaldecor 2026

0
Modern living room interior with natural light, plants, and cozy decor — showing why Mintpaldecor interior design is interesting in 2026.
A cozy modern living room designed by Mintpaldecor — combining natural light, greenery, and comfort.

Interior design is the art of creating comfortable and stylish living spaces that match your lifestyle. Why interior design is interesting Mintpaldecor shows how thoughtful design goes beyond looks and builds homes that make everyday life better.

Mintpaldecor explains that good design is not just about looks. It’s also about how a space makes people feel and live. A well-designed home balances comfort and beauty, turning ordinary rooms into places that feel relaxing and inspiring.

When colors, textures, and furniture reflect your personal style, your home becomes a true expression of who you are. It feels warm, welcoming, and full of life.

Good interior design also helps improve focus, creativity, and mood. It makes daily routines easier and more enjoyable. In 2026, Mintpaldecor continues to create homes that are stylish, functional, and filled with character, showing that beautiful design can make daily life happier and more inspiring.

The Art of Interior Designing and Its Emotional Impact

Interior design shapes how a residential space looks and how it makes people feel. Mintpaldecor focuses on how smart design decisions can improve mood, comfort, and everyday living.

Why Interior Design Is Interesting Mintpaldecor and Creativity in Home Design

At Interesting Mintpaldecor, creativity and emotion work together to make every home feel special. Each detail, from color palettes to furniture placement, changes how a room feels. Design is seen as an art that gives meaning and beauty to home life.

A cozy living room or a simple bedroom can show warmth and personality when designed with care. Even small homes can feel peaceful and inspiring when every element fits together naturally.

How Design Elements Influence Daily Life and Mood

Colors, light, and layout affect how people experience their homes. Soft shades bring calmness, while bold colors create excitement and energy. Mintpaldecor shows how thoughtful design choices can boost focus, happiness, and relaxation.

A well-designed home makes everyday life easier and more enjoyable. It supports clear thinking, balance, and a lasting sense of comfort that turns ordinary spaces into places people love to live in.

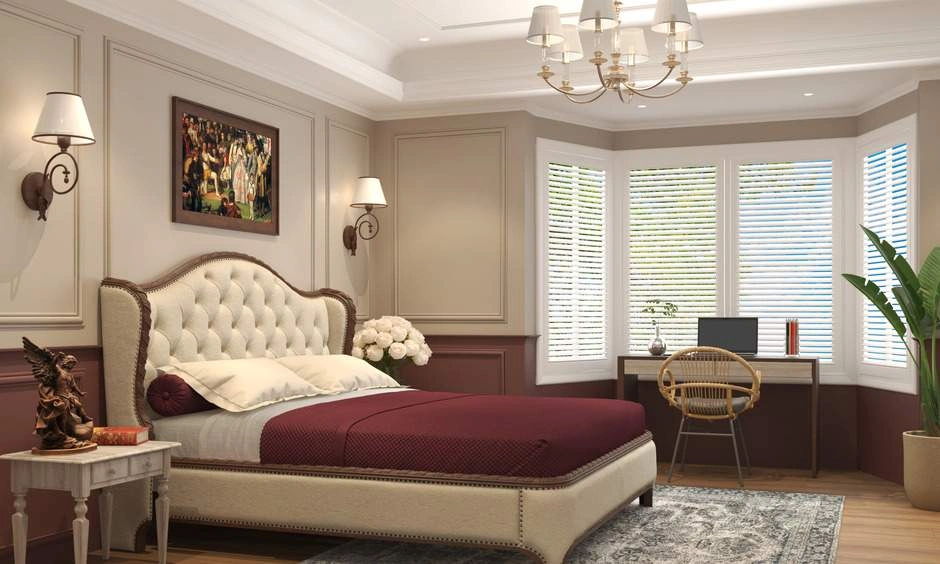
Living Spaces That Reflect Personal Style

Every home tells a story through its design. Mintpaldecor believes that living spaces should reflect who you are while keeping comfort, balance, and beauty in mind.

Furniture Arrangements and Space Planning

A dream home starts with smart planning. The way you arrange furniture and lighting affects how a room looks and feels. A good layout makes the living room feel open, warm, and easy to enjoy.

Mintpaldecor suggests creating small zones for everyday activities like reading, dining, or relaxing. A dining area placed near natural light makes meals brighter and more pleasant, while a cozy corner with soft lighting adds comfort.

Even a small change in layout can make a big difference in how a space feels and functions.

Expressing Personal Style Through Colors and Textures

Interior design is a fun way to show your personal style. From natural wood textures to smooth modern finishes, every choice helps tell your story. Mintpaldecor encourages mixing colors, patterns, and materials that match your personality.

Whether your design is simple, classic, or modern, the right details bring harmony and beauty to your home, turning it into a dream home filled with warmth and character.

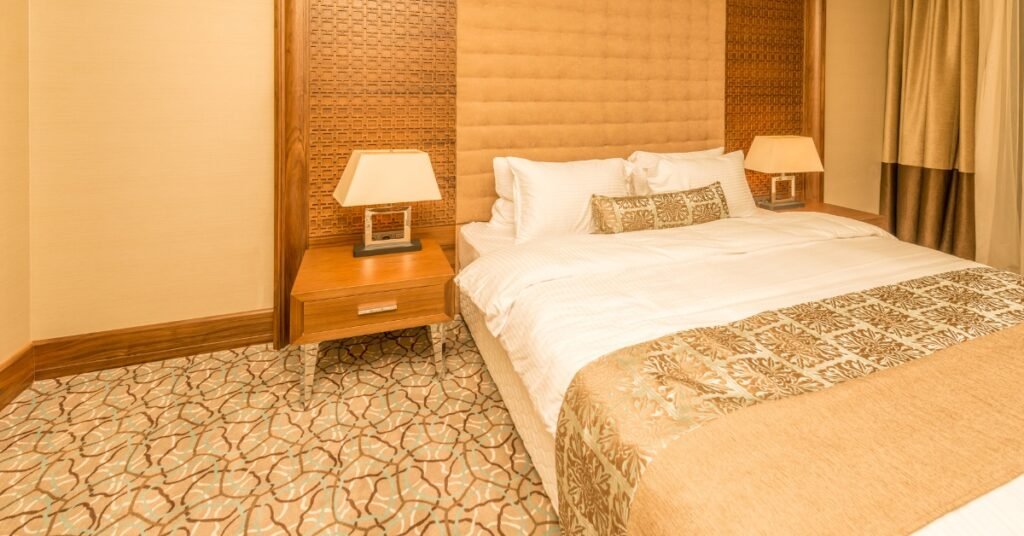
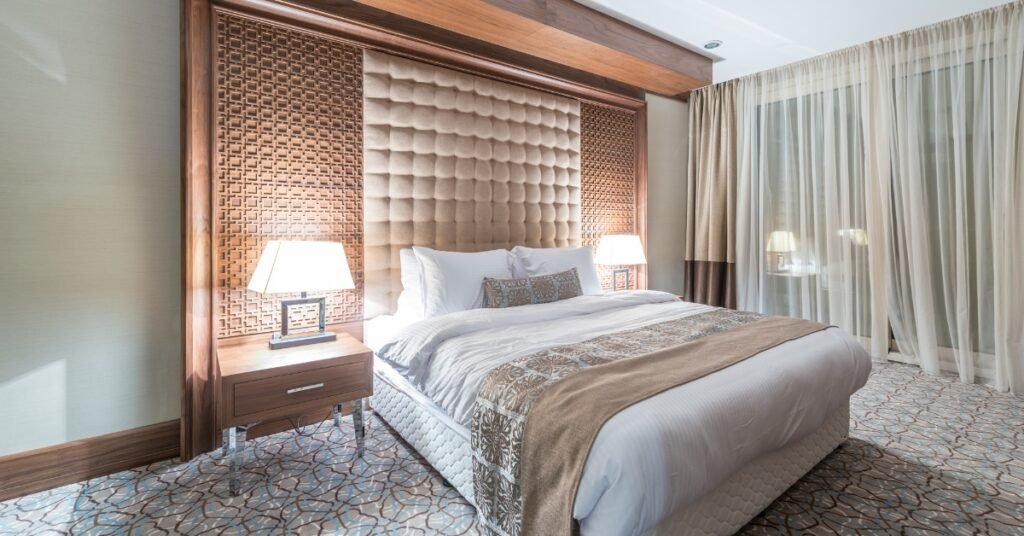
Creating the Perfect Living Space with Mintpaldecor

A well-designed living room is more than just a place to sit — it’s the heart of a home. It reflects the homeowner’s style and sets the mood for the whole house. Mintpaldecor believes every space should feel warm, balanced, and easy to live in.

Start by choosing a focal point, such as a sofa arrangement, wall art, or a statement piece of furniture. Then build the design around it. Small touches like soft rugs, cushions, and cozy lighting can make a big difference.

These details connect comfort with beauty, creating a space that feels both relaxing and stylish.

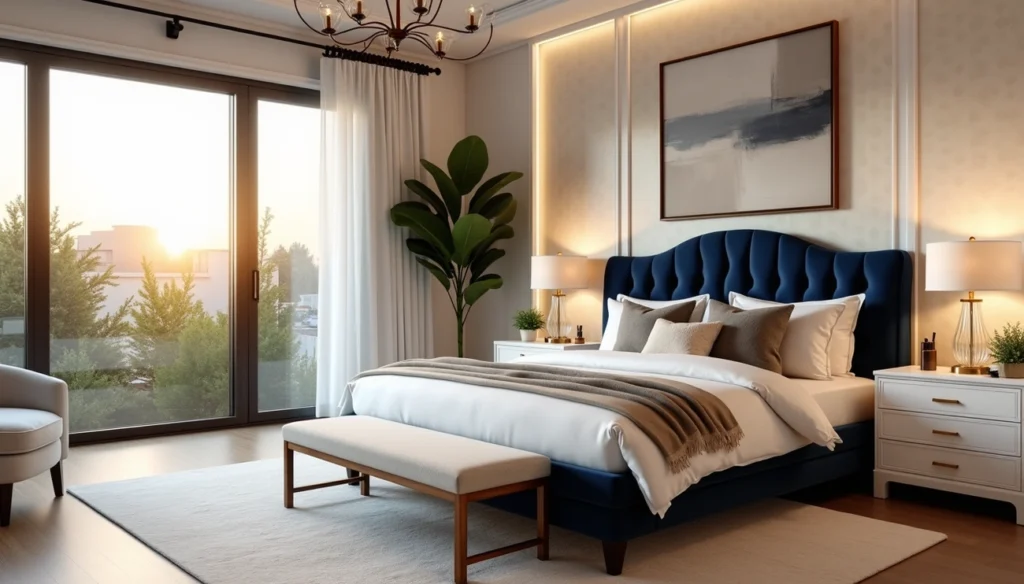
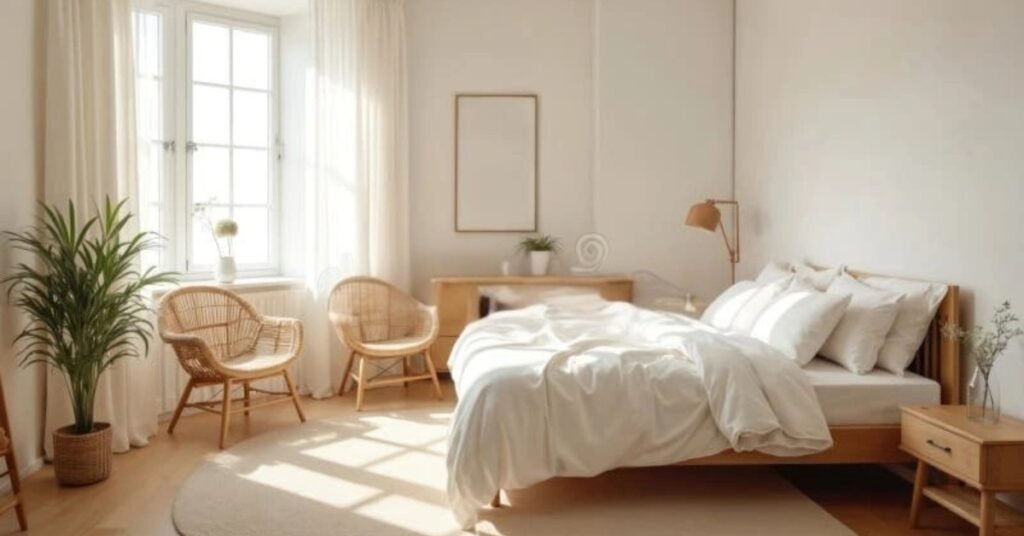
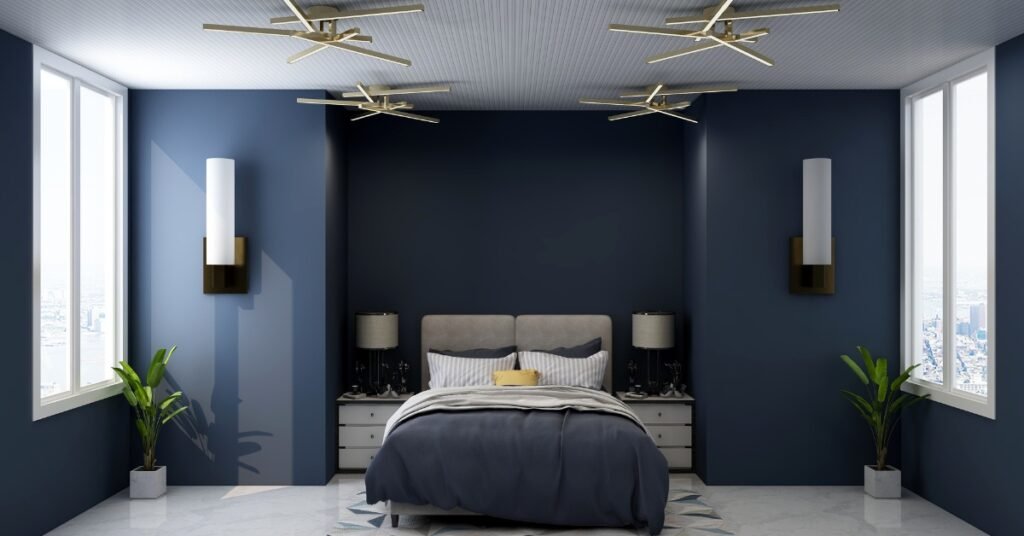
Natural Light and the Energy of Space

Natural light changes how a room looks and how people feel in it. Large windows, sheer curtains and bright color schemes make a space feel open, fresh and cheerful. Sunlight brings warmth and highlights the furniture and textures, giving the room a comfortable and natural space feel.

For rooms with little daylight Mintpaldecor suggests adding mirrors to reflect light and make the area brighter. Using layered lighting with a mix of ambient, accent and task lights keeps the room cozy and welcoming even after sunset. With the right balance of light and color every space can feel alive and full of positive energy.

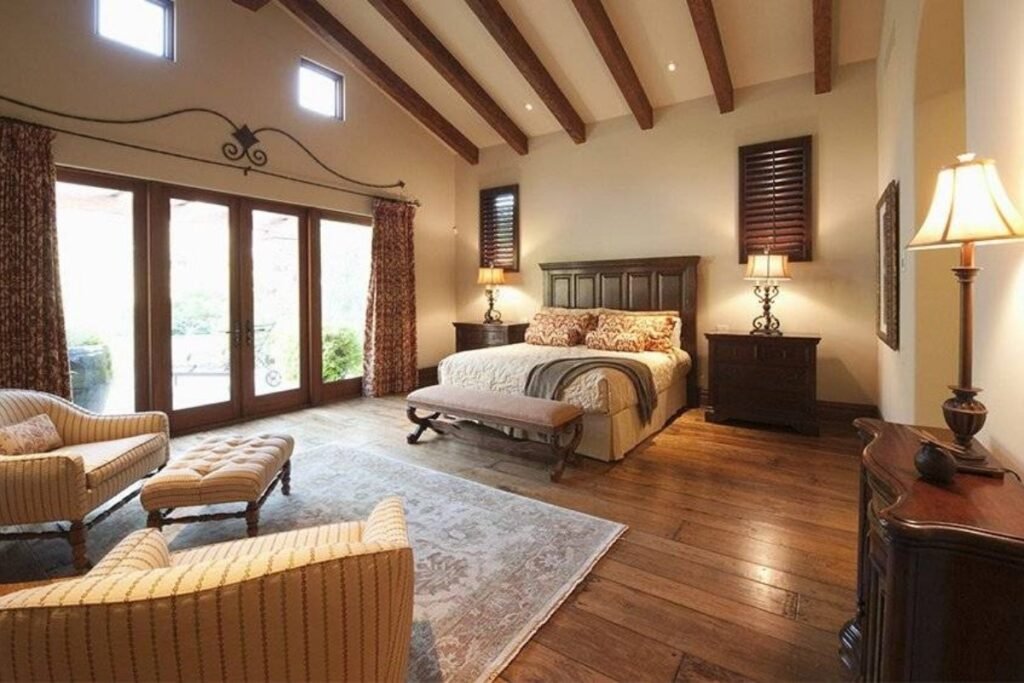
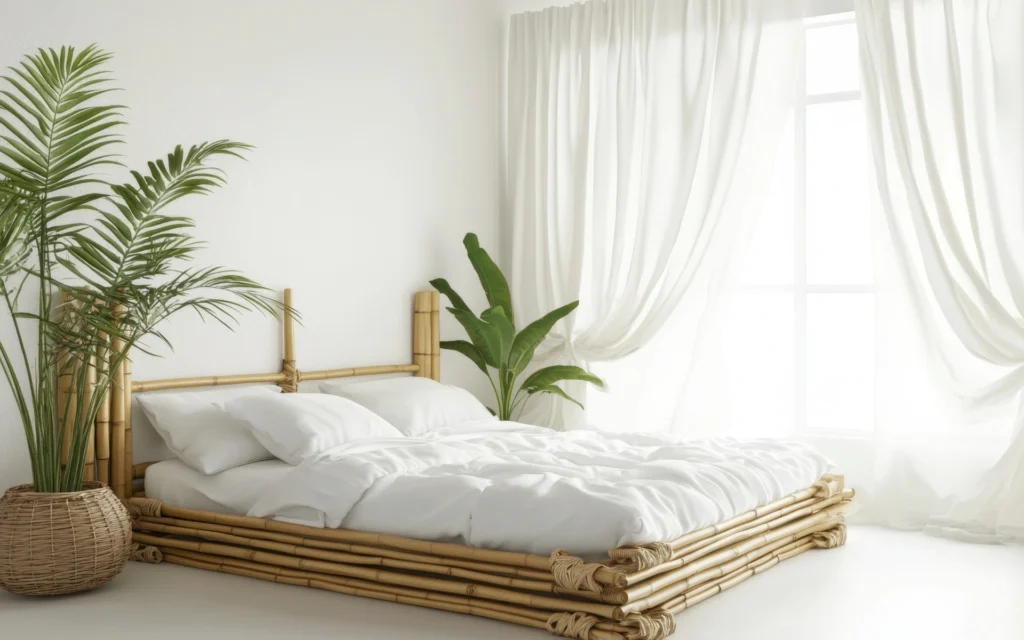
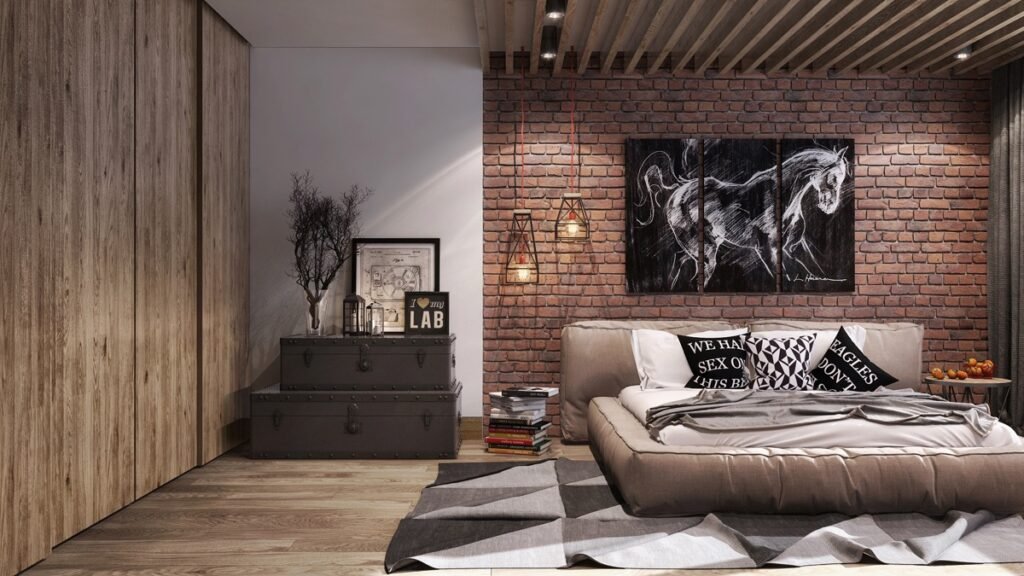
Natural Materials and Eco-Friendly Design

Why Interior Design Is Interesting Mintpaldecor — modern living room with bamboo furniture, rattan accents, and plants showing natural materials and eco-friendly design.
Natural materials like bamboo and rattan bring warmth, texture, and sustainability to modern Mintpaldecor interiors.

Modern homes feel more comfortable and welcoming when they use natural materials. Adding bamboo, rattan or reclaimed wood brings warmth and texture to any room. Mintpaldecor believes that friendly materials are the key to good design principles because they make spaces look beautiful and last longer.

Choosing eco-friendly materials also helps improve air quality and supports a healthier lifestyle. These simple choices make your home elegant while caring for the environment.

With the right mix of organic materials and thoughtful design every home can be stylish, sustainable and full of life.

Smart Homes and Modern Design Integration

Modern smart home interior with automated lighting and minimalist decor.
Mintpaldecor’s modern smart home design blends comfort, technology, and simplicity.

Modern design and technology now work together to make homes smarter and easier to live in. Mintpaldecor believes Smart Homes should mix style, comfort, and sustainability to create connected spaces that make life better every day.

Home Improvement with Technology

Smart Homes are the future of modern living. From smart thermostats to voice-controlled lighting systems, technology is changing how people use and enjoy their homes. Mintpaldecor focuses on adding these smart features while keeping each design simple, elegant, and functional.

Automated curtains, climate control, and motion-sensor lights make daily life smoother and more comfortable. These upgrades save time, use less energy, and add a touch of luxury to every room.

Energy Efficiency and Sustainable Materials

Energy efficiency is an important part of good home design. Smart systems and eco-friendly materials reduce power use while keeping homes beautiful and comfortable. Mintpaldecor recommends using natural and sustainable materials like bamboo, cork, and recycled metal to protect the planet and add lasting quality.

By combining technology with sustainable design, Mintpaldecor creates homes that are smart, stylish, and environmentally friendly, homes built for the future.

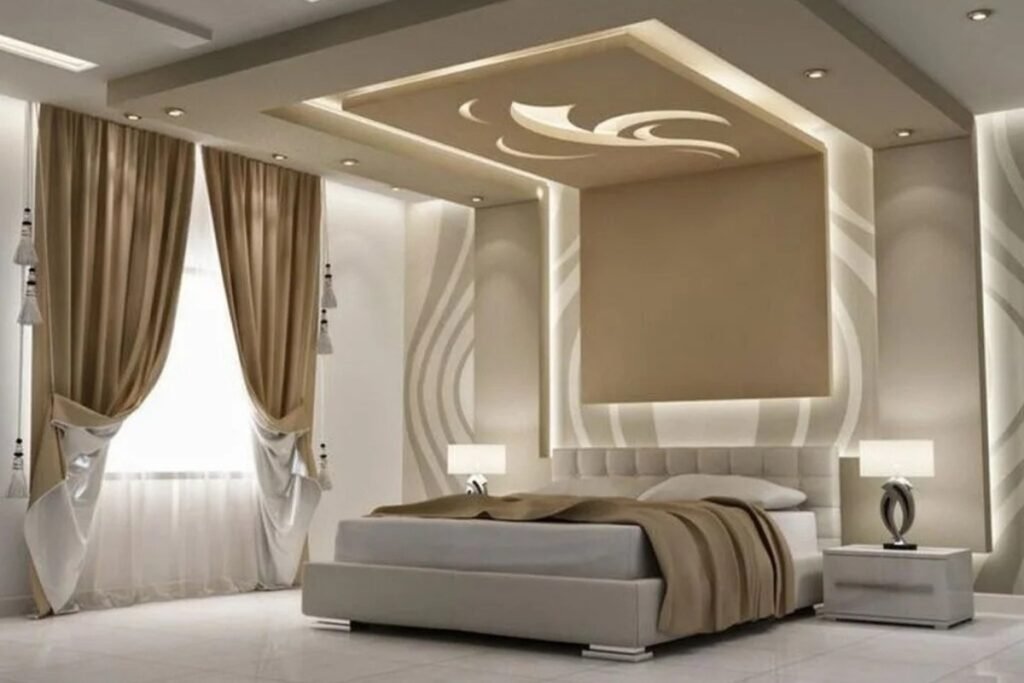
Interior Decoration Tips Mintpaldecor Approach

Mintpaldecor believes that good home design should feel balanced, comfortable, and personal. Every home area should show who lives there while staying neat, cozy, and welcoming.

Space Feel and Furniture Placement

The way a room vibe starts with its layout. Too much furniture can make it feel crowded, while too little can make it look empty. Mintpaldecor suggests choosing only the furniture you need and arranging it to leave open space for easy movement.

In the living area, use rugs to mark sections and place table lamps to create soft light. Keep space around furniture so the room atmosphere open.

A coffee table or a simple centerpiece can connect all the design elements and make the space look complete.

Interior Decoration Advice by Mintpaldecor

Even small updates can change how a home feels. Mintpaldecor recommends these simple ideas for better decoration:

  • Paint walls in neutral colors to create warmth and calm.
  • Mix raw materials and textures like linen, wood, and wool for a cozy feel.
  • Add a personal touch with family photos, travel souvenirs, or artwork that shows your story.
  • Refresh your dining table with simple linens or natural items for a clean and modern look.

These small touches make a big difference in any house space. They bring beauty, comfort, and emotion into daily life. Mintpaldecor believes thoughtful home design improves mood and makes every home feel peaceful, stylish, and full of personality.

Good design also adds value in real estate by creating homes that look beautiful and feel welcoming.

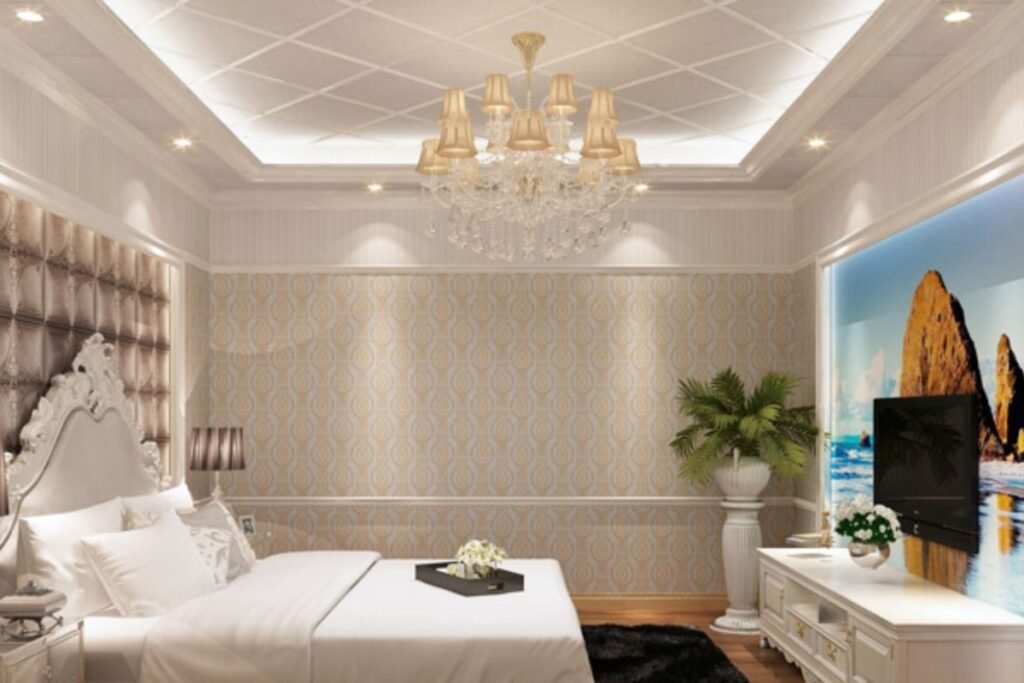
Color Schemes, Decor Ideas, and Modern Inspiration

Colors and decor are an important part of interior designing. They shape how a home looks and how it feels to live in. Mintpaldecor focuses on creating comfortable and modern interiors that follow the latest trends while keeping a natural and relaxing room tone.

Smart color choices, textures, and interior design ideas make every space both beautiful and easy to enjoy.

Color Psychology and Accent Colors

Home office designed with calming blue tones and minimalist decor.
Mintpaldecor uses color psychology to design inspiring and balanced spaces.

Colors can change how people feel in a room. The right shades make a space look brighter, cozier, or more peaceful. Mintpaldecor uses color psychology to design homes that match different moods and emotions.

  • Warm tones bring energy and joy, perfect for dining areas or creative corners.
  • Cool tones create calm and focus, great for bedrooms or study rooms.
  • Accent colors highlight special spots and add personality without overpowering the design.

By mixing these colors carefully, Mintpaldecor creates balanced and inviting homes. A good color scheme doesn’t just decorate walls — it sets the mood and makes every room feel special.

Interior Design Ideas for Every Home

Mintpaldecor’s interior design ideas combine modern style with simple comfort. Any home, big or small, can feel welcoming and stylish with a few smart choices.

  • In small rooms: use mirrors, tall storage, and sheer curtains to make spaces look open.
  • In larger homes: create zones for reading, dining, or relaxing to improve flow and comfort.
  • For family homes: choose natural resources that are strong, safe, and long-lasting.

These easy updates help every living space feel warm, modern, and full of life. Mintpaldecor believes interior designing is about more than looks — it’s about creating homes where people feel happy, relaxed, and connected every day.

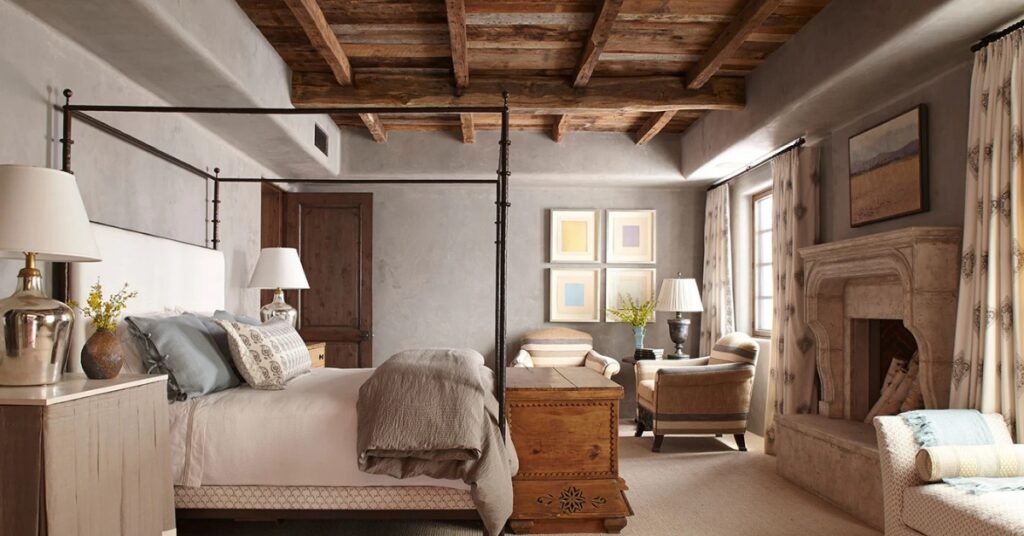
Biophilic Design and the Connection to Nature

Biophilic design is more than just a style. It’s a way to bring nature into homes and improve the quality of life. Mintpaldecor uses this approach to create rooms that feel calm, healthy, and full of energy.

When natural elements mix with modern style, a home feels fresh, relaxing, and alive every day.

Bringing Nature Indoors with Natural Elements

This design helps people feel closer to nature even when they are indoors. Mintpaldecor adds plants, wood, stone, and water features to make spaces peaceful and inviting.

These elements do more than look beautiful, they help clean the air and lift your mood.

Simple ways to add nature at home:

  • Place indoor plants or hanging gardens near windows.
  • Use bamboo, rattan, or wood for a warm and natural look.
  • Let sunlight fill the room or add a small water feature for calm.

Even small changes can make a big difference. A few plants or natural textures can turn a plain room into a cozy, nature-inspired space that improves comfort and happiness.

Health, Calmness, and Everyday Living Benefits

Environmentally friendly materials and design choices help people feel focused, happy, and relaxed. The sound of water or the sight of greenery can lower stress and bring peace.

Mintpaldecor believes that true beauty comes from balance, comfort, and connection to nature.

When homes include natural elements, they don’t just look nice — they support better health, peace of mind, and overall quality of life.

How Interior Design Affects Property Value and Quality of Life

Interior design is more than making a home look nice. It plays a crucial role in how people live and how much their home is worth. Mintpaldecor shows how good design improves comfort, style, and long-term value in any home.

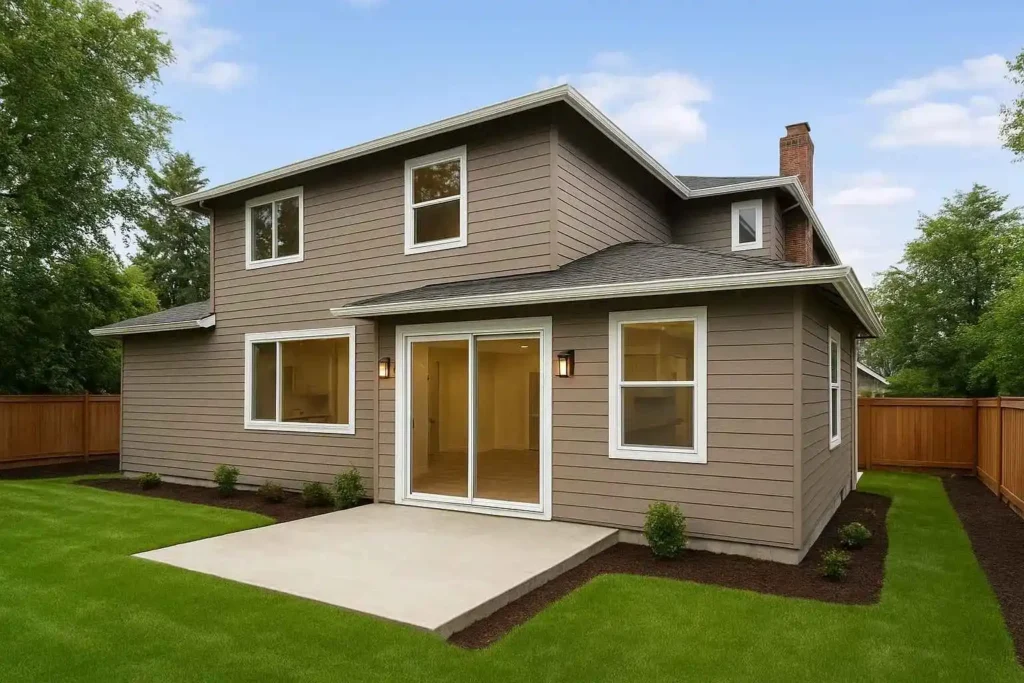
Curb Appeal and Long-Term Property Value

A well-designed space always stands out. Balanced color combinations, sunlight, and smart space planning make rooms feel open and modern. These design elements don’t just make a home beautiful; they also increase its Real Estate value.

Good design starts even before you step inside. A clean entryway, healthy plants, and a neat garden make a strong first impression for guests and buyers.

Simple ways design increases property value:

  • Use timeless color themes that fit different styles.
  • Add proper lighting to make rooms bright and welcoming.
  • Choose eco-friendly materials that last longer and look great.
  • Keep outdoor areas tidy with plants and simple decorations.

Homes that look beautiful and function well attract more attention and often sell for a better price. Mintpaldecor believes great design improves both comfort and long-term value.

Enhancing Daily Living Through Good Design

Well-designed spaces improve how people feel, move, and live each day. Every detail — from furniture placement to lighting — plays a crucial role in mood, comfort, and focus.

Bright rooms with daylight make people feel active and happy, while cozy corners create calm and relaxation.

Key ways design improves daily life:

  • Combine beauty and function for balance and comfort.
  • Add small touches like smart storage or simple focal points.
  • Use natural materials and gentle colors to make rooms peaceful.

These thoughtful design choices make routine life easier and more enjoyable. Mintpaldecor believes good interior design lifts mood, saves space, and adds lasting value to both home and lifestyle.

Building Your Dream Home with Mintpaldecor Style

Every dream home begins with a plan that combines comfort, purpose, and personal taste. Mintpaldecor believes that every choice, from wall colors to furniture placement, should reflect how people live and what makes them feel happy.

Even small changes can make a big difference. Adding plants, improving lighting, or moving furniture around can make a home feel fresh and more balanced. Mintpaldecor focuses on creating home designs that feel warm, stylish, and peaceful.

With careful design and attention to detail, ordinary rooms become inspiring homes filled with beauty, harmony, and life.

FAQs 

Q 1. What makes Mintpaldecor different from other interior design brands?
A:
Mintpaldecor stands out for its balanced mix of creativity and purpose. It designs interiors that reflect emotion, lifestyle, and sustainability — not just aesthetics.

Each project focuses on comfort, energy efficiency, and a connection to nature through biophilic and smart design principles.

Q 2. How does modern interior design improve home functionality?
A: Modern interior design improves home functionality by optimizing layouts, maximizing natural light, and integrating smart features. It ensures every space serves a purpose while maintaining visual harmony, making day-to-day life more organized, efficient, and inspiring.

Q 3. What role does technology play in Mintpaldecor’s interior design approach?
A: Technology enhances Mintpaldecor’s designs by adding automation, energy efficiency, and comfort. Smart thermostats, lighting systems, and voice control tools create adaptive interiors that simplify living while maintaining style and elegance.

Q 4. How can interior design influence emotions and well-being?
A: Interior design influences emotions through color, texture, and spatial balance. Mintpaldecor’s design philosophy promotes calmness, focus, and happiness by using natural elements, soft lighting, and harmonious layouts that support mental clarity and relaxation.

Q 5. Why is sustainable interior design important for modern homes?
A: Sustainable interior design is vital because it reduces waste, saves energy, and supports healthier living. Mintpaldecor uses eco-friendly materials and energy-efficient systems to create homes that are beautiful, long-lasting, and kind to the planet.

Final Thoughts and Home Inspiration

Interior design is exciting because it turns ideas into real spaces. Mintpaldecor believes every home has its own story, shown through colors, natural materials, and thoughtful design. When creativity meets function, a house becomes a true reflection of the people who live in it.

Even small updates, like changing the lighting or redesigning a dining space, can make a big difference in how a room feels. Mintpaldecor’s style blends nature-inspired design, modern touches, and classic beauty to create homes that feel joyful and balanced.

Each project brings homeowners closer to their dream home, a space that combines comfort, style, and lasting value. Why interior design is interesting Mintpaldecor shows that with creativity and care, every home can reflect beauty, balance, and joy.

Top Hotels in Sea Isle City NJ

0
Luxury beachfront hotels in Sea Isle City NJ with ocean views, palm trees, and sunset sky in 2025.
Top hotels in Sea Isle City NJ offer stunning oceanfront views and modern comfort for 2025 stays.

Planning a beach vacation in New Jersey often leads travelers to Sea Isle City, a charming coastal town known for its peaceful beaches, family appeal, and welcoming spirit. Whether traveling for a weekend or a week, hotels in Sea Isle City NJ provide comfort, convenience, and easy access to ocean activities.

According to local tourism data, Sea Isle City continues to be one of Cape May County’s most visited coastal destinations, drawing repeat travelers every season.

From beach hotels with direct beach access to budget-friendly inns close to the city center, there’s an option for every traveler. Families, couples, and business visitors appreciate this destination’s free parking, free Wi-Fi, and relaxing atmosphere.

Why Visit Sea Isle City, NJ

Sea Isle City offers a mix of calm shoreline energy and small-town warmth. Its Sea Isle City Promenade stretches along the coast, perfect for walks or bike rides with ocean views.

The relaxed vibe and friendly locals make it ideal for travelers who want sun and serenity without the crowds of other Jersey Shore towns.

This destination sits between Somers Point and Avalon, providing easy access to nearby Atlantic City Hotels, dining, and entertainment. The region’s Cape May County Zoo, Pirate Island Golf, and the Wetland’s Institute are popular family stops.

Visitors can explore beyond the beach by heading to Shelter Haven or enjoying events at the Atlantic City Convention Center.

Types of Hotels in Sea Isle City

From luxury oceanfront stays to cozy budget inns, Sea Isle City offers accommodations for every traveler. Whether you want a family retreat, a romantic escape, or a pet-friendly getaway, you’ll find hotels that match your style and budget.

Oceanfront Hotels in Sea Isle City

Oceanfront hotels in Sea Isle City NJ with beach views and bright coastal scenery.

Sea Isle City hotels with oceanfront locations let guests enjoy sea views, hot tubs, and outdoor pools right on the sand. These 4-star hotels often feature air conditioning, spa services, and beachside dining.

Guests love the great location, where they can walk straight from their room to the beach. Popular stays include ICONA Avalon, a top Beach Resort in Cape May County, known for elegance and proximity to local boutiques.

Budget-Friendly Hotels

Those searching for cheap hotels in Sea Isle City NJ will find plenty of comfort without high costs. Budget stays offer free WiFi, self-parking, and cozy motel rooms near the city center.

These hotels provide Internet access, family-friendly amenities, and clean, simple rooms with easy routes to Wildwood Beach and Egg Harbor Township.

Family-Friendly Stays

Families traveling to the United States’ East Coast appreciate family hotels here. These stays often include free breakfast, swimming pools, and access to kid-friendly attractions like Waterpark adventures and Pirate Island Golf.

Many of these 3-star hotels are within walking distance of local diners and souvenir shops.

Pet-Friendly Hotels

Travelers looking for the best pet-friendly hotels will find that Sea Isle City Hotels welcome four-legged guests. From Ludlam Hotel to smaller inns, many offer self-parking, pet beds, and outdoor play areas.

The town’s Beach Block even has pet-walking paths, making it easy to include furry companions on vacation.

Top-Rated Hotels in Sea Isle City, NJ

Finding the best hotels in town is easier when you know what to look for. For a wider look at trusted hotel brands across New Jersey, you can visit Choice Hotels. Below are a few of the most trusted names known for comfort, great location, and top star rating. Many Sea Isle City hotels maintain a 3 to 4-star rating, offering reliable amenities and guest satisfaction.

These properties balance comfort and affordability for all travelers.

  • Colonnade Inn: Classic Victorian charm, free parking, and near the Sea Isle City Promenade.
  • The Dunes: Stylish suites with ocean views, hot tub, and family amenities.
  • Ludlam Hotel: Central Beach Block location with live music and on-site dining.
  • Oceanside Lodge: Just outside Sea Isle City, perfect for quieter stays.
  • ICONA Avalon: High-end Beach Resort offering spa services and business center access.

Each hotel’s star rating reflects strong reviews, quality service, and convenient access to nearby attractions like Wildwood Beach and Somers Point.

Best Areas to Stay in Sea Isle City

Choosing the right area can shape your entire vacation experience. Sea Isle City offers a mix of lively downtown hotels, peaceful beachfront stays, and quiet residential rentals for every traveler.

Downtown Sea Isle City

Downtown is ideal for visitors wanting proximity to shops, restaurants, and meeting rooms for business. It’s close to Convention Center Hotels and family parks, offering a lively local scene.

Beachfront District

Perfect for visitors seeking direct beach access, outdoor pool relaxation, and stunning ocean views. Many NJ Hotels here include free Wi-Fi, self-parking, and air conditioning.

Residential Zones

On the west side, vacation rentals and motel rooms offer quiet surroundings for longer stays. These areas are great for families wanting privacy but still within walking distance of the beach.

Hotels in Sea Isle City NJ near the beach during sunrise with relaxing coastal views.

Amenities and Features to Expect

Modern Sea Isle City Hotels provide everything guests need for comfort and relaxation. Modern hotel rooms include Wi-Fi, air conditioning, and flat-screen TVs, ensuring every stay is cozy and convenient.

Guests can expect:

  • Free parking and self-parking options
  • Reliable free Wi-Fi and Internet access
  • Air conditioning and heating
  • Outdoor or indoor pools
  • Hot tub and lounge areas
  • Complimentary breakfast
  • Meeting rooms and business center facilities

Higher star-rated hotels may include spa services, rooftop decks, and luxury suites with panoramic ocean views.

Average Hotel Prices and Booking Tips

In 2025, average hotel rates in Sea Isle City NJ range between $150–$350 per night, depending on price range and location.

  • Summer (June–August): Highest demand with limited hotel deals.
  • Spring & Fall: Moderate prices, great for vacation rentals.
  • Winter: Lowest rates for peaceful getaways.

To secure the best stays, book at least two months early. Area hotels in every price range fill up quickly during summer, so early reservations ensure preferred locations and better rates.

Many offer early-bird hotel deals that include free upgrades or breakfast packages.

Local Attractions Near Hotels

Sea Isle City sits in the heart of Cape May County, surrounded by family attractions and scenic stops like:

  • Sea Isle City Promenade: Perfect for sunset walks
  • Dealy Field: Sports, playgrounds, and swimming pools
  • Wetland’s Institute: A great educational stop for nature lovers
  • Pine Haven Campground: Ideal for outdoor enthusiasts
  • Pirate Island Golf: Mini-golf fun for families

Nearby, visitors can also explore Rehoboth Beach, Wildwood Hotels, and the Atlantic City Convention Center — all within driving distance.

Dining and Nightlife in Sea Isle City

Hotels in Sea Isle City NJ near beachfront dining and nightlife spots at sunset.

Sea Isle City’s dining scene offers something for everyone. Many Sea Isle City Hotels are near seafood restaurants, beach cafes, and classic American diners.

Evenings bring a relaxed coastal energy with live music, sunset lounges, and open-air bars. Whether it’s a family dinner or cocktails by the beach, the nightlife complements every traveler’s mood.

Seasonal Travel Tips for Visitors

Each season brings a unique charm to Sea Isle City, NJ:

  • Summer: Festivals, Beach Block events, and active nightlife
  • Spring & Fall: Comfortable weather and better hotel deals
  • Winter: Peaceful and ideal for off-season relaxation

Those traveling from New York, Jersey City, or Egg Harbor Township will find easy access routes for quick weekend trips.

Final Thoughts

Sea Isle City Hotels capture the coastal essence of the Jersey Shore. With free parking, cozy hotel rooms, and breathtaking ocean views, visitors can enjoy both relaxation and adventure.

Whether you choose a Beach Resort like ICONA Avalon or smaller cheap hotels with charm, every stay promises comfort and convenience.

For travelers exploring New Jersey Hotels in Cape May County, Sea Isle City NJ remains one of the best spots to unwind and enjoy the Atlantic breeze.

20×20 Room Addition Cost in 2025

0
20x20 Room Addition Cost
Modern 20x20 Room Addition Under Construction – 2025 Home Expansion

20×20 Room Addition Cost in 2025: Homeowner Guide

Planning a 20×20 room addition in 2025 can feel overwhelming without a clear understanding of the true cost, required permits, and what’s included in the construction process. Whether you’re expanding your home with a family room addition, home office, or master suite, a well-planned project enhances comfort, functionality, and long-term property value.

In 2025, the average home addition cost continues to rise due to higher labor rates, evolving building codes, and increased material prices. That’s why setting a realistic budget and working with experienced home addition contractors is essential for success.

This guide breaks down everything you need to know about the cost to build a 20×20 room addition, including estimated cost, permit fees, and return on investment (ROI). You’ll learn how to plan confidently, stay within budget, and create the extra living space your family needs.

Before diving into pricing, let’s look at the major cost factors that shape every room addition project.

Understanding the True Cost of a 20×20 Room Addition

Every home addition project is different, but a few major factors always affect the overall price. Square footage, design complexity, and construction materials are the biggest influences on your total cost.

1. Design and Structural Factors

Your floor plan and type of addition determine price. A simple extra bedroom or family room addition costs less than a bathroom or kitchen that requires plumbing and electrical work. Homes needing structural changes or support beams raise project costs, while straightforward layouts save money.

2. Regional Labor and Material Pricing

Labor and material costs vary widely across the U.S. Urban areas like Los Angeles or San Francisco often face higher costs due to permit fees and contractor demand. Suburban regions may benefit from more affordable labor and materials.

3. Hidden and Additional Costs

Smaller but significant expenses—such as site preparation, insulation, or interior finishes—add up quickly. Including these early helps maintain accurate cost estimates.

4. Transparent Planning and Expert Guidance

Partnering with experienced professionals ensures every stage, from permits to completion, stays aligned with local building codes and budget goals.

Now that you understand the main cost drivers, let’s see how these translate into per-square-foot pricing.

Average Cost per Square Foot in 2025

Understanding cost per square foot helps homeowners estimate total investment before construction begins. In 2025, the home addition cost in 2025 varies depending on addition type, materials, and finishes.

National Cost Ranges

On average, a 20×20 room addition costs between $125 and $250 per square foot. Basic family room or bedroom additions sit at the lower end. Bathrooms, kitchens, or home offices—requiring plumbing, wiring, or HVAC upgrades—cost more. Premium finishes can push totals toward the high end.

How Square Footage Impacts Budget

A 20×20 room equals 400 sq ft. Even a small size change affects your total cost; adding 50 square feet can raise expenses by $6,000–$12,000 depending on labor and material rates.

Material and Labor Balance

Construction costs typically split 50/50 between materials and labor. Choosing durable roofing, energy-efficient insulation, and quality interior finishes increases upfront spending but reduces long-term maintenance.

Regional Variation

Areas with strict building codes, high permit costs, or extreme climates—like coastal or cold zones—often see elevated prices due to specialized materials and regulations.

Once you know your average cost range, it’s helpful to see what that investment actually covers.

What’s Included in a 20×20 Room Addition Project

A well-planned home addition project includes multiple phases that collectively determine your total construction expense.

  1. Foundation and Framing: Involves excavation, crawl space or new foundation, and structure alignment with your existing structure.
  2. Roofing and Insulation: Protects against weather while improving energy efficiency.
  3. Electrical Work, Plumbing, and HVAC System: Includes lighting fixtures, water lines, and air circulation systems.
  4. Interior Finishes: Paint, flooring, and trim complete your new space.
  5. Final Inspection: Confirms compliance with local building codes and safety rules.

Each stage adds measurable value to your home and influences your final cost.

Each construction phase plays a role in cost, but the type of room you choose has the biggest impact overall.

Room Type Cost Comparison

High-quality photo of a modern 20x20 home addition featuring a family room and kitchen extension, showcasing open-concept design, natural lighting, and premium finishes — ideal for illustrating room type cost comparison.

The type of room you add plays a major role in your overall cost, square footage planning, and future property value. Each home addition project carries unique design demands, construction costs, and long-term benefits. Below is a breakdown of how different room types compare in 2025.

Bedroom Addition

A 20×20 bedroom addition cost is one of the most affordable ways to expand your home. It typically includes basic construction materials and minimal structural changes. However, upgrading to a master suite addition with a walk-in closet, bathroom, or primary suite layout can raise the total cost but significantly improve your home’s value. This type of addition is ideal for a growing family or homeowners looking for more privacy and comfort.

Family Room Addition

A family room addition adds livable square footage without the need for plumbing or extensive electrical work. This room addition project offers one of the highest returns on investment because it enhances comfort and boosts home value with a relatively low-cost construction plan.

Bathroom or Master Suite Addition

Adding a bathroom addition or primary suite involves detailed plumbing work, HVAC system updates, and high-end finishes. While this option increases the cost per sq ft, it delivers exceptional convenience and long-term property value growth.

Kitchen or Dining Addition

A kitchen or dining room addition typically has the highest construction costs because it includes electrical wiring, plumbing work, and premium interior finishes. Although expensive, this home improvement project offers one of the strongest boosts to home value and energy efficiency in 2025.

Beyond room type, several other elements can influence your total budget and project timeline.

Major Factors That Influence Cost

Key cost factors shape the overall cost of a home addition project:

  1. Location and Labor Rates: Metro areas have higher costs; smaller towns often enjoy low-cost labor.
  2. Material Choices and Quality: Premium construction materials or exterior finishes raise expense but increase durability.
  3. Structural Changes and Foundation Work: Reinforcing your existing structure or adding a new foundation increases total cost.
  4. Utilities and Systems: Electrical wiring, plumbing, and HVAC system design affect price.
  5. Design Complexity: Custom layouts, vaulted ceilings, or high-end finishes raise construction costs.
  6. Site Preparation: Clearing trees or adjusting slope adds to additional costs and timeline.

After identifying the main influences, it’s time to put those details into a structured project budget.

Budgeting and Estimating the Total Cost

To create a realistic budget, start with a cost calculator or HomeAdvisor tool to gauge average rates in your region.

1. Define Your Budget

Use cost per square foot addition as your baseline, then add 10–15% as a contingency for unexpected additional costs.

2. Break Down Expenses

  • Labor and Permits: Contractor, building permit, and inspection fees
  • Materials: Lumber, drywall, roofing materials, and insulation
  • Utilities: Electrical work, plumbing, and HVAC system
  • Finishes: Paint, trim, lighting fixtures, and flooring

3. Get Multiple Estimates

Collect at least three cost estimates from licensed home addition contractors. Comparing bids clarifies transparency and prevents surprises.

4. Prioritize Long-Term Value

Investing in energy efficiency upgrades, high-end materials, or better insulation increases home’s value and cuts long-term bills.

Once your budget is set, the next step is ensuring your project complies with all legal and safety standards.

Permits, Codes, and Legal Requirements

Before construction begins, you’ll need the right building permit to comply with local building codes.

  1. Permits Protect Homeowners: They confirm safety, structural soundness, and code compliance.
  2. Local Codes Vary: Some regions regulate square footage limits, setbacks, and energy efficiency standards.
  3. Inspections and Approvals: City inspectors review framing, wiring, and plumbing work at each stage.
  4. Peace of Mind: Proper permits protect your home’s value and simplify insurance or resale processes.

With permits handled, the next major decision is whether to take a DIY approach or hire professionals.

DIY vs. Hiring Professional Contractors

When planning a 20×20 room addition in 2025, many homeowners wonder whether to handle it themselves or hire professional home addition contractors. Both choices affect your total project cost, timeline, and overall construction quality.

DIY Approach

A DIY room addition may seem cost-effective, but it involves complex steps such as framing, plumbing work, and electrical wiring that require technical skill. Even small mistakes can raise costs or create safety issues.

Key challenges include:

  • Incorrect plumbing or wiring that leads to expensive repairs.
  • Missing building permits or failed inspections that delay progress.
  • Structural errors that reduce safety and resale value.

DIY efforts work best for minor finishing tasks—like painting, landscaping, or installing trim—but not for large-scale home additions.

Professional Contractors

Hiring licensed builders ensures your project meets local codes and high construction standards. Professionals manage everything—from planning and permits to inspections and completion—saving time and avoiding costly rework.

Key benefits include:

  • Complete management of permits, scheduling, and inspections.
  • Consistent quality control and adherence to regulations.
  • Predictable total project cost and on-time completion.

Working with professionals delivers expertise, safety, and peace of mind—ensuring your 20×20 room addition is built efficiently and adds lasting value.

Even when hiring contractors, there are still smart strategies to manage costs effectively.

Ways to Save Money on a Room Addition

  1. Plan Early – Detailed designs and careful planning prevent budget overruns.
  2. Compare Quotes – Get multiple bids to spot fair construction costs.
  3. Simplify Design – Avoid unnecessary structural changes or roofline adjustments.
  4. Use Cost-Saving Materials – Engineered wood or local building materials lower expenses.
  5. DIY Finishes – Handle painting or landscaping yourself to cut labor rates.
  6. Focus on Energy Efficiency – Invest in insulation and windows that reduce long-term bills.

These strategies keep your total cost manageable without sacrificing quality or home’s value.

After managing costs and construction, let’s explore how your investment can pay off in long-term value.

Impact on Property Value and Return on Investment (ROI)

Modern home exterior featuring a newly completed 20x20 room addition with large windows, blending seamlessly with the original structure to enhance property value.

A 20×20 room addition adds both valuable square footage and long-term equity. On average, homeowners recover 60–75% of their construction costs through increased property value.

Rooms That Add the Most Value:

  • Master Suite or Family Room Addition – Delivers high comfort, functionality, and excellent ROI.
  • Home Office – Appeals strongly to remote workers and modern buyers, improving resale potential.

Key Buyer Appeal Factors:

  • Updated HVAC system, modern floor plan, and cohesive design with the existing home.
  • Durable interior finishes and energy-efficient quality materials that lower maintenance costs.

Professionally managed home addition projects yield the best ROI because they meet local building codes, ensure structural integrity, and elevate your home’s overall market appeal.

Overall, a 20×20 room addition remains one of the most valuable upgrades for homeowners seeking both functionality and financial return.

Still have questions about costs, permits, or timelines? Here are some common homeowner questions answered.

Frequently Asked Questions (FAQs)

Q: How much does a 20×20 room addition cost in 2025?
A: It typically ranges from $80,000 to $200,000, depending on construction materials, labor rates, and project size.

Q: Do I need a building permit?
A: Yes. Every home addition project requires one to meet local building codes and protect your home’s value.

Q: How long does construction take?
A: Most projects last 3–6 months depending on weather and complexity of the project.

Q: Will this increase property taxes?
A: Possibly, since your home value and square footage rise.

Q: Is DIY cheaper?
A: Not usually. Professional Home Addition Contractors ensure safety, permits, and quality work that protects your significant investment.

Now that you have a full picture of the process, cost, and ROI, let’s close with some final guidance for planning success.

Final Words

A 20×20 room addition in 2025 offers a practical way to expand your home and enhance daily living. Success begins with thoughtful planning—covering design, permits, budgeting, and construction scheduling. Careful preparation helps avoid delays, unexpected costs, and design compromises.

Working with trusted home addition contractors ensures your project meets code, stays on schedule, and reflects your vision. Whether you’re building a relaxing master suite, a spacious family room, or a functional home office, a well-executed room addition enhances your home’s functionality, long-term value, and overall satisfaction.

Want more expert insights on home addition costs, home renovation trends, and property value tips?

Visit Redfinz.com — where smart homeowners begin their planning journey.

Luxury Modern Bedroom Ceiling Design in 2025

0
Luxury Modern Modern Bedroom Ceiling Design

Luxury modern bedroom ceiling design transforms an ordinary sleeping space into an extraordinary personal retreat. Whether you’re renovating or building from scratch, the ceiling presents a canvas of design possibilities that’s often overlooked. In fact, with over 14,964 master bedroom design ideas from top decorators and architects available for inspiration, the options are virtually limitless.

Modern false ceiling designs for bedrooms have evolved significantly, incorporating materials like wood, metal, plaster, and fabric that allow designers to experiment with various styles. Additionally, these luxury ceiling designs for bedrooms elevate the entire vibe of your personal space, creating a personalized interior that reflects your unique taste. From single-layered structures to multi-dimensional masterpieces, we’ve compiled this comprehensive guide to help you navigate the most stunning luxury false ceiling design for bedroom spaces that will dominate trends in 2025.

Types of Modern Bedroom Ceiling Designs

Types of Modern Bedroom Ceiling Designs

Modern bedroom designs have embraced the ceiling as a focal point of luxury and style. The right ceiling treatment can completely transform your sleeping sanctuary, creating an ambiance that’s both sophisticated and serene.

Single-layered ceiling design

The single-layered ceiling design represents elegant simplicity at its finest. Using materials like gypsum, POP (Plaster of Paris), or wood, this style creates a clean, uncluttered look that complements minimalist esthetics. These ceilings typically feature a smooth, flat surface with perhaps a gentle curve or slight recess. Moreover, single-layered designs work particularly well in spaces with height constraints, as they don’t consume vertical space while still offering visual interest. The beauty lies in their versatility—you can enhance them with recessed lighting, gentle curves, or even textured finishes while maintaining their straightforward appeal.

Multi-layered ceiling design

For those desiring dramatic impact, multi-layered ceiling designs incorporate different levels of gypsum or POP panels to create stunning depth. These layered structures allow for multiple lighting options, enabling you to craft precisely the ambiance you desire. The various levels can include two or more layers arranged in geometric patterns, each potentially showcasing different materials or colors. Furthermore, this style excels at making rooms feel more structured and architecturally interesting while providing excellent opportunities for incorporating chandeliers, pendant lighting, and concealed LED strips.

Peripheral ceiling layout

Peripheral ceiling designs focus on the room’s edges, creating a sophisticated framed effect that draws attention to the perimeter. This approach leaves the central portion flat and unobtrusive, making spaces feel more open and airy. Consequently, peripheral designs work exceptionally well in modern and minimalist interiors where clean lines are prioritized. The border can be enhanced with cove lighting, textured finishes, or even wooden accents for added warmth and visual interest.

Coffered ceiling structure

Coffered ceilings bring architectural significance through their grid-like patterns of recessed panels. Besides enhancing esthetic appeal, they create an illusion of height and improve room acoustics by breaking up sound waves. The grid arrangement instantly elevates your bedroom to a chic, structured appearance—perfect for a luxurious setting. Traditionally associated with classic designs, modern interpretations now seamlessly integrate with contemporary decor, offering texture and visual interest through depth and shadow play.

Central drop ceiling style

The central drop ceiling features a lower middle section surrounded by higher edges, creating a focal point directly above key furniture pieces like beds. This design naturally draws the eye upward and can accommodate statement lighting fixtures such as chandeliers or pendant lights. The central portion often includes decorative elements or integrated lighting that enhances the overall esthetic. Particularly effective in spacious bedrooms, this style adds dimension while defining functional zones within the space.

Materials That Define Luxury Ceiling Design

redfinz new images

The selection of materials is a decisive factor that can either elevate or diminish the impact of luxury modern bedroom ceiling design. Each material brings its own character, texture, and functional benefits to the space above.

Gypsum: lightweight and versatile

Gypsum boards have become a cornerstone of contemporary ceiling construction due to their remarkable versatility. Essentially, these lightweight panels offer excellent fire resistance and sound insulation properties, making them ideal for creating a peaceful bedroom environment. The material provides an incredibly smooth finish that pairs beautifully with any interior design scheme. Gypsum is especially suitable for crafting elegant and intricate luxury ceiling designs, as it’s easy to mold into sophisticated patterns. Homeowners appreciate its practical benefits too—gypsum ceilings resist mold and mildew growth while contributing to better thermal insulation.

Wood: warmth and elegance

Nothing infuses a bedroom with natural warmth quite like wooden ceiling elements. The organic textures and rich grains immediately transform sterile spaces into inviting retreats. Wooden ceilings excel at reducing echo and reverberation, creating acoustically balanced environments perfect for restful sleep. Indeed, this timeless material ages gracefully, often developing a deeper, more distinguished patina over the years. From oak and pine to maple and walnut, each wood type offers distinct characteristics—oak provides versatility with both warm and cool color schemes, while walnut delivers rich, deep tones that contrast beautifully against lighter elements.

POP: clean lines and curves

Plaster of Paris (POP) remains a favorite for designers seeking ultimate creative flexibility. This quick-setting white powder, made from semi-dehydrated gypsum, hardens into durable surfaces when mixed with water. The material’s exceptional moldability allows craftsmen to create everything from simple geometric forms to elaborate curved patterns and three-dimensional effects. Although initially more affordable than gypsum, POP requires skilled installation and regular maintenance to prevent cracking. Nevertheless, its ability to form clean lines, gentle curves, and intricate details makes it irreplaceable in luxury bedroom ceiling designs.

Concrete: industrial modern appeal

For those seeking contemporary sophistication, exposed concrete ceilings represent one of the boldest trends in modern interior design. Once hidden behind traditional coverings, concrete’s raw texture now takes center stage in luxury spaces. The industrial esthetic brings an undeniable edge to bedroom environments, especially when paired with softer elements like textiles and wood. Polished concrete options add a particularly refined touch, with glossy finishes reflecting light and creating an illusion of expanded space. Despite its robust appearance, concrete offers practical advantages including durability, moisture resistance, and exceptional thermal properties.

Shapes and Layouts That Transform Spaces

redfinz new images

The shape of your ceiling design plays a pivotal role in defining the character of your luxury bedroom. Beyond mere esthetics, thoughtfully chosen ceiling geometry creates visual harmony that complements your overall interior concept.

Rectangular ceiling layout

Rectangular ceiling designs naturally command attention, adding distinctive character to bedroom spaces. First and foremost, these structured layouts offer unique esthetics while addressing specific lighting and spatial needs. The elongated form creates a sense of direction, guiding the eye across the room. Certainly, rectangular ceilings pair beautifully with central lighting fixtures like chandeliers or pendant lights, creating a balanced focal point. These designs excel in both contemporary and classic settings—from clean-lined modern installations to ornate, detailed patterns that suggest traditional luxury.

Square ceiling design

Square ceiling patterns create perfect symmetry that radiates balance throughout the bedroom. Unlike rectangular spaces, square designs work exceptionally well with proportional furniture arrangements and central lighting elements. In essence, the uniform dimensions allow for equal distribution of visual weight, making square bedrooms particularly functional and practical. This geometric precision makes square layouts ideal for featuring decorative elements like suspended pendant lights on either side of the bed—a chic, contemporary look that’s both stylish and practical.

Circular and curved ceiling forms

Nothing softens a bedroom quite like curved ceiling elements. Notably, circular designs work remarkably well in square or large bedrooms, creating an eye-catching counterpoint to angular furniture. Placing a chandelier at the center establishes perfect symmetry and grandeur—ideal for master bedrooms deserving dramatic impact. Furthermore, wave-like patterns and gentle curves crafted in gypsum can transform the ceiling into the primary focal point. For a truly distinctive look, floating false ceiling designs with oval or circular shapes provide an artistic, contemporary edge that appears suspended below the main ceiling.

Lighting Techniques for a Modern Luxury Look

redfinz new images

Proper lighting elevates luxury modern bedroom ceiling designs from merely decorative to truly functional art. The right illumination not only highlights architectural features but also creates ambiance that transforms your entire space.

Cove lighting for soft glow

Cove lighting, tucked into ceiling recesses or ledges, casts soft illumination upward or along walls. This technique creates a gentle, diffused glow that adds depth and warmth to bedrooms. Specifically designed for modern interiors, cove lighting enhances architectural features without visible fixtures, making rooms appear larger and more inviting.

Recessed lights for minimalism

Recessed fixtures, installed flush against the ceiling, offer clean, streamlined esthetics perfect for minimalist bedrooms. These subtle lights blend seamlessly into the ceiling while providing ample illumination. Accordingly, they’re ideal for smaller bedrooms since they don’t consume any floor or wall space, creating an open, airy feel.

Strip lighting for futuristic appeal

LED strip lights bring versatility and modern flair to bedroom ceilings. These slim, flexible lights conform to various architectural contours, enabling creative design solutions. Similarly, they excel in multi-colored applications, allowing mood changes at the touch of a button.

Chandeliers for a statement piece

A chandelier serves as the ultimate statement piece that immediately transforms a room’s character. These fixtures not only provide illumination but also act as focal points that reflect personal style. Hence, they’re perfect for creating luxurious retreats that showcase sophisticated taste.

Combining multiple lighting types

Layered lighting—using ambient, task, and accent sources together—creates a comprehensive, balanced atmosphere. This approach allows you to highlight architectural elements, illuminate specific areas, and establish different moods simultaneously.

Conclusion

Luxury bedroom ceiling design stands as one of the most impactful yet overlooked aspects of interior decoration. After exploring various options, we believe the perfect ceiling transforms an ordinary bedroom into a sanctuary of style and comfort. Therefore, considering both esthetics and functionality remains essential when selecting from single-layered simplicity, multi-dimensional masterpieces, or elegant coffered structures.

Materials certainly play a crucial role in achieving your desired atmosphere. Gypsum offers versatility for intricate designs, while wood brings natural warmth unmatched by other options. Additionally, POP allows for unlimited creative expression through curves and details, and concrete delivers contemporary sophistication for those seeking industrial modern appeal.

The shape of your ceiling design fundamentally influences your room’s overall character. Rectangular layouts guide the eye across the space, square patterns create perfect symmetry, and circular forms soften angular furniture arrangements with their gentle contours. Above all, these geometric choices should complement your existing decor while enhancing spatial perception.

Lighting, undoubtedly, makes the ultimate difference between ordinary and extraordinary ceiling designs. Cove lighting creates soft, ambient illumination, while recessed fixtures offer clean minimalism. Strip lighting brings futuristic appeal, and chandeliers serve as dramatic focal points. Combining these techniques allows for customized atmospheres that adapt to different moods and occasions.

How to Create a Simple Bedroom Interior Design: A Step-by-Step Guide for Beginners

0
How to Create a Simple Bedroom Interior Design: A Step-by-Step Guide for Beginners

Did you know your bedroom is more than just a place to sleep? With our increasingly fast-paced lives, a simple bedroom interior design creates a private sanctuary where you can truly unwind and recharge.

In fact, the right simple bedroom design balances relaxation space with practical storage solutions while still feeling vibrant and alive. We believe that creating a clutter-free environment makes your room feel more spacious and naturally relaxing. Moreover, implementing bedroom interior design simple principles can transform your personal space into one that reflects your personality while providing that much-needed escape from everyday life.

As we head into 2025, modern bedroom designs are evolving to blend luxury, function, and comfort—especially for urban lifestyles. However, you don’t need complicated designs to achieve this balance. Simple designs often incorporate neutral color palettes and straightforward furniture arrangements, which can make daily cleaning and maintenance easier.

Plan Your Bedroom Layout

How to Create a Simple Bedroom Interior Design

The foundation of any successful bedroom makeover begins with understanding your space. Before browsing through furniture catalogs or interior design ideas, I recommend taking a step back and planning your bedroom layout methodically.

Measure your room dimensions

Creating a simple bedroom interior design starts with accurate measurements. Grab a measuring tape and note down the exact length, width, and ceiling height of your room. Additionally, measure alcoves, built-in features, and the location of windows and doors. These measurements will prevent costly mistakes like ordering furniture that won’t fit through doorways.

I suggest creating a simple sketch of your room with these measurements as your reference point throughout the design process. For most American homes, the average bedroom size is approximately 132 square feet (11′ x 12′), which comfortably fits a queen-sized bed and small wardrobe. If you’re working with a master bedroom, ideal dimensions typically range between 12′ x 14′ to 14′ x 16′.

Decide bed placement and walking space

The bed is undeniably the focal point of your bedroom, so its placement deserves careful consideration. Generally, I recommend positioning your bed against the longest wall if possible, avoiding blocking windows or creating awkward traffic patterns.

For comfortable movement around your bedroom, maintain these essential clearances:

  • At least 24 inches of walking space around the sides of the bed
  • 30-36 inches between the foot of the bed and opposite wall for queen beds
  • 36-42 inches for king beds to prevent the space from feeling cramped

This circulation space ensures you can easily access your bed from both sides and comfortably open wardrobes or drawers without obstacles. For smaller bedrooms, an L-shaped arrangement works well—place your bed in one corner and use remaining wall space for a dresser or desk.

Consider natural light and ventilation

Natural light plays a crucial role in regulating your sleep-wake cycle (circadian rhythm). Proper exposure to daylight during waking hours helps you feel more alert and energetic. Consequently, bedroom layout planning should account for window positions and light patterns.

If you enjoy waking up with the sun, consider partially placing your bed along a south-facing wall. Alternatively, if you prefer darker sleeping conditions, a north-facing wall might be ideal. For maximum flexibility, install blackout curtains that can block light at night but open easily in the morning.

Ventilation is equally important for quality sleep. When deciding on furniture placement, think about how air moves through your room. Adequate airflow prevents stuffiness and creates a more comfortable sleeping environment. Position your bed to take advantage of cross-ventilation when possible, avoiding placements that block air circulation between windows or vents.

By carefully planning these three fundamental aspects of your bedroom layout—measurements, bed placement, and environmental factors—you’ll establish a solid foundation for the subsequent design elements of your simple bedroom interior.

Choose a Simple Color Palette

How to Create a Simple Bedroom Interior Design: A Step-by-Step Guide for Beginners

Selecting the right colors for your bedroom sets the foundation for a restful environment. Colors influence our minds and moods significantly, with some shades promoting relaxation while others energize the space. Let’s explore how to create a simple color palette that transforms your bedroom into a peaceful sanctuary.

Neutral tones for a calm look

Neutral colors remain timeless favorites for bedroom designs due to their versatility and ability to create serene environments. These shades extend beyond just white and beige, encompassing a range of hues with subtle undertones.

For a bedroom that promotes relaxation and comfort, consider these calming options:

  • Warm whites like Roman Column by Sherwin-Williams create a cozy, inviting atmosphere while making the room feel spacious
  • Soft gray serves as one of the most popular bedroom colors because of its soothing, neutral effect
  • Earthy taupe with gray undertones (like Stirabout) creates a totally calm space, particularly when used on all surfaces including the ceiling
  • Soothing cream promotes relaxation while offering flexibility for accent colors

When working with neutrals, the key to success lies beyond just color selection. Texture, pattern, and subtle shimmer will make neutral palettes sing. Mix different neutral shades within the same family (sharing similar undertones) to create visual interest without overwhelming the space.

Accent walls for subtle contrast

An accent wall provides a focal point and ties room elements together cohesively while preventing your simple bedroom design from feeling flat. This technique works particularly well behind the bed, creating a natural visual anchor.

For subtle yet effective contrast:

  • Paint just half a wall for visual interest without overwhelming the space—try navy on the bottom with white on top to make ceilings appear taller
  • Implement a two-tone design to break up solid colors, which prevents patterns from visually cluttering the space
  • Consider an ombré effect, starting with the darkest shade at the bottom and gradually lightening upward for a serene effect

Fundamentally, when creating an accent wall, make it darker than surrounding walls to establish a clear focal point that immediately draws attention. This contrast works beautifully with the neutral base palette while adding dimension to your simple bedroom wall design.

How color affects room size perception

Colors possess remarkable power to alter spatial perception without moving a single wall. Understanding these effects helps you manipulate your room’s visual dimensions:

  • Lighter and cooler colors make spaces appear larger and more open—ideal for small bedrooms
  • Darker colors create a cozy, intimate feeling by absorbing light, making rooms feel smaller but more enclosed
  • Ceiling color impacts perceived height—painting it lighter than walls makes a room feel taller

To visually widen a narrow room, paint the back wall and ceiling with the same darker color while keeping side walls lighter. Conversely, if a room feels too wide, paint opposing side walls darker while leaving the background and ceiling light.

For small bedrooms specifically, earthy beige tones can make interiors appear more spacious while simultaneously adding warmth and coziness. Additionally, consider matte or silk finishes rather than high-gloss options, as they don’t reflect excessive light that might disturb sleep.

As a result, your color choices become powerful tools in creating the perfect simple bedroom interior design—one that feels appropriately sized, visually balanced, and conducive to rest.

Select Essential Bedroom Furniture

How to Create a Simple Bedroom Interior Design: A Step-by-Step Guide for Beginners

Furniture selection represents the tangible elements that bring your simple bedroom design to life. After planning your layout and choosing colors, it’s time to select pieces that balance functionality with esthetics.

Low-height bed with storage

A low-height bed creates an illusion of spaciousness by reducing visual bulk in your bedroom. Furthermore, beds with built-in storage compartments eliminate the need for additional furniture pieces, making them ideal for compact spaces. These beds typically sit 350mm from the ground, allowing easy access for children and elderly individuals.

Storage beds come in various configurations:

  • Hydraulic storage designs that lift the entire mattress, revealing spacious storage underneath
  • Drawer storage beds with compartments accessible from the sides
  • Box storage options with four separate compartments for organized storage

When selecting a storage bed, consider durability and weight capacity. Most engineered wood beds last approximately 5 years with proper care. Essentially, your bed should provide both comfort and practical storage without dominating the room visually.

Sliding wardrobe for space-saving

Unlike traditional hinged door wardrobes, sliding designs don’t require clearance space for doors to swing open—a crucial advantage for smaller bedrooms. This space-saving feature makes them perfect for rooms with limited square footage or awkward layouts.

Beyond space efficiency, sliding wardrobes offer numerous benefits:

  • Smooth functionality with quiet operation for hassle-free daily use
  • Versatile storage with adjustable shelves, hanging rails, and integrated drawers
  • Enhanced organization that makes clothing and accessories easily accessible
  • Sleek esthetics that complement modern interiors

For a truly minimalist approach, choose sliding wardrobes with monochromatic finishes that blend with your walls, creating a cohesive look that makes the room appear larger.

Minimal bedside tables and dressers

Bedside tables are essential for keeping nighttime necessities within arm’s reach. Initially, focus on functionality—a table with at least one drawer provides storage while maintaining a clean surface. For smaller spaces, floating bedside tables free up floor area and create an airy, open look.

Complete your bedroom furniture ensemble with a compact dresser. Given space constraints, consider:

  • Vertical designs that utilize height rather than width
  • Multifunctional pieces that can serve as both storage and workspace
  • Corner units that maximize unused spaces

When selecting dressers, prioritize pieces that complement your overall design while providing adequate storage. In tight spaces, wall-mounted or floating designs maintain floor clearance, creating visual lightness that’s essential for simple bedroom interior design.

Add Simple Wall and Lighting Features

Bedroom Interior Design Styles

Lighting and wall features form the finishing touches that elevate a simple bedroom design from basic to beautiful. Once you’ve arranged your furniture, these elements create atmosphere and personality without cluttering your space.

Use of soft cove lighting

Cove lighting involves installing light fixtures into recessed areas or concealed channels within walls or ceilings. This technique creates indirect, diffused illumination that transforms your bedroom’s ambiance. Notably, cove lighting works exceptionally well in bedrooms as it produces a gentle glow without harsh shadows, ideal for creating a calming environment.

For simple installation, consider:

  • LED strips tucked behind headboards for a soothing backlit effect
  • Light strips along ceiling perimeters or under crown moldings
  • Soft illumination behind floating shelves

Indeed, the concealed nature of cove lighting provides a clean, minimalist appearance while adding warmth and sophistication to your space.

Simple bedroom wall design ideas

Walls occupy the largest visual space in your bedroom, making their design crucial yet straightforward. Amid various options, consider these simple approaches:

First, textured walls add character without overwhelming the space. Limewash paint creates subtle variations in texture and tone, giving your bedroom wall a raw, organic feel. Alternatively, textured wallpapers offer an easy-to-execute and cost-effective solution.

Second, create a statement wall using a calming shade like moss green or sea blue as your focal point. For added dimension, consider rectangular recessed boxes carved into the wall.

Third, upholstered accent walls behind your bed spread a luxurious feeling while enhancing comfort. Materials like velvet, leather, hemp cotton, or jute work wonderfully.

Mirrors and textures for depth

Mirrors do more than just reflect your image—they expand visual space. Placing a mirror opposite a window helps reflect natural light throughout your room, making it appear larger and brighter.

For small bedrooms, consider:

  • A large mirror opposite a window to double perceived space
  • Mirror-framed vanity areas for both function and style
  • Floor-length mirrors to create an illusion of depth

Fundamentally, mirrors can emphasize key design elements when placed above headboards or dressers, drawing attention to these areas and creating a cohesive feel to your bedroom layout.

Decorate with Function in Mind

Mediterranean Style Bedroom

Functional decoration transforms your bedroom from simply habitable to truly livable. After establishing the fundamentals, how you accessorize determines whether your space remains practical long-term.

Simple room decoration ideas that work

I’ve found that decorating with intention creates lasting impact. Question each item before bringing it into your bedroom: “Does this belong here?” or “Would I buy this today?”. This approach prevents accumulating unnecessary items that eventually become clutter.

For nightstands, stackable organizers keep essentials accessible while maintaining clean surfaces. Likewise, personal touches matter—display only select decorative pieces that genuinely make you happy, like a special photo frame or meaningful figurine.

Use of indoor plants and rugs

Indoor plants serve multiple purposes beyond esthetics. Lemon balm emits a gentle citrusy scent that naturally calms anxiety and alleviates insomnia symptoms. Similarly, snake plants produce oxygen at night, making them ideal companions for better sleep. For those with limited gardening experience, air plants require minimal care—occasional misting suffices.

Regarding rugs, placement matters tremendously. A large rug under your bed with the seam positioned beneath creates a plush foundation that softens acoustics throughout. Alternatively, runner-style rugs around the bed provide comfort for your first morning steps. For under-bed storage accessibility, flatwoven rugs prevent sliding accidents.

Keep surfaces clutter-free

Maintaining clear horizontal surfaces forms the cornerstone of a peaceful bedroom environment. Accordingly, implementing daily habits proves more effective than occasional deep cleaning. Put clothes away immediately after changing, return kitchen items promptly, and unplug and coil cords after use.

Establish designated zones for frequently used items—labeled storage bins for medicines, jewelry, and electronics prevent random placement. Furthermore, removing unnecessary furniture eliminates potential clutter-catching surfaces.

Conclusion

Simple bedroom interior design offers far more than esthetic appeal. Throughout this guide, we’ve explored how thoughtful planning transforms your bedroom into a personal sanctuary that balances function and style. Your bedroom serves as both your starting and ending point each day, therefore creating a space that promotes relaxation becomes essential for overall wellbeing.

Layout planning undeniably forms the foundation of any successful bedroom design. Proper measurements, strategic bed placement, and consideration of natural light establish the framework upon which all other design elements build. Similarly, a neutral color palette creates the calm atmosphere necessary for quality rest while accent walls add personality without overwhelming the space.

Furniture selection plays a crucial role in maintaining simplicity. Low-height beds with built-in storage, space-saving sliding wardrobes, and minimal bedside tables maximize functionality while preserving visual openness. Additionally, soft cove lighting, thoughtfully designed walls, and strategically placed mirrors work together to enhance the perception of space.

Lastly, decoration choices determine whether your bedroom remains a peaceful retreat long-term. Indoor plants improve air quality while adding natural elements, quality rugs add comfort and warmth, and clutter-free surfaces maintain the tranquil environment you’ve worked to create.

Remember, simple bedroom interior design doesn’t mean boring or lacking personality. Rather, it focuses on intentional choices that support both functionality and personal style. When each element works harmoniously together, you’ll find yourself with a bedroom that truly feels like home—a place where you can unwind, recharge, and face each new day refreshed.

How to Choose the Right Finish for Your New Concrete Driveway

0
How to Choose the Right Finish for Your New Concrete Driveway

When it comes to building concrete driveways the finish you choose can make all the difference. The right finish improves appearance adds safety and increases your home’s value. Many homeowners in Mooresville are upgrading their driveways not just for function but for a look that complements their property.

At Local Concrete Co we know that every driveway should fit both your home’s style and your daily use. Let’s go over how to pick the best finish for your new driveway.

Understand What a Driveway Finish Does

A finish gives your concrete driveway its texture look and level of grip. It’s the last step after the concrete is poured and smoothed. While some finishes make the surface shine others create patterns that prevent slipping or hide tire marks.

If you’ve seen driveways that look dull rough or cracked too soon chances are the finish wasn’t right for the local weather or the homeowner’s use. Choosing the right one ensures your driveway lasts longer and keeps its appeal.

Popular Finishes for Concrete Driveways

redfinz new images

Not all finishes are the same. Each offers different benefits depending on your budget style and maintenance needs.

Broom Finish

The broom finish is one of the most common choices for concrete driveways. While the concrete is still wet a broom is dragged across the surface leaving fine lines. This texture gives grip and makes it safe for both cars and people especially during rain. It’s simple effective and cost-friendly.

Exposed Aggregate

This finish exposes the small stones and pebbles mixed in the concrete. It adds color strength and a natural look. Homeowners love it because it hides stains well and looks elegant with landscaping. The texture also offers strong traction.

Stamped Concrete

Stamped finishes let you mimic the look of stone brick or even wood. They’re perfect for homeowners who want design without the high cost of natural materials. The concrete is stamped with patterns before it fully sets. You can even choose custom designs that fit your property’s architecture.

Smooth Trowel Finish

For a modern and sleek appearance the trowel finish works well. It creates a smooth surface often used in garages or covered areas. However it can be slippery when wet so it’s best suited for low-traffic driveways or paired with a sealer that adds grip.

Stained or Colored Concrete

If you want a driveway that stands out staining or coloring the concrete can help. This finish adds depth and tone giving your concrete driveway a more decorative look. The colors resist fading and work well with stamped or smooth finishes.

Factors to Consider Before Choosing a Finish

How to Choose the Right Finish for Your New Concrete Driveway

Every home in Mooresville has its own conditions and style. Before you make a choice think about a few key points:

  • Climate: Some finishes handle moisture better than others. Broom or exposed aggregate finishes are best if you get frequent rain.
  • Maintenance: Smooth or stained finishes may require more sealing to keep their look.
  • Budget: Simple finishes like broom are affordable while stamped or colored ones cost more but offer visual appeal.
  • Durability: If your driveway sees heavy vehicles or constant use go for finishes that resist wear and tear.

How Professionals Apply the Finish

At Local Concrete Co we follow a careful process to make sure your concrete driveway looks clean and lasts long.

After pouring the concrete our team waits until it’s set enough to hold shape but still soft on the surface. Depending on your choice we use tools like brooms trowels or stamps to create texture or patterns.

Once the finish is complete we let the driveway cure properly. This curing step strengthens the surface and prevents cracks. Finally we apply a sealant that protects the surface from stains and moisture.

This process ensures you get both strength and beauty in your new driveway.

Maintenance Tips to Keep It Looking New

Even the best finish needs care. Simple habits can help extend the life of your concrete driveway.

  • Clean regularly with water and mild soap.
  • Avoid harsh chemicals or de-icers in winter.
  • Reseal the surface every 2 to 3 years to prevent fading or moisture damage.
  • Keep heavy vehicles from parking in one spot for long periods.

Regular care helps maintain both the strength and look of your driveway for years.

Why Local Concrete Co Is Trusted in Mooresville

Homeowners across Mooresville rely on Local Concrete Co because we combine quality materials with skilled workmanship. We handle every project with precision and care. Our team is trained to guide you in choosing the right finish keeping both looks and performance in mind.

When you choose us you’re choosing experience honesty and lasting results. Our goal is simple to build concrete driveways that stay strong and look great for decades.

Get Started Today

If you’re planning a new driveway or replacing an old one it’s worth getting expert advice before you decide. The right finish can turn a plain surface into an eye-catching part of your property.

At Local Concrete Co we’re ready to help you choose the perfect finish that fits your style budget and needs.

Call us today at (980) 480-6489 or visit Local Concrete Co to learn more about our concrete driveways in Mooresville NC 28117.

We’ll help you build a driveway that’s built to last and made to impress.

27 Captivating Bedroom Interior Design Styles for your Home

0
Bedroom Interior Design Styles

Your bedroom interior design reflects more than just style—it’s the sanctuary where you begin and end each day. Whether you’re planning a complete redesign, which typically costs ₹2 to ₹6 lakhs in India depending on size and materials, or simply refreshing your space, understanding different design styles is essential.

Looking ahead, 2025 bedroom trends emphasize smart storage, biophilic elements, and soothing, layered textures, while 2026 will welcome warm, cozy spaces with tone-on-tone colors and strategic lighting. From minimalist designs with clean lines and neutral color palettes to rustic styles that rebel against minimalism, your options are virtually limitless. Additionally, modern bedroom designs range from luxurious master bedrooms to efficient solutions for smaller spaces.

In this comprehensive guide, we explore 27 distinctive bedroom interior design styles that can transform your sleeping space. From timeless traditional to bold artistic concepts, these approaches will help you create a bedroom that perfectly aligns with your personal taste and lifestyle needs.

Timeless and Traditional Bedroom Styles

redfinz new images

Traditional bedroom styles offer a sense of elegance, comfort, and timelessness that never goes out of fashion. These designs emphasize classic elements while creating spaces that feel both welcoming and sophisticated.

1. Traditional Bedroom Decor

Traditional bedroom interior design embraces classic charm with rich textures and decorative elements. Though formal in design, these spaces remain comfortable and welcoming through balanced color palettes and thoughtful furnishings. Most colors work well in traditional bedrooms, from muted blues and greens to deep reds and natural wood tones. For furniture, consider mixing and matching pieces in various styles—upholstered beds, wooden frames, and four-poster designs all enhance the traditional charm. Crown molding, wainscoting, and floor-length curtains add those finishing touches that elevate the space.

2. Cottage Style Bedroom

Cottage bedrooms offer comforting, lived-in charm through pastel colors, floral patterns, and painted wooden furniture. These spaces value character over polish, creating a sense of ease and relaxation. To achieve this look, incorporate elements like quilts, vintage furnishings, and natural textures. Consider adding a cane chair near a window or a quilted throw across the bed. Exposed beams, wooden floors, sloping ceilings, and leaded windows all contribute to the quintessential cottage esthetic.

3. Indian Style Bedroom

Mediterranean Style Bedroom

Indian style bedrooms keep tradition close with distinctive elements like heavy wooden furniture, brass lamps, and vibrant textiles. This style often incorporates regional crafts, wall art, and Vastu principles for layout. 

The placement of furniture is particularly important—beds should avoid placement under windows or next to doors for optimal sleep quality. For a royal touch, consider Rajasthani-inspired deep reds and golds, intricate woodwork, or traditional Jaisalmer wall carvings.

4. French Country Bedroom

French country bedrooms blend elegance with rustic charm, creating spaces that feel both sophisticated and lived-in. Soft color palettes, lush bedding, and dreamy decor create a restful sanctuary. Key elements include patterns like toile, floral prints, and gingham, often mixed throughout the space. Furniture typically features carved details, fluted legs, and antique or distressed finishes. Crystal chandeliers, exposed beams, and shiplap walls further enhance the French country esthetic.

5. Gustavian Bedroom Style

Gustavian style, originating in late 18th-century Sweden during King Gustav III’s reign, offers a simplified Swedish interpretation of French neoclassicism. Characterized by symmetry, proportion, and muted color palettes (whites, pale blues, greens, and soft grays), this style evokes the appearance of marble. 

Furniture features straight backs, tapered legs, and minimal ornamentation, often painted in soft pastels. Fluting, subtle carved designs, and neoclassical motifs like laurel wreaths and festoons are common decorative elements.

6. Southern Traditional Bedroom

Southern traditional bedrooms reflect classic Southern interior design with an emphasis on gracious living and entertaining. Essential elements include tall ceilings, ornate crown molding, heart pine floors, and symmetrical layouts. The style incorporates patterned fabrics (toile, gingham, floral chintz), antiques, and heirloom pieces that tell a story. 

Color palettes typically feature pale blues, sage greens, buttery creams, and soft blush tones, grounded with natural wood. Personal touches like monograms and family mementos complete these elegant yet comfortable spaces.

Modern and Minimalist Bedroom Styles

Modern and Minimalist Bedroom Style

Modern bedroom styles emphasize simplicity, functionality, and clean esthetics to create peaceful retreats from busy lives. These designs focus on essential elements that promote relaxation and tranquility.

7. Modern Bedroom Interior Design

Modern bedroom design prioritizes clean lines, uncluttered spaces, and functional layouts that create bright, airy environments. These spaces typically feature neutral color palettes with strategic pops of color, often drawing inspiration from nature with earthy hues and natural materials. In 2025, modern bedrooms are evolving into deeply restorative havens with intuitive layouts and thoughtful material choices.

8. Minimalist Bedroom Design

Minimalist bedrooms embody the “less is more” philosophy, focusing on essential furniture with clean, straight lines in light colors. This approach eliminates visual noise through clever integrated storage solutions like under-bed drawers and floor-to-ceiling wardrobes. The goal is creating profound calm through decluttered sightlines and intentional choices, not emptiness.

9. Japandi Bedroom Design

Japandi style masterfully blends Japanese minimalism with Scandinavian functionality, merging zen principles with hygge comfort. These bedrooms feature low wooden bed frames, neutral linens, and textured accessories that create serene, uncluttered spaces.Natural materials like wood, stone, and linen dominate, alongside organic shapes, clean lines, and simple silhouettes.

10. Scandinavian Bedroom Style

 Style Bedroom

Scandinavian bedrooms offer calming, uncluttered environments with white or neutral walls, light hardwood floors, and minimal furniture. This design celebrates simplicity with functional layouts and a less-is-more approach. 

Furniture features minimalist designs with sleek, clean lines, complemented by natural materials like wood, linen, and wool for warmth and texture.

11. Contemporary Style Bedroom

Contemporary bedrooms reflect current design trends, embracing vibrant colors, soft textures, and warm wood furnishings. These spaces take advantage of natural light for brightness and pare down furnishings to essentials. They serve as personal sanctuaries where you can relax and recharge while escaping everyday stresses.

12. Transitional Bedroom Style

Transitional design bridges traditional elegance and modern simplicity, creating a timeless, inviting esthetic. Rather than committing to one design period, these spaces combine furnishings from both modern and traditional styles. Key elements include calming monochromatic color schemes, textural variety, and carefully curated accessories.

13. Monochromatic Bedroom Style

Monochromatic bedrooms employ variations within a single color family to create depth and interest. These spaces use texture to add visual richness—the sheen of silk cushions against matte cotton bedding or the softness of cashmere throws against structured upholstered headboards. In urban settings, this approach helps visually simplify potentially cluttered environments.

Nature-Inspired and Rustic Bedroom Styles

Nature-inspired bedroom styles bring the outdoors inside, creating tranquil retreats that reconnect us with natural elements. These designs emphasize organic materials, earthy color palettes, and textural variety.

14. Rustic Bedroom Decor

Rustic bedrooms embrace authenticity with weathered wood, natural textures, and timeworn finishes. This style celebrates imperfections, following the Japanese wabi-sabi philosophy that finds beauty in the unpolished and aged.

For a refined rustic look, pair silky sateen bed linen with quilted velvet throws and arrange mismatched cushions against feather pillows for cozy contrast.

15. Farmhouse Bedroom Decor

redfinz new images

Farmhouse style blends rustic charm with sophisticated modern elegance. This design incorporates neutral colors with warm woods and metal elements. Essential components include reclaimed barn wood, vintage furniture pieces, and cozy textiles in soft, muted tones. The style values character over polish, creating effortlessly refined spaces with thoughtful material combinations.

16. Biophilic Bedroom Design

Biophilic design strengthens our connection to nature, significantly improving physical and mental wellbeing. This approach incorporates abundant plant life, natural sunlight, organic materials, and nature-inspired colors.

To create a true biophilic bedroom, arrange potted plants on bedside tables, dress your bed with natural cotton or hemp linens, and select furniture crafted from sustainable materials.

17. Alpine Chic Bedroom

Alpine chic elevates cozy mountain living by blending Swiss chalet charm with French Alps elegance. This style combines reclaimed wood, rugged stone, and iron accents with luxurious textiles like shearling, wool, and velvet.

Furniture balances comfort with elegance through oversized, plush seating and rustic wooden tables, creating a sophisticated yet inviting mountain retreat.

Mediterranean Style Bedroom

18. Mediterranean Style Bedroom

Mediterranean bedrooms capture sun-drenched coastal ambiance with soothing colors and timeless elegance. This style incorporates natural stone, rustic wood, and ornate details. The color palette features blues inspired by the Aegean Sea, complemented by warm earthy tones and crisp whites. Furniture choices include ornate headboards, vintage finds, and wrought iron accents.

19. California Coastal Bedroom

California coastal style combines relaxed beach house esthetics with classic Hamptons elegance. This design emphasizes natural light, airy spaces, and organic elements. Key features include white or light-colored furniture, woven textures, and subtle patterns that create a laid-back yet sophisticated atmosphere.

20. Coastal Bedroom Ideas

Coastal bedrooms evoke seaside tranquility through blue and white color schemes, natural textures, and ocean-inspired elements. For authentic coastal design, incorporate woven light fixtures, jute rugs, and wood elements with weathered finishes.

Unlike typical beach themes, modern coastal style focuses on subtle, sophisticated interpretations of maritime influences, avoiding literal seashell or anchor motifs.

Bold, Artistic, and Eclectic Bedroom Styles

Bold, Artistic, and Eclectic Bedroom Styles
Eclectic primary bedroom with vibrant blue walls, floral wall art, white bedding, and patterned benches at the foot of the bed.

Image Source: Home Stratosphere

Bold, Artistic, and Eclectic Bedroom Styles
Bedrooms that make bold statements allow for personal expression through vivid colors, unexpected combinations, and artistic elements. These styles embrace individuality over convention.

21. Eclectic Bedroom Design
Eclectic bedrooms blend different design elements, mixing patterns, vintage decor, and vibrant colors. This style celebrates the freedom to combine what you love without rigid rules. The key to successful eclectic design is maintaining a cohesive thread—perhaps through color palette or materials—that connects diverse pieces. Pattern mixing is essential, from subtly patterned wallpaper alongside patterned rugs to oversized floral designs that provide visual interest.

22. Industrial Bedroom Design
Industrial bedrooms showcase raw, utilitarian elements inspired by old factories. Essential components include weathered wood, exposed brick, concrete surfaces, and metal accents. This minimal, esthetic style embraces open spaces with clutter-free environments. Industrial bedrooms often feature exposed ducts, unfinished wood, and sleek bedspreads that create simple yet visually pleasing spaces.

23. Neo-Industrial Bedroom
Neo-Industrial bedrooms refresh factory-inspired interiors with luxury elements. This contemporary style draws from industrial revolution esthetics while incorporating modern functionality. A concrete accent wall paired with exposed ductwork and warm wood floors creates a high-end look without sacrificing character. Neo-Industrial design celebrates the marriage of form and function, highlighting natural textures of industrial materials like concrete, steel, and wood.

24. Art Deco Bedroom
Art Deco bedrooms channel 1920s glamor through geometric patterns, bold colors, and luxurious materials. Signature elements include curved headboards, brass accents, and symmetrical arrangements. The style employs rich jewel tones like emerald green and deep blue alongside metallics such as chrome and brass. Mirrors, marble, velvet upholstery, and globe lighting fixtures enhance the sophisticated atmosphere.

25. Maximalist Bedroom Style
Maximalist bedrooms embrace a "more is more" philosophy through bold colors, mixed patterns, and layered textures. Unlike minimalism, this approach celebrates personality through carefully curated displays that might appear chaotic but remain intentional. Creating a maximalist bedroom involves gallery walls, statement lighting, ornate headboards, and varied textiles that pack style and attitude into your space.

26. Mid-Century Modern Bedroom
Mid-Century Modern bedrooms feature clean lines, minimal ornamentation, and natural materials. This style emerged between 1940-1970, defined by vibrant colors in wall art and textiles. Furniture often displays low profiles, tapered legs, and sleek silhouettes. Solid wood—especially walnut, teak, and rosewood—defines this esthetic alongside geometric shapes and balanced, symmetrical arrangements.

27. Zen Bedroom Retreat
Zen bedrooms create peaceful sanctuaries through simplicity, natural elements, and intentional design. These spaces emphasize curved shapes, low-profile furniture, and minimalist esthetics. Essential elements include neutral color palettes, natural light, plush textures, and symmetrical layouts. For truly zen spaces, consider removing electronics, incorporating plants, and ensuring every item serves a purpose or brings joy.

Conclusion
Your bedroom serves as more than just a sleeping space—it represents your personal sanctuary where style meets comfort. Throughout this exploration of 27 distinct bedroom design styles, one thing remains clear: possibilities for creating your ideal retreat are virtually endless.

Whether you gravitate toward timeless traditional elegance, sleek modern minimalism, nature-inspired rustic charm, or bold artistic expression, each style offers unique elements to transform your bedroom. Additionally, many homeowners find joy in mixing complementary aspects from different styles to create spaces that truly reflect their personalities.

Remember that bedroom redesigns typically cost between ₹2-6 lakhs depending on size, materials, and complexity. However, you can certainly incorporate elements of these styles through smaller updates like textiles, paint, or statement pieces if a complete overhaul exceeds your current budget.

Above all, your bedroom should feel like a personal haven that welcomes you at day's end and energizes you each morning. The perfect bedroom balances esthetic appeal with practical functionality while honoring your individual preferences. After all, the most successful bedroom designs prioritize not just how spaces look, but how they make you feel.

Take inspiration from these diverse styles, then customize your approach to create a bedroom that perfectly aligns with your lifestyle, needs, and dreams. The result will be a deeply personal retreat that supports both restful sleep and waking inspiration.

FAQs
Q1. What are some popular bedroom interior design styles for 2025? Popular bedroom styles for 2025 include modern designs with smart storage solutions, biophilic elements that incorporate nature, and spaces with soothing, layered textures. There's also a trend towards warm, cozy spaces with tone-on-tone colors and strategic lighting.

Q2. How can I create a traditional bedroom with a modern twist? To create a traditional bedroom with a modern twist, consider a transitional style. This approach combines classic elements like crown molding and upholstered headboards with modern touches such as clean-lined furniture and a monochromatic color scheme. Balance traditional patterns with contemporary textures for a timeless yet fresh look.

Q3. What are the key elements of a minimalist bedroom design? Key elements of a minimalist bedroom include essential furniture with clean, straight lines, light colors, and clever integrated storage solutions. The focus is on creating a calm environment through decluttered sightlines and intentional choices, not emptiness. Natural materials and neutral color palettes are often used to enhance the serene atmosphere.

Q4. How can I incorporate nature-inspired elements into my bedroom? To incorporate nature-inspired elements, consider a biophilic design approach. Add potted plants, use natural materials like wood and stone, and choose organic cotton or hemp linens. Incorporate nature-inspired colors and ensure ample natural light. You can also add textural elements like jute rugs or woven light fixtures for a coastal or rustic touch.

Q5. What's the difference between eclectic and maximalist bedroom styles? While both styles embrace bold choices, eclectic bedrooms focus on blending different design elements with a cohesive thread, such as a color palette or material theme. Maximalist bedrooms, on the other hand, follow a "more is more" philosophy, celebrating personality through carefully curated displays of bold colors, mixed patterns, and layered textures that may appear chaotic but remain intentional.

Bedrooms that make bold statements allow for personal expression through vivid colors, unexpected combinations, and artistic elements. These styles embrace individuality over convention.

21. Eclectic Bedroom Design

Eclectic bedrooms blend different design elements, mixing patterns, vintage decor, and vibrant colors. This style celebrates the freedom to combine what you love without rigid rules. The key to successful eclectic design is maintaining a cohesive thread—perhaps through color palette or materials—that connects diverse pieces.

Pattern mixing is essential, from subtly patterned wallpaper alongside patterned rugs to oversized floral designs that provide visual interest.

22. Industrial Bedroom Design

Industrial Bedroom Design

Industrial bedrooms showcase raw, utilitarian elements inspired by old factories. Essential components include weathered wood, exposed brick, concrete surfaces, and metal accents. This minimal, esthetic style embraces open spaces with clutter-free environments. Industrial bedrooms often feature exposed ducts, unfinished wood, and sleek bedspreads that create simple yet visually pleasing spaces.

23. Neo-Industrial Bedroom

Neo-Industrial bedrooms refresh factory-inspired interiors with luxury elements. This contemporary style draws from industrial revolution esthetics while incorporating modern functionality. A concrete accent wall paired with exposed ductwork and warm wood floors creates a high-end look without sacrificing character.

Neo-Industrial design celebrates the marriage of form and function, highlighting natural textures of industrial materials like concrete, steel, and wood.

24. Art Deco Bedroom

Art Deco bedrooms channel 1920s glamor through geometric patterns, bold colors, and luxurious materials. Signature elements include curved headboards, brass accents, and symmetrical arrangements.

The style employs rich jewel tones like emerald green and deep blue alongside metallics such as chrome and brass. Mirrors, marble, velvet upholstery, and globe lighting fixtures enhance the sophisticated atmosphere.

25. Maximalist Bedroom Style

Maximalist bedrooms embrace a “more is more” philosophy through bold colors, mixed patterns, and layered textures. Unlike minimalism, this approach celebrates personality through carefully curated displays that might appear chaotic but remain intentional. Creating a maximalist bedroom involves gallery walls, statement lighting, ornate headboards, and varied textiles that pack style and attitude into your space.

26. Mid-Century Modern Bedroom

Mid-Century Modern bedrooms feature clean lines, minimal ornamentation, and natural materials. This style emerged between 1940-1970, defined by vibrant colors in wall art and textiles. Furniture often displays low profiles, tapered legs, and sleek silhouettes. Solid wood—especially walnut, teak, and rosewood—defines this esthetic alongside geometric shapes and balanced, symmetrical arrangements.

27. Zen Bedroom Retreat

Zen bedrooms create peaceful sanctuaries through simplicity, natural elements, and intentional design. These spaces emphasize curved shapes, low-profile furniture, and minimalist esthetics. Essential elements include neutral color palettes, natural light, plush textures, and symmetrical layouts. For truly zen spaces, consider removing electronics, incorporating plants, and ensuring every item serves a purpose or brings joy.

Conclusion

Your bedroom serves as more than just a sleeping space—it represents your personal sanctuary where style meets comfort. Throughout this exploration of 27 distinct bedroom design styles, one thing remains clear: possibilities for creating your ideal retreat are virtually endless.

Whether you gravitate toward timeless traditional elegance, sleek modern minimalism, nature-inspired rustic charm, or bold artistic expression, each style offers unique elements to transform your bedroom. Additionally, many homeowners find joy in mixing complementary aspects from different styles to create spaces that truly reflect their personalities.

Remember that bedroom redesigns typically cost between ₹2-6 lakhs depending on size, materials, and complexity. However, you can certainly incorporate elements of these styles through smaller updates like textiles, paint, or statement pieces if a complete overhaul exceeds your current budget.

Above all, your bedroom should feel like a personal haven that welcomes you at day’s end and energizes you each morning. The perfect bedroom balances esthetic appeal with practical functionality while honoring your individual preferences. After all, the most successful bedroom designs prioritize not just how spaces look, but how they make you feel.

Take inspiration from these diverse styles, then customize your approach to create a bedroom that perfectly aligns with your lifestyle, needs, and dreams. The result will be a deeply personal retreat that supports both restful sleep and waking inspiration.

FAQs

Q1. What are some popular bedroom interior design styles for 2025? 

Popular bedroom styles for 2025 include modern designs with smart storage solutions, biophilic elements that incorporate nature, and spaces with soothing, layered textures. There’s also a trend towards warm, cozy spaces with tone-on-tone colors and strategic lighting.

Q2. How can I create a traditional bedroom with a modern twist?

 To create a traditional bedroom with a modern twist, consider a transitional style. This approach combines classic elements like crown molding and upholstered headboards with modern touches such as clean-lined furniture and a monochromatic color scheme. Balance traditional patterns with contemporary textures for a timeless yet fresh look.

Q3. What are the key elements of a minimalist bedroom design? 

Key elements of a minimalist bedroom include essential furniture with clean, straight lines, light colors, and clever integrated storage solutions. The focus is on creating a calm environment through decluttered sightlines and intentional choices, not emptiness. Natural materials and neutral color palettes are often used to enhance the serene atmosphere.

Q4. How can I incorporate nature-inspired elements into my bedroom? 

To incorporate nature-inspired elements, consider a biophilic design approach. Add potted plants, use natural materials like wood and stone, and choose organic cotton or hemp linens. Incorporate nature-inspired colors and ensure ample natural light. You can also add textural elements like jute rugs or woven light fixtures for a coastal or rustic touch.

Q5. What’s the difference between eclectic and maximalist bedroom styles?

 While both styles embrace bold choices, eclectic bedrooms focus on blending different design elements with a cohesive thread, such as a color palette or material theme. Maximalist bedrooms, on the other hand, follow a “more is more” philosophy, celebrating personality through carefully curated displays of bold colors, mixed patterns, and layered textures that may appear chaotic but remain intentional.

butterfly style shirt cutting

0
How to Sew a Stunning Butterfly Top in Under 2 Hours

Did you know butterfly tops have garnered over 254.1K views on TikTok tutorials alone? This trendy fashion piece isn’t just popular—it’s surprisingly easy to create yourself!

Whether you’re drawn to a butterfly wrap top, butterfly cut top, or classic butterfly style shirt cutting, we’ve got you covered. Even beginners can successfully craft these elegant garments. Actually, the high-low butterfly top design is especially popular for its elegant and classic appearance.

In this guide, we’ll walk you through creating your own stunning butterfly top in less than two hours. From selecting your preferred style to cutting techniques and customization options, we’ve broken down the process into simple, manageable steps. Ready to transform a piece of fabric into your new favorite fashion statement? Let’s get started!

Pick Your Butterfly shirt top Style

redfinz new images


Butterfly tops have been fluttering through fashion circles since Mariah Carey first showcased a beaded version at the VH1 Divas Live concert in 2000. Now, these versatile garments come in various styles that suit different preferences and skill levels.

Butterfly wrap top vs. butterfly cut top

The primary distinction between these two popular styles lies in their construction and appearance. Butterfly wrap tops feature a reversible wrap bodice with wide sleeves that typically reach the elbow. These tops include long ruffled ties that can be arranged in multiple configurations—tied in front for a smooth back or tied in back for a clean front appearance.

Butterfly cut tops, alternatively, are shaped like actual butterfly wings when laid flat. This design begins with the body (middle section) and then adds the wings by joining them to the sides. The straps attached to the top tie around your neck, while the other straps cross over your back and thread through the wings’ openings.

High-low, crop, and tank top variations

The high-low butterfly top offers an elegant silhouette with a shorter front that gracefully extends longer in the back. This style creates a dramatic, flowing effect that works well for both casual and dressy occasions.

Crop variations have gained immense popularity at music festivals, parties, and outdoor concerts. These shorter styles showcase your midriff while maintaining the distinctive butterfly wing shape. Many incorporate embellishments like rhinestone straps, metallic fabric, or pastel sheers that shimmer in sunlight.

Tank top versions provide a more modest approach with wider V-necks, ruffled spaghetti straps, and occasional cutouts along the chest. These variations offer greater versatility for everyday wear while maintaining the butterfly esthetic.

Choosing between no-sew and sewn versions

For beginners, no-sew butterfly tops offer an appealing entry point. These designs typically use non-fraying, self-finishing fabrics that drape well. Materials like extra-large scarves, sarongs, or pareos work perfectly for this technique. The advantage here is speed—you can create a wearable garment in minutes rather than hours.

Sewn versions provide more structure and longevity. With basic sewing skills, you can create a drapey, gauzy layering piece using an oversized t-shirt as your template. Sewn butterfly tops allow for additional customization options, including hemlines, sleeve variations, and decorative elements.

Both approaches have their merits—choose based on your skill level, available time, and desired outcome. Furthermore, consider fabric selection carefully since it significantly impacts the final appearance and wearability of your butterfly top.

Prepare and Cut the Fabric

redfinz new images

Preparing fabric properly forms the foundation of a well-made butterfly top. With the right measurements and cutting techniques, you’ll create a garment that flows beautifully and fits perfectly.

Measure your body or use free-size method

Before cutting your fabric, you need specific measurements. Initially, measure your center back from your shoulder blade to your wrist—this determines the sleeve width. Additionally, measure from your shoulder to your desired hip length for the top’s length. For most women, you’ll also need bust measurements divided by four for proper sizing.

Alternatively, use the free-size method which works well for butterfly tops. This approach uses standard measurements: approximately 48 inches wide fabric with 56 inches length to create a top about 27 inches long. This method is particularly useful if you’re making the top as a gift or want a more relaxed fit.

Fold and mark the fabric for butterfly style shirt cutting

Proper folding creates the characteristic butterfly shape without needing shoulder seams. Begin by folding your fabric lengthwise, then fold it again widthwise. Consequently, your fabric should be folded into four parts with the fold at the shoulder.

On this folded fabric, mark the following points:

  • The neckline width (approximately 3.5 inches)
  • Shoulder width (divided by two)
  • Sleeve length from shoulder
  • Top length from shoulder

Subsequently, mark where your hands will emerge—typically 18 inches from the neckline with an opening about 2.5-3 inches wide.

Cut neckline, sleeves, and hemline

The neckline requires different cuts for front and back. For the back, cut a shallow curve (about 1-1.5 inches deep and 3.5 inches wide). Conversely, for the front, create either a deeper V-neck (approximately 6-9 inches deep) or a rounded neckline that’s wider than the back.

For the sleeves, draw a gentle curve connecting the sleeve length to the top’s hemline. The characteristic butterfly shape emerges as you cut along this curve. To finish, cut the hemline with a slight upward curve at the sides for a flattering silhouette.

Prior to sewing, pre-wash your fabric to prevent shrinkage and ensure your stitches don’t pull out when washed later. This step also makes your fabric delightfully soft before wearing.

Sewing or No-Sew Assembly

redfinz new images

Now that your fabric is ready, let’s assemble your butterfly top. With the right techniques, you’ll complete this project in record time.

How to sew a butterfly top in under 2 hours

Start by pinning front and back pieces together at shoulder seams and sides, then stitch with a 3/8″ seam allowance. Next, attach the facing pieces with right sides together, sewing along the edges. Clip curved edges carefully to ensure they lay flat when turned.

Finish raw edges with a zigzag stitch or serger for a professional look. Finally, double-fold the hem and sleeves by 1/2″, pin and stitch. For a flawless neckline, use bias binding tape or create a hand-rolled edge with a whip stitch.

No-sew hacks using fabric glue or hemming tape

If sewing isn’t your strength, hemming tape offers a professional alternative. This double-sided adhesive bonds fabric layers with heat, eliminating needles and thread. Simply place the tape between fabric layers and press with an iron – perfect for hemming sleeves and necklines.

Alternatively, create a completely no-sew butterfly top using non-fraying, self-finished fabric. After cutting your pattern, you’ll need only fabric, scissors, and a belt to complete the look. This method works wonderfully with scuba fabric, scarves, or pareos.

Butterfly shirt cutting and stitching tips

To achieve clean seams, use a roller foot to finish edges. At junction points, clip seam allowances carefully until reaching the seam line – this prevents puckering when turning corners.

For challenging fabrics like chiffon, hand-roll edges instead of machine finishing. Moreover, use fabric clips instead of pins on delicate materials to prevent snags or holes.

Customize Your Look

The magic of a handmade butterfly top lies in making it uniquely yours. Once you’ve assembled your basic top, personalization options are practically endless.

Add crochet details or lace trims

Transform your butterfly top with delicate butterfly lace trim along the hemline or neckline. These trims come in various widths (approximately 0.5-0.6 inches) and patterns, perfect for adding feminine flair. Alternatively, attach fabric butterflies using decorative stitches or fabric glue. For extra glamor, embellish with pearls and gemstones along the bodice.

Use butterfly top crochet pattern free for accents

Crochet enthusiasts can find size-inclusive free patterns online that create gorgeous butterfly-shaped pieces. These designs typically start from the middle (butterfly body) before adding wings to the sides. Lightweight cotton yarn works best, allowing your top to maintain its shape while remaining cool enough for summer wear. Even beginners can follow video tutorials for stunning results.

Create eye-catching embellishments

For festival-ready looks, add sparkling sequins that catch light with every movement. These sequin embellishments create a dazzling effect perfect for dance floors or outdoor events. Experiment with rhinestone appliqués along wing edges or metallic butterfly motifs for Y2K-inspired fashion. Remember, these custom touches are what elevate a simple butterfly top into a head-turning fashion statement that reflects your personal style.

FAQs

Q1. How long does it take to make a butterfly top?

 With the right techniques and materials, you can create a stunning butterfly top in under 2 hours. The process can be even quicker if you opt for a no-sew version using fabric glue or hemming tape.

Q2. What fabric works best for a butterfly top?

 Lightweight, flowy fabrics like chiffon, silk, or lightweight cotton work well for butterfly tops. For no-sew versions, consider using non-fraying, self-finishing fabrics like scuba fabric or large scarves.

Q3. Can I make a butterfly top without sewing?

 Yes, you can create a no-sew butterfly top using fabric glue, hemming tape, or by choosing non-fraying fabrics. These methods are perfect for beginners or those looking for a quick fashion fix.

Q4. What are some ways to customize a butterfly top? 

You can personalize your butterfly top by adding lace trims, crochet details, sequins, or rhinestone appliqués. You can also experiment with different necklines, lengths, or incorporate unique fabric patterns to make it truly your own.

Q5. Are butterfly tops suitable for different body types?

 Absolutely! Butterfly tops are versatile and can be adjusted to flatter various body types. You can choose between wrap styles, high-low designs, or crop versions to suit your preference and body shape. The free-size method also allows for a more relaxed, adaptable fit.

Modern Butterfly Cut Ideas That Turn Heads Everywhere

0
Modern Butterfly Cut Ideas That Turn Heads Everywhere

The butterfly haircut has taken social media by storm with over 1.1 billion views on TikTok alone. You’ve likely spotted this trendy style while scrolling through your feed, characterized by short, face-framing pieces and longer layers beneath that resemble delicate butterfly wings (hence the name). This game-changing style has become one of the biggest hair trends of 2023, dominating salons everywhere.

Not only is the butterfly haircut stylish and flattering, but it’s also surprisingly low-maintenance. Whether you have straight, wavy, or curly hair, this magical cut creates stunning layers that add incredible volume, movement, and dimension. The weightless, feathery effect is particularly enhancing around the crown and face, making it adaptable for virtually any hair type or lifestyle.

Top Butterfly Cut Styles That Are Trending Now

redfinz new images

1. Classic Butterfly Cut with Curtain Bangs

Timeless and universally flattering. This variation blends curtain bangs with cascading layers, softening facial lines while elongating round and square faces. Curtain bangs part naturally down the centre, adding symmetry and a gentle frame around your cheekbones.

2. Short Butterfly Cut for a Bold, Fresh Look

This shorter version hits around the chin, offering a light, edgy frame that accentuates your features. It’s ideal for anyone who wants a low-maintenance yet high-impact hairstyle that air-dries beautifully.

3. Long Butterfly Cut with Airy Layers

Perfect if you love your length but crave more movement. The longer version removes bulk from thick hair and adds bounce without sacrificing fullness. It’s flattering for oval and heart-shaped faces alike.

4. Butterfly Cut with Full Fringe

Adding a fringe gives your cut extra volume and structure. A soft, brow-skimming fringe complements the winged layers beautifully, balancing wider foreheads and creating a bold, fashion-forward silhouette.

5. Butterfly Cut for Curly Hair

Curly hair thrives with this cut. The layered structure helps curls form naturally while reducing bulk. For best results, request a dry cut — it maintains shape and prevents unwanted shrinkage.

6. Medium-Length Butterfly Cut with Retro Flips

Inspired by early 2000s glamour, this version hits just below the shoulders. It’s a brilliant choice for thicker hair, as it lightens the weight while keeping plenty of movement.

7. Straight Hair Butterfly Variation

For straight hair, the butterfly cut adds much-needed shape and body. The wispy layers prevent flatness and create soft texture. Keep it sharp with trims every 6–8 weeks to maintain definition.

8. Natural Butterfly Cut (Undone Texture)

The effortless, “woke-up-like-this” version that’s all over Gen Z’s feeds. Airy, disconnected layers embrace your natural texture — ideal for a relaxed, cool-girl aesthetic that doesn’t try too hard.

How to Choose the Right Butterfly Cut for Your Hair Type

redfinz new images

Selecting the perfect butterfly cut depends largely on your natural hair texture and thickness. Finding the right variation ensures you get maximum benefit from this versatile style.

Straight hair: Add volume with feathered layers

Straight hair immediately gains dimension through strategically placed feathered layers. For naturally straight strands that tend to fall flat, a textured butterfly cut creates much-needed lift. Focus on shorter pieces at the crown to add height, coupled with a volumizing mousse at the roots. This approach prevents the common problem of limp-looking straight hair while maintaining that signature butterfly movement.

Wavy hair: Enhance bounce with mid-length layers

Wavy hair naturally complements the butterfly cut, as your existing texture enhances the layered structure. Mid-length layers specifically amplify your wave patterns without creating frizz. Consider incorporating a curl-defining spray to emphasize the natural movement. Indeed, this combination creates that sought-after soft, romantic look with minimal styling effort.

Curly hair: Reduce bulk and define shape

For curly textures, the butterfly cut removes weight so curls maintain their springy nature. Request dry cutting techniques to account for shrinkage, ensuring layers blend seamlessly. The specialized layering highlights your curls’ natural texture, giving them definition without disrupting their pattern. Subsequently, apply curl cream and scrunch upward for that effortless, lived-in finish.

Thick hair: Use layering to remove weight

Thick-haired individuals benefit tremendously from the butterfly cut’s ability to reduce bulk. This specialized approach distributes volume more evenly throughout your hair, eliminating that heavy, flat look. Through creating shorter layers at the crown and longer layers below, the cut feels lighter and more breathable. Accordingly, your thick locks gain movement without sacrificing fullness.

Thin hair: Create fullness with face-framing pieces

Fine or thin hair requires a modified approach—ask for soft, graduated layers around the crown. Instead of all-over layering, pair face-framing curtain bangs with a blunter cut to create thickness illusion. The butterfly cut adds perceived volume, especially at the crown. Finish with root-lifting spray before blow-drying to maximize volume where needed.

Styling Tips to Make Your Butterfly Cut Stand Out

redfinz new images

Mastering the art of styling brings your butterfly haircut to life, highlighting those gorgeous layers and creating that signature bounce. With the right techniques and tools, you’ll transform your cut from beautiful to breathtaking.

Using a round brush for volume

The secret to salon-quality volume lies in your round brush technique. Choose a 2-inch round brush for longer layers and a 1.5-inch brush for shorter sections. First, apply volumizing mousse to damp hair, concentrating on the roots. Next, rough-dry your hair to about 75% before using the round brush. For maximum lift, slide the brush back into your hair, hook it, and pull forward while directing the blow dryer’s airflow down the hair shaft. This creates tension that activates the mousse for impressive volume at the roots.

Heatless styling with mousse and rollers

Not a fan of heat? Your butterfly cut naturally lends itself to heatless styling! Apply a light mousse to damp hair (about 80% dry) and choose your preferred method: Velcro rollers create blown-out volume, sock curls offer looser waves, whereas overnight braids provide defined, frizz-free texture. For best results with rollers, roll each section away from your face and let them set for 30-40 minutes before gently removing.

How to style butterfly haircut with a curling iron

For polished yet bouncy waves, a curling iron perfectly enhances your butterfly layers. Choose a 1.25-inch barrel for defined waves or a 1.5-inch barrel for looser movement. Always apply heat protectant first! Section your hair (three sections on each side plus three on top), then curl the front sections toward your face and the rest away from it. Afterward, run your fingers through the curls to break them up for that effortlessly tousled finish.

Best products for butterfly layers haircut

The right products elevate your butterfly cut’s natural movement. Essential items include volumizing mousse for lightweight lift, texturizing spray for definition, heat protectant before any hot tools, and a light-hold hairspray that won’t weigh down your layers. For straight hair, light pomades help define layers, meanwhile curly hair benefits from curl-defining creams applied with a raking motion.

Quick styling for butterfly haircut straight hair

Need a fast refresh? For straight hair, simply grab a curling wand and quickly re-curl just the top layers and face-framing pieces. Alternatively, use dry texturizer at the roots for instant lift without restyling. For maximum volume in minimal time, flip your head upside down, apply volumizing spray at the roots, and finish with a cool shot from your dryer to set the style.

Color Ideas That Elevate Your Butterfly Cut

redfinz new images


The right color technique transforms a butterfly cut from merely stylish to absolutely stunning. Strategic color placement highlights layers, adds movement, and personalizes your signature look.

Good hair color for brown skin tones

Warm undertones truly shine on brown skin with butterfly cuts. Caramel highlights create rich dimension on darker bases, complementing warm brown shades beautifully. For a more dramatic statement, copper red tones bring fiery vibrancy while emphasizing layered movement. Moreover, espresso hair color pairs exceptionally well with butterfly cuts, creating an enchanting appeal while maintaining depth and sophistication.

Blonde balayage for added dimension

Blonde balayage masterfully showcases butterfly layers, creating that coveted sun-kissed dimension. This technique features soft, feathered highlights creating champagne tones that move naturally with your hair. Consequently, the layers appear more defined, with each one catching light differently. For straight hair butterfly cuts, blonde balayage prevents the style from appearing flat while maintaining natural-looking radiance.

Soft ombre for long butterfly cut

Long butterfly cuts gain extraordinary dimension through ombre techniques. The gradual color transition creates a stunning gradient effect as layers cascade downward. In fact, chocolate brown to soft light brown ombre enhances flowing layers while creating a seamless, blended appearance. This technique adds visual interest without overwhelming the cut’s natural movement.

Pastel ends for a playful twist

Playful personalities can experiment with pastel-colored ends—typically pink, lilac, or blue—that draw attention to feathered ends. These unexpected pops of color work wonderfully on red or brown bases. Similarly, rose gold tones offer a modern twist on the traditional butterfly cut, creating an ethereal, romantic look with wispy bangs.

Money piece highlights to frame the face

Face-framing money piece highlights have become inseparable from butterfly cuts. These strategic lighter sections at the front instantly illuminate facial features, creating a striking focal point. Alternatively, honey blonde or caramel strands delicately highlight facial features while emphasizing layered texture. For a bolder approach, platinum blonde sections create modern flair against darker bases.

Conclusion

The butterfly haircut stands out as one of the most versatile and flattering styles today. Throughout this guide, you’ve discovered how this revolutionary cut combines short, face-framing pieces with longer layers beneath to create that signature winged effect. Whether you prefer the classic version with curtain bangs or a bolder short variation, the butterfly cut offers something for everyone.

Your hair type no longer limits your style options. Straight hair gains much-needed volume, wavy hair embraces enhanced bounce, curly hair benefits from reduced bulk, and thick hair becomes more manageable. Even those with thin hair can achieve the illusion of fullness through strategic face-framing pieces.

Styling your butterfly cut remains surprisingly simple. You can choose between round brush techniques for volume, heatless methods for damage-free texture, or curling irons for defined waves. Additionally, the right products—from volumizing mousses to texturizing sprays—help maintain that salon-fresh look between appointments.

Color techniques further elevate this dynamic haircut. Face-framing money pieces highlight your features, while balayage and ombre effects accentuate the layers’ movement. For those feeling adventurous, pastel ends offer a playful twist that showcases your personality.

After all, the butterfly haircut’s enduring popularity stems from its perfect balance of style and practicality. This adaptable cut works with your natural texture rather than against it, creating effortless movement that turns heads everywhere. As you consider your next salon appointment, remember that the butterfly cut doesn’t just transform your hair—it gives you wings to express your unique style with confidence.

FAQs

Q1. How does a butterfly haircut differ from a regular layered cut?

 A butterfly haircut features shorter face-framing layers combined with longer lengths underneath, creating a winged effect. Regular layered cuts may not have the same dramatic contrast between short and long sections.

Q2. Can a butterfly haircut make me look younger? 

Yes, a butterfly haircut can create a youthful appearance by adding volume, movement, and face-framing layers that soften facial features. The style’s versatility allows it to be adapted to complement various face shapes and ages.

Q3. Is the butterfly haircut still trendy?

 Absolutely! The butterfly haircut remains a popular trend, with billions of views on social media platforms. Its ability to blend short and long layers while maintaining overall length continues to attract those seeking a stylish, low-maintenance look.

Q4. Which face shapes are best suited for a butterfly haircut?

 The butterfly haircut is versatile and can be adapted to suit most face shapes. It’s particularly flattering for round and square faces, as the face-framing layers and curtain bangs can help soften and contour facial features.

Q5. How often should I trim my butterfly haircut to maintain its shape? 

To keep your butterfly haircut looking fresh and well-defined, it’s recommended to get regular trims every 6-8 weeks. This helps maintain the layered structure and prevents the style from losing its signature shape and movement.

how to make curls with remington curler

0
how to make curls with remington curler

Struggling with how to use your Remington curling wand to achieve those effortless beach waves? You’re not alone. This versatile styling tool heats up to an impressive 425°F, making it powerful enough for even the most stubborn hair types.

Whether you prefer tighter curls with more volume or looser beach waves, Remington has options specifically designed for your styling goals. The 1-inch barrel creates bouncy, voluminous curls, while the 1.5-inch version delivers those relaxed, beachy waves. But the benefits don’t stop there. Priced at just $29.99, these Keratin Ceramic Curlers help keep your hair healthier and shinier while styling.

In this guide, we’ll walk you through everything you need to know about using your Remington curling wand – from choosing the right barrel size to proper technique and finishing touches. Follow these steps, and you’ll create perfect beach waves in just 10 minutes, even if you’re a complete beginner.

Choose the Right Remington Wand for Your Hair

redfinz new images

Before diving into curling techniques, selecting the right Remington wand for your hair type and desired style is essential. The barrel size, your hair characteristics, and the type of styling tool all impact your final look.

1. Differences between 1″ and 1.5″ barrels

The size of your curling wand’s barrel directly influences the type of curls you’ll create. Remington offers various barrel sizes, with 1″ and 1.5″ being the most popular:

  • 1″ barrel wands: Create tighter, more defined curls with added volume. These barrels produce bouncy curls that hold their shape throughout the day. This size is perfect for creating classic curls that maintain definition.
  • 1.5″ barrel wands: Produce looser, more relaxed beach waves. The wider barrel creates softer curls that appear more natural and casual. If you want those effortless, tousled waves, this is your go-to option.

The Pearl Ceramic Conical Curling Wand features a tapered barrel (1″-1.5″) that combines both sizes, allowing for versatile styling options with just one tool.

2. Choosing based on hair length and texture

Your hair characteristics should guide your barrel selection:

  • Short hair: Smaller barrels (0.5″-1″) work best as they can grip shorter sections and create proportionate curls.
  • Medium to long hair: Can use larger barrels (1.25″-1.5″) for loose, flowing waves. The larger surface area works well with longer sections.
  • Fine hair: Opt for adjustable heat settings (250°F-325°F) to prevent damage.
  • Medium-thick hair: Use temperatures between 300°F-375°F for effective styling.
  • Thick or coarse hair: Higher temperatures (325°F-400°F) may be necessary for long-lasting results.

3. Remington curling wand vs curling tong vs straightener-curler

Remington offers different styling tools for various curling needs:

  • Curling wands: Clipless barrels create natural-looking, beachy waves. Ideal for medium to long hair and casual styles.
  • Curling tongs (irons): Feature a clip to secure hair, creating uniform, defined curls. Perfect for all hair lengths and more polished looks.
  • Straightener-curlers: Dual-purpose tools like the Remington ONE™ offer both straightening and curling capabilities in a single device. These feature heated plates (300°F-450°F) and a separately heated barrel (300°F-410°F) for versatile styling.

For those new to curling, Remington wands offer budget-friendly options with features like ceramic coating, multiple heat settings, and even conditioning technology to protect your hair.

Prep Your Hair for Long-Lasting Curls

redfinz new images

The perfect beach waves start with proper preparation. Getting your hair ready is just as important as the curling technique itself. Properly prepped hair holds curls longer and looks healthier, so follow these steps before you reach for your Remington curling wand.

1. Wash and dry your hair properly

Surprisingly, day-old hair typically holds curls better than freshly washed hair. Your natural oils give hair texture and make strands more moldable, helping curls last longer. If your hair struggles to maintain curls, try washing it the night before styling.

For those with oily scalps, curling on freshly washed and dried hair works fine, just add a small amount of styling serum to the ends for protection. Consider skipping deep conditioning treatments before curling as they can weigh hair down and make it harder to style. Additionally, using a lightweight styling lotion beforehand adds texture that enhances curl formation.

Hair Tip: Make sure your hair is completely dry before using your Remington curling wand. Even slightly damp strands can suffer serious damage when exposed to high heat.

2. Apply heat protectant spray

Heat protectant is non-negotiable when using your Remington curling wand. Think of it as sunscreen for your hair – without it, temperatures above 392°F can cause irreversible damage to your strands. Heat protectants work by creating a protective barrier between your hair and the wand’s heat, essentially sacrificing themselves rather than your hair.

For application, hold the spray 10-12 inches away from your hair and mist evenly. Subsequently, brush through to ensure complete coverage. Apply on damp hair before blow-drying or on dry hair before using your Remington wand.

Temperature guidelines by hair type:

  • Fine or damaged hair: 250°F-325°F
  • Medium-thick hair: 300°F-375°F
  • Thick or coarse hair: 325°F-400°F

The optimal temperature for most hair types is around 350°F when using a Remington curling wand.

3. Detangle and section your hair

Sectioning is crucial for achieving consistent, beautiful waves with your Remington wand. Start by thoroughly detangling your hair with a wide-tooth comb or paddle brush. Afterward, divide your hair into manageable sections.

For thick hair, work with approximately 1-inch sections. Those with thinner hair can handle 1-2 inch sections. Remember that larger sections create softer, looser waves, whereas smaller sections produce tighter, more defined curls.

You can section either vertically (for gentle waves) or horizontally (for added volume). Using clips to secure sections keeps your hair organized and makes the curling process much more efficient.

Step-by-Step: How to Use the Remington Curling Wand

redfinz new images

Now that your hair is prepped, it’s time to master the actual curling technique with your Remington wand. Follow these steps for perfect beach waves every time.

1. Set the right temperature for your hair type

Initially, plug in your Remington curling wand and press the on button. Use the “+” and “-” buttons to select the appropriate temperature. Temperature guidelines:

  • 120°C-170°C (250°F-340°F): Fine, damaged or bleached hair
  • 170°C-200°C (340°F-390°F): Normal, healthy hair
  • 200°C-220°C (390°F-425°F): Thick, difficult-to-style hair

Wait for the temperature display to stop flashing, indicating it’s reached your selected heat.

2. Hold the wand correctly (tip down)

Always hold the wand with the barrel facing downward. This position helps create natural-looking waves and prevents accidental burns. Furthermore, use the heat-resistant glove that comes with your Remington wand to protect your hand.

3. Wrap hair around the barrel away from your face

Take approximately 1-inch sections of hair. Wrap each section around the barrel, moving away from your face. Ensure hair lies flat against the barrel without overlapping for even heat distribution. The tapered design creates waves that are wider at the top and smaller at the ends.

4. Hold for 8–10 seconds and release

Keep hair wrapped around the barrel for 8-10 seconds. For fine hair, 8 seconds is sufficient, while thicker hair might need the full 10 seconds. During this time, you can gently touch the hair to check how hot it’s getting.

5. Repeat for all sections

Work methodically through all sections, starting with lower layers first. For smaller, tighter curls, use smaller sections. For looser waves, use larger sections. Consequently, you’ll create consistent curls throughout your hair. The entire process typically takes about 10 minutes.

Style and Set Your Beach Waves

redfinz new images

After completing all your curls with the Remington wand, these crucial finishing steps transform tight ringlets into gorgeous, natural-looking beach waves.

1. Let curls cool before touching

Allow your curls to cool completely before styling. This cooling period sets the curl pattern and significantly increases longevity. Patience during this step ultimately determines how well your waves hold throughout the day.

2. Finger comb or brush for softer waves

Once cooled, break up tight curls to achieve that relaxed, beachy look:

  • Finger combing: For soft, tousled waves with definition, gently run your fingers through curls. This preserves some curl structure while reducing formality.
  • Brushing: For looser, more casual waves, use a brush to blend the curls together. This creates a unified, flowing wave pattern.

3. Use light hairspray or texturizing spray

Finish with the right product to set your beach waves:

  • Light hairspray: Apply generously after curls cool for flexible hold without stiffness.
  • Texturizing spray: Adds volume, grip, and movement to hair without the weight of dry shampoo or stiffness of hairspray. Perfect for creating that “lived-in,” piecey look.

4. Tips for short hair and bangs

For shorter styles with your Remington curling wand:

  • Curl all sections away from your face for a more modern appearance
  • Work with smaller sections (about 1-inch wide)
  • Leave the ends straight for a contemporary look
  • Vary your section sizes for a more natural effect

5. How to refresh curls the next day

Revitalize second-day curls without completely restyling:

  • Quickly touch up face-framing pieces with your Remington wand
  • Apply dry shampoo at the roots for volume
  • Use a bit of mousse or texturizing spray to reactivate waves
  • Dampen hands slightly and scrunch to redefine curls

Conclusion

Creating perfect beach waves with your Remington curling wand certainly doesn’t require professional styling skills or hours of effort. Throughout this guide, we’ve covered everything from selecting the right barrel size to finishing touches that make your waves last all day.

Remember, the right temperature setting makes a significant difference in both styling effectiveness and hair health. Fine hair needs gentler heat around 250°F-340°F, while thicker hair benefits from temperatures closer to 425°F. Additionally, proper preparation with heat protectant spray serves as essential armor against potential damage.

Patience plays a key role when using your Remington wand. Allowing curls to cool completely before styling helps lock in the wave pattern, while finger combing afterward creates that effortless, tousled look everyone loves.

Most importantly, practice makes perfect. Your first attempt might not yield salon-quality results, but each styling session will improve your technique. Soon enough, you’ll create those gorgeous beach waves in just 10 minutes flat.

The Remington curling wand offers an affordable yet effective way to achieve versatile hairstyles at home. Therefore, grab your wand, follow these steps, and enjoy beautiful, bouncy waves that look professionally styled without the salon price tag. After all, those compliment-worthy beach waves are now just a few wraps away!