Wednesday, March 18, 2026

How do I grow hair thicker? Which vitamins can I take?

0

Did you know that more than 50% of women will experience noticeable hair loss during their lifetime? Surprisingly, many cases of thinning hair might be connected to what’s missing from your plate rather than your genes.

The most common nutritional deficiency worldwide is iron deficiency, which frequently appears in women with hair loss. In fact, an estimated 40% of Americans are deficient in vitamin D, a crucial nutrient for creating the cells that develop into hair follicles.

When we talk about vitamins for hair growth, we’re addressing a real concern that affects millions. The female-pattern hair loss alone impacts about 30 million Americans. Specific vitamins like biotin, vitamin D, and vitamin E can significantly contribute to hair health, with vitamin E supplementation (100 milligrams) shown to increase total hair count.

For many of us struggling with thinning hair, understanding which hair growth supplements actually work can feel overwhelming. Throughout this article, we’ll explore the best vitamins for hair growth, how they support your hair’s structure, and practical ways to incorporate them into your daily routine for thicker, healthier locks.

Understanding Hair Thinning and Nutrient Deficiency

redfinz new images

Hair thinning affects millions of people worldwide and often sneaks up gradually. Understanding the underlying causes can help us take the right steps toward healthier, thicker hair.

What causes hair to thin over time

Hair thinning stems from multiple factors working together. While genetics play a significant role in conditions like androgenetic alopecia (male or female pattern baldness), other influences include aging, hormonal fluctuations, stress, medical treatments, and underlying health conditions. Chronic stress raises cortisol levels, potentially triggering telogen effluvium—a condition where hair follicles enter an extended “resting” phase and new growth stalls.

Additionally, external factors like tight hairstyles, chemical processing, and certain medications can damage follicles over time. Furthermore, poor nutrition undermines hair health at its foundation, causing brittleness and accelerated shedding.

Can vitamin deficiency cause hair loss?

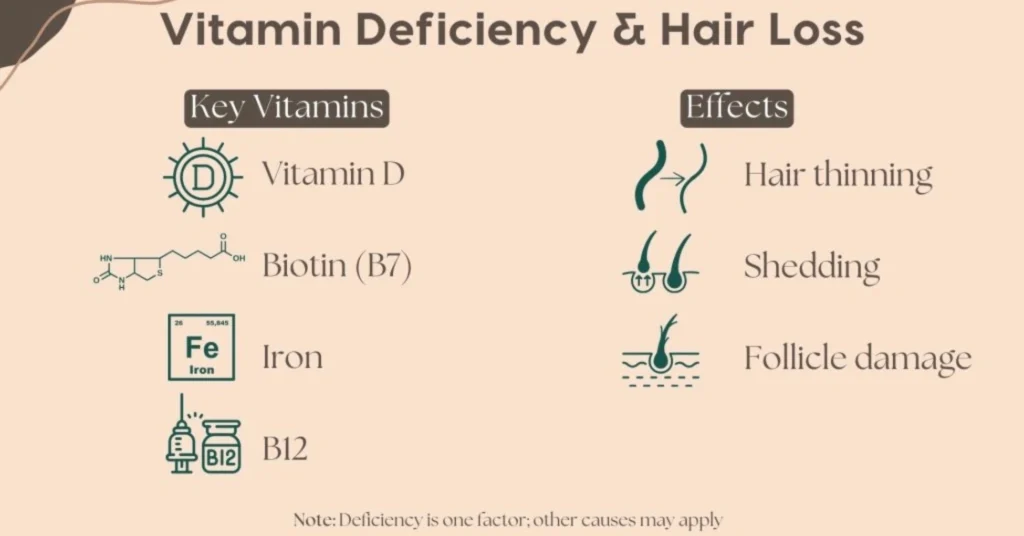
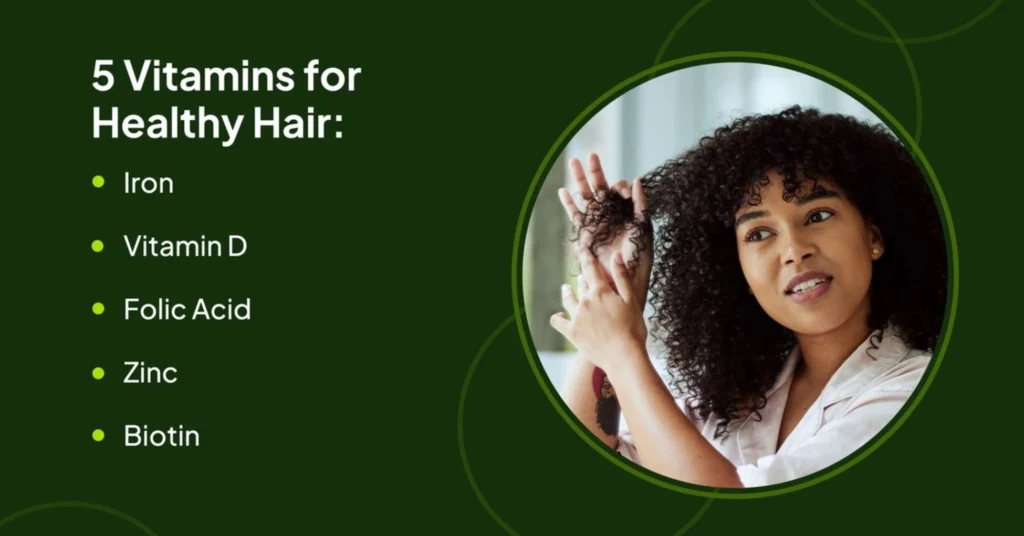
Absolutely. Research confirms that nutritional deficiencies often contribute to noticeable hair thinning and loss. Among the most common deficiencies linked to hair problems are iron, biotin, vitamin D, zinc, and protein.

The association between hair loss and low ferritin (iron storage) levels remains particularly significant, especially for menstruating women. Likewise, vitamin D deficiency has been connected to various forms of alopecia, including autoimmune-related hair loss.

Scientists have found that people experiencing hair thinning often show below-optimal levels of several key nutrients: biotin, zinc, iron, vitamin D, selenium, and essential fatty acids. Moreover, these deficiencies typically cause other symptoms like brittle nails, dry skin, fatigue, and reduced immune function.

How nutrients support hair structure and growth

Hair follicles depend on proper nutrition to function optimally. Your hair is primarily composed of a protein called keratin, which requires adequate dietary protein intake. Iron carries vital oxygen to follicles, enabling growth and regeneration. Without sufficient iron, follicles become oxygen-starved, leading to slower growth and increased shedding.

Vitamin C works as both an antioxidant and a collagen builder, minimizing inflammation that can inhibit hair growth. Zinc plays an essential role in hair follicle function and repair, while biotin (vitamin B7) contributes to keratin production—the fundamental protein making up hair structure.

Essential fatty acids, particularly omega-3s, help maintain scalp hydration and reduce inflammation that might otherwise interfere with healthy growth cycles.

Essential Vitamins for Hair Growth

The right vitamins can transform your hair health, acting as essential building blocks for stronger, thicker strands. Let’s explore the most effective vitamins that specifically target hair growth.

Biotin for hair growth and strength

Biotin (vitamin B7) plays a crucial role in hair health by supporting keratin production—the primary protein in hair. Although biotin deficiency is rare, it can cause hair thinning and loss. For people with self-perceived thinning hair, studies show that supplements containing biotin contributed to visible increases in overall hair volume and thickness after six months.

However, biotin supplements only effectively prevent hair loss in people with an existing deficiency. In one study, 38% of women complaining of hair loss had a biotin deficiency. The recommended biotin intake for addressing hair loss is approximately 3 milligrams (3,000 mcg) daily.

Vitamin D for hair loss prevention

Vitamin D is essential for creating the cells that develop into hair follicles. Research shows an inverse relationship between serum vitamin D levels and non-scarring alopecias such as telogen effluvium and androgenetic alopecia. Low vitamin D may be present in people with alopecia, though it’s not typically a common symptom of deficiency.

Vitamin D receptors found in hair follicle cells influence the growth and differentiation of hair follicle stem cells, affecting the hair growth cycle. Consequently, when vitamin D levels drop, it can disrupt this process and potentially lead to thinning hair.

Vitamin C for collagen and hair growth

Vitamin C plays a critical role in maintaining a normal mature collagen network, which is essential for hair structure. It acts as a cofactor that prevents auto-inactivation of key enzymes in collagen biosynthesis.

Furthermore, vitamin C enhances blood circulation to the hair follicles, ensuring they receive adequate nutrients and oxygen. Clinical studies show vitamin C improves hair density and reduces shedding when paired with collagen. Vitamin C also protects hair from oxidative stress caused by environmental factors like pollution and UV radiation.

Vitamin A for scalp health

Vitamin A affects hair health in a dose-dependent manner—both too much and too little can have negative effects. This vitamin helps regulate sebum production, keeping your scalp moisturized and preventing dryness. It also promotes cell turnover, essential for follicle health.

Nevertheless, excessive vitamin A can actually lead to hair loss by disrupting the natural growth cycle. The recommended daily allowance is 700 micrograms for women and 900 micrograms for men.

Vitamin E and its antioxidant role

Vitamin E functions as a powerful antioxidant that protects hair from damage caused by free radicals. It directly interacts with lipid free radicals, preventing oxidative stress that can damage hair follicles.

Studies show that vitamin E can reduce skin roughness and dehydration while protecting against UV damage. This vitamin may also help prevent premature aging of the scalp and expand capillaries to increase blood flow to follicles.

Vitamin B12 for hair strength

Vitamin B12 promotes healthy hair growth by supporting red blood cell formation. These red blood cells deliver oxygen to the living portion of hair strands, which is essential for sustaining growth. Without adequate oxygen, your hair typically cannot maintain healthy development.

Research indicates that correcting a vitamin B12 deficiency can help treat hair loss and stimulate growth, though the condition may become irreversible if deficiency causes permanent follicle damage. Common symptoms of B12 deficiency affecting hair include thinning, dry or brittle strands, unusual texture changes, and faster graying.

Important Minerals and Nutrients for Thicker Hair

Diagram showing healthy hair foods including avocado, berries, nuts, spinach, eggs, seafood, and bell peppers for hair growth.

Beyond vitamins, certain minerals and nutrients play fundamental roles in creating thicker, stronger hair. These elements work at the cellular level to support growth and repair.

Iron and its role in oxygen delivery to follicles

Iron deficiency stands as the world’s most common nutritional deficiency and appears frequently in women with hair loss. This mineral carries vital oxygen to hair follicles, with inadequate levels leading to oxygen-starved follicles that grow more slowly and shed prematurely. Studies show premenopausal women with female pattern hair loss have significantly lower serum ferritin than healthy controls. The daily recommendation is 8 mg for men and postmenopausal women but 18 mg for premenopausal women. read more about hair oils.

Zinc and its impact on hair repair

Zinc works as a potent inhibitor of hair follicle regression and accelerates recovery. Research reveals that hair loss patients typically have serum zinc levels approximately 13 μg/dl lower than those without hair loss. This mineral helps build hair protein structure, maintains follicles, and regulates hormones affecting hair loss. Adults need 8-11 mg daily for optimal hair health.

Magnesium for protein synthesis and hair shaft growth

Magnesium supports over 300 biochemical reactions, including protein synthesis essential for hair growth. It regulates calcium levels around follicles, preventing buildup that could block new growth. This mineral also aids in keratin production—hair’s primary structural component. Women need 310-320 mg daily while men require 400-420 mg.

Folic acid and keratin production

Folic acid (vitamin B9) plays a crucial role in regulating keratin production—hair’s main protein. It supports cell division and DNA synthesis, processes essential for the rapidly dividing cells in hair follicles. Deficiency may lead to thinning hair shafts and overall loss. The recommended daily intake is 400 mcg for adults.

Omega-3s and anti-inflammatory properties for hair

Omega-3 fatty acids provide anti-inflammatory benefits for the scalp, creating a healthier environment for hair growth. Studies indicate women taking fish oil supplements experienced increased hair growth and reduced loss. These fatty acids nourish follicles, promote circulation, and can make hair feel thicker. Nearly 90% of participants in one omega-3 supplement study reported thicker-feeling hair and reduced shedding.

How to Use Vitamins and Supplements Effectively

redfinz new images

Taking supplements correctly can make all the difference between seeing results and wasting money. Understanding the right approach helps maximize benefits for your hair.

Best hair growth supplements to consider

Research-backed supplements like Viviscal Pro, Nutrafol, and Rogaine have proven effectiveness through clinical studies. Viviscal contains vitamin C and measured biotin amounts, whereas Nutrafol features anti-inflammatory ingredients like curcumin. For some, prenatal vitamins with folic acid can help combat hair loss. Multivitamins generally offer a safer alternative to single-nutrient supplements.

Foods rich in vitamins for hair

A balanced diet often provides all necessary nutrients without supplementation. For optimal hair health, focus on:

  • Lean proteins (chicken, fish) for keratin production
  • Omega-3 rich foods (salmon, walnuts, flaxseeds) for reducing inflammation
  • Eggs for biotin
  • Leafy greens for vitamins A and C
  • Berries for antioxidants

How to use vitamins for hair regrowth

Different supplements require different dosages—some brands need four pills daily, others just one or two. Consider your lifestyle when choosing supplement forms. For best absorption, avoid consuming tea or coffee with iron supplements since tannins can inhibit uptake.

Risks of over-supplementation

Excessive supplementation can be harmful. Taking too much iron may cause poisoning, whereas biotin megadoses (10,000mg) can disrupt blood test results, particularly for cardiac and thyroid conditions. Excessive vitamin A can trigger hair loss instead of promoting growth.

When to consult a doctor for testing

Consult a doctor for blood tests if you suspect an underlying condition. Testing for ferritin levels helps identify iron deficiency—often missed in women. Thyroid function tests may reveal hormonal imbalances affecting hair health. Remember that supplements only help when you have a confirmed deficiency.

Conclusion

Achieving thicker, healthier hair requires understanding what your body truly needs. Throughout this article, we’ve seen how nutrient deficiencies significantly impact hair health, with iron and vitamin D deficiencies being particularly common culprits behind thinning hair.

Undoubtedly, vitamins play crucial roles in supporting hair structure and growth. Biotin strengthens keratin production, vitamin D activates hair follicles, while vitamin C promotes collagen formation. Additionally, vitamins A, E, and B12 contribute to scalp health, antioxidant protection, and oxygen delivery to follicles respectively.

Beyond vitamins, minerals like iron, zinc, and magnesium work as fundamental building blocks for hair growth. Iron delivers oxygen to follicles, zinc accelerates repair processes, and magnesium supports protein synthesis essential for developing strong hair shafts. Furthermore, nutrients such as folic acid and omega-3s enhance keratin production and reduce inflammation.

Most importantly, balance remains the key. Before starting any supplement regimen, consider whether your diet provides adequate nutrients through foods like eggs, leafy greens, fatty fish, and lean proteins. Though supplements can help address deficiencies, excessive amounts may actually harm your hair health rather than improve it.

If you’ve tried dietary changes and still struggle with thinning hair, consulting a healthcare professional for appropriate testing might reveal underlying deficiencies or conditions. Ultimately, the path to thicker hair combines proper nutrition, targeted supplementation when necessary, and professional guidance tailored to your unique needs.

FAQs

Q1. What are the most effective vitamins for promoting hair growth? 

The most effective vitamins for hair growth include biotin, vitamin D, vitamin C, vitamin E, and vitamin B12. These vitamins support keratin production, activate hair follicles, promote collagen formation, provide antioxidant protection, and aid in oxygen delivery to follicles, respectively.

Q2. Can nutritional deficiencies cause hair thinning? 

Yes, nutritional deficiencies can lead to hair thinning. Common deficiencies linked to hair loss include iron, biotin, vitamin D, zinc, and protein. These deficiencies can affect hair structure, growth cycles, and overall follicle health.

Q3. How do omega-3 fatty acids benefit hair health? 

Omega-3 fatty acids provide anti-inflammatory benefits for the scalp, creating a healthier environment for hair growth. They nourish follicles, promote circulation, and can make hair feel thicker. Studies have shown that women taking fish oil supplements experienced increased hair growth and reduced hair loss.

Q4. Are there any risks associated with taking hair growth supplements? 

Yes, there are risks associated with over-supplementation. Excessive iron intake can lead to poisoning, while high doses of biotin may interfere with certain blood test results. Taking too much vitamin A can actually trigger hair loss instead of promoting growth. It’s important to follow recommended dosages and consult a healthcare professional before starting any supplement regimen.

Q5. How long does it typically take to see results from hair growth vitamins? 

The time frame for seeing results from hair growth vitamins can vary. Some studies have shown visible increases in hair volume and thickness after six months of consistent use. However, individual results may differ based on factors such as the specific deficiencies being addressed, overall health, and lifestyle habits. Patience and consistency are key when using hair growth supplements.

Achieve Professional Skincare at Home with the QuasarMD 3D Mask

0
Achieve Professional Skincare at Home with the QuasarMD 3D Mask

Finding time for professional skincare treatments can be a real challenge, especially with a busy lifestyle. But what if you could get the same clinic-level results from the comfort of your own home? Enter the QuasarMD 3D Light Therapy Mask, a simple, affordable solution that brings medical-grade LED light therapy right to your door. Designed to address common skin concerns like aging, acne, and pigmentation, this mask offers a non-invasive treatment with visible results. In just 10 minutes a day, you can transform your skincare routine and enjoy smoother, clearer, and more youthful-looking skin—all without stepping foot into a clinic.

What’s the Deal with LED Light Therapy?

You’ve probably heard of LED light therapy before, but why is it so effective? Simply put, LED therapy uses different light wavelengths to target specific skin issues. From wrinkles to acne, this treatment works at a deeper level to improve your skin’s health. And the best part? It’s non-invasive and gentle, so you won’t have to worry about harsh chemicals or procedures.

Seven Light Modes to Cover All Your Skin Needs

The 3D Light Therapy Mask gives you seven different light modes—each one designed to address a particular skin concern. Here’s what they do:

  1. Red Light: Helps boost collagen, reducing fine lines and improving skin elasticity.
  2. Blue Light: Targets the bacteria that cause acne, helping you clear up breakouts.
  3. Green Light: Works on pigmentation and helps even out skin tone.
  4. Yellow Light: Improves skin texture, giving you a brighter, smoother look.
  5. Purple Light: Combines red and blue to tackle both aging and acne concerns.
  6. Cyan Light: Reduces redness and inflammation, calming sensitive skin.
  7. White Light: Promotes overall skin health, leaving you with a refreshed, healthy glow.

Each of these modes works in harmony to tackle different skin issues, making this mask a powerful tool in your skincare routine.

Why Should You Choose This Mask?

It’s not just another beauty gadget you’ll toss aside after a few uses. Here’s why this mask stands out:

Professional-Grade Tech, At Home

The LED lights used in this mask are medical-grade, which means you’re getting the same quality as you would in a professional clinic. Whether you’re trying to fight fine lines or clear up acne, each light mode is designed to go deep enough into your skin to make a real difference. You’ll see results that rival those expensive treatments—but without stepping foot in a clinic.

Comfortable and Easy to Wear

Let’s be honest, traditional silicone masks can be bulky and uncomfortable. This mask is different. It’s lightweight, breathable, and fits comfortably over your face and neck. No more constantly adjusting or dealing with that feeling of being trapped inside a thick mask. The 3D structure molds to the shape of your face, ensuring even light distribution and a snug fit.

Plus, you won’t have to worry about overheating. The material is breathable, so you can wear it for the full 10-minute treatment without feeling suffocated. It’s an easy, comfortable experience that won’t interrupt your day.

Affordable Results

If you’ve looked at professional LED treatments before, you know they can cost a pretty penny. But with this mask, you’re getting the same technology at a fraction of the price. So, you don’t have to break the bank to get real results. You’ll see noticeable improvements in your skin, and you won’t need to book expensive clinic visits to make it happen.

How Easy Is It to Use?

The best part? It couldn’t be simpler to fit this mask into your routine. All you need is 10 minutes a day, 3 to 5 times a week. That’s it. You don’t have to carve out a huge chunk of time for your skincare treatment. Whether you’re working, relaxing, or catching up on your favorite show, you can wear it while you do other things.

And since it’s so easy to use, you’re more likely to stick with it and see results. You don’t have to make your skincare routine complicated—just a quick treatment a few times a week, and you’re good to go.

What Results Can You Expect?

The best part about this mask is that you’ll actually see the difference. Many people start noticing smoother, clearer skin within just a few weeks of regular use. Fine lines start to fade, acne clears up, and your skin tone becomes more even. With consistent use, your skin will look healthier and more radiant.

It’s not just a mask that promises change—it actually delivers.

One Mask, Multiple Solutions

Whether you’re battling fine lines, struggling with acne, or dealing with uneven pigmentation, this mask has a light mode that’s right for you. It’s like having a customizable skincare treatment in one device. You can pick the mode that targets your specific concern and switch between them as needed.

For example, if you’re focused on clearing acne, the blue light is your go-to. If wrinkles are your concern, the red light helps stimulate collagen production. If pigmentation is bothering you, the green light will help even things out. Whatever your skin needs, this mask has a solution.

Save Money, Get Results

Let’s face it—professional skincare treatments can be expensive, especially if you need regular sessions. But with the QuasarMD 3D Light Therapy Mask, you’re getting the same benefits without the clinic prices.

Instead of spending hundreds on in-office treatments, you can treat yourself to professional-quality care at home. The mask is a great investment, and the results are totally worth it. Over time, it’s a cost-effective way to improve your skin without the need for costly procedures.

Wrapping It Up: Get Skin That Works for You

If you’re ready to upgrade your skincare routine, this mask might just be what you’ve been looking for. It’s easy to use, affordable, and delivers real results. Whether you want to reduce wrinkles, fight acne, or just improve overall skin health, this mask offers a solution for all your skincare concerns.

Marula Oil For Hair

0
Marula Oil For Hair

How to Use Marula Oil for Hair Growth: Expert-Backed Guide for Beginners

Are you aware that marula oil benefits for hair include antioxidants up to 60 times more potent than regular vitamin E? This rare, exotic oil derived from the fruit of the marula tree native to southern Africa has been part of century-old beauty rituals. Also known as the “elixir of youth,” marula oil is packed with nutrients including fatty acids, vitamin E, vitamin C, and flavonoids that deeply nourish and moisturize your hair. In fact, this natural oil can improve hair strength while providing protection from environmental damage.

Whether you’re struggling with dry, damaged hair or simply looking to enhance your hair care routine, marula oil for hair growth offers a versatile solution. Rich in protein and easily absorbed, it effectively treats both skin and hair concerns. Additionally, this powerful oil encourages hair growth while hydrating the scalp[-5]. Throughout this guide, you’ll discover exactly how to incorporate this ancient beauty secret into your hair care regimen for transformative results.

What Is Marula Oil and Why It Matters for Hair

Native to southern Africa, the marula tree (Sclerocarya birrea) has been revered for generations as a source of natural wellness. Throughout the continent, this remarkable tree has earned its place in local traditions and beauty rituals.

Origin and extraction process

The journey of marula oil begins with the tree’s fruit, traditionally harvested by local communities in regions like Kenya, South Africa, and Namibia. For centuries, women in rural African communities have meticulously cracked the nuts through a process known as “decortication” to extract the precious kernels. These kernels are subsequently hand-pressed to produce the highly-valued oil.

Modern extraction primarily utilizes cold-pressing techniques without heat or solvents, preserving the oil’s beneficial properties. This careful process ensures the oil maintains its naturally stable characteristics and active ingredients. Unlike some commercial oils, quality marula oil undergoes minimal processing—just light refining and natural filtration.

Nutritional composition and key compounds

Marula oil stands out for its exceptional fatty acid profile, containing approximately 70-78% oleic acid (omega-9). This high concentration contributes to its excellent moisturizing properties and stability. Furthermore, it contains linoleic acid (4-9%), palmitic acid (9-12%), and stearic acid (5-8%).

Beyond fatty acids, marula oil contains powerful antioxidants including vitamins E and C. Notably, the marula fruit contains eight times more vitamin C than oranges, making its derivatives particularly beneficial for collagen production and skin elasticity.

The oil also harbors tocopherols, sterols, flavonoids, and catechins—compounds that collectively contribute to its anti-inflammatory and protective qualities.

How it compares to other oils like argan or jojoba

How it compares to other oils like argan or jojoba

When compared to popular oils like argan, marula oil offers several distinctive advantages:

  • Texture and absorption: Marula oil has a lighter consistency that absorbs more quickly than argan oil, making it ideal for all hair types without causing heaviness.
  • Antioxidant contentContains approximately 60% more antioxidants than argan oil, providing superior protection against environmental damage.
  • Vitamin composition: Unlike argan oil, marula oil contains vitamin C alongside vitamin E, offering enhanced brightening and collagen-boosting properties.
  • Moisture retention: With its higher oleic acid content, marula oil penetrates deeper and locks in moisture longer than both argan and jojoba oils.

Essentially, marula oil combines the best qualities of several hair oils—providing both deep hydration and lightweight application without clogging follicles.

Marula Oil Benefits for Hair Growth

redfinz new images

Marula oil delivers exceptional benefits for hair growth through its unique combination of nutrients and properties. The results are visible in healthier hair from root to tip.

Hydrates and locks in moisture

With approximately 70-78% oleic acid content, marula oil penetrates deeply into hair shafts to provide lasting hydration. Its occlusive properties create a protective barrier that locks moisture into the hair, preventing water loss throughout the day. This makes it especially beneficial for dry, damaged, or curly hair that requires intense moisturization. Moreover, the oil’s lightweight nature allows it to absorb quickly without leaving greasy residue.

Strengthens hair strands and reduces breakage

The abundant fatty acids in marula oil improve hair elasticity, making strands more resilient against tension and daily styling. Consequently, your hair becomes less prone to breakage and split ends. The oil’s protein-enhancing properties increase strength within hair fibers, creating strands that can withstand normal manipulation without snapping. Regular application helps repair damaged follicles by strengthening cellular membranes.

Improves scalp health and reduces inflammation

Marula oil is pH-balanced and non-comedogenic, meaning it won’t clog hair follicles or cause buildup on your scalp. Its anti-microbial properties effectively address scalp issues such as inflammation, itchiness, and dandruff. The linoleic acid (an Omega-6 fatty acid) in marula oil reduces trans-epidermal water loss and increases scalp smoothness, allowing natural building of the scalp’s lipid layers. This anti-inflammatory action creates an optimal environment for healthy hair growth.

Protects against environmental damage

Rich in antioxidants, including vitamins C and E, marula oil shields hair from free radical damage caused by pollution and UV radiation. These protective properties help prevent premature graying, brittle hair, and early hair loss. The oil creates a defensive barrier against heat styling tools, serving as a natural heat protectant.

Adds shine and reduces frizz

The smoothing effect of marula oil on hair cuticles creates immediate visual improvements by eliminating frizz and enhancing shine. It effectively tames flyaways, especially in high humidity conditions.

How to Use Marula Oil for Hair Growth

redfinz new images

Incorporating marula oil into your hair care routine can be done through several effective methods. Below are expert-recommended techniques to maximize its benefits for hair growth.

Pre-shampoo treatment method

To use marula oil as a pre-shampoo treatment, place a few drops in your palms and massage thoroughly into your scalp and hair. Allow it to sit for at least 30 minutes or leave overnight for deeper conditioning. Rinse thoroughly before shampooing as usual. This method helps prepare your hair to better absorb nutrients during washing.

Leave-in conditioner technique

After washing your hair, pat it dry with a towel until damp. Apply 1-2 drops of marula oil to the lengths and ends of your hair. Comb through to distribute evenly. This technique adds shine and keeps hair light and soft without greasiness. For extremely dry hair, you may apply an additional 1-2 pumps.

Scalp massage for circulation

Massage a few drops of marula oil into your scalp using circular motions. This stimulates blood flow to hair follicles while reducing inflammation. Leave on for at least 30 minutes before washing. Regular scalp massages can help relieve dryness, flakiness, and promote healthy hair growth.

DIY hair mask recipes

Create a nourishing hair mask by combining:

  • 2 tablespoons marula oil
  • 1 ripe avocado (mashed)
  • 1 tablespoon honey
  • 1 tablespoon coconut oil (optional)

Apply to clean, damp hair, focusing on lengths and ends. Leave on for 20-30 minutes before rinsing thoroughly with warm water.

Mixing with other oils or products

For enhanced results, combine marula oil with complementary ingredients. Pairing marula oil with coconut oil provides extra moisture as a deep conditioning treatment. Alternatively, mix marula oil with essential oils like lavender or tea tree to soothe the scalp further. You can even add a few drops to your favorite shampoo or conditioner for daily nourishment.

Precautions, Side Effects, and Best Practices

While marula oil offers numerous hair benefits, understanding proper usage and potential concerns is crucial for optimal results.

Who should avoid marula oil

Although generally safe, individuals with nut allergies should exercise caution when using marula oil. People undergoing major surgeries or with conditions like cancer, heart ailments, or hormone-related issues ought to consult a physician first. Pregnant and nursing women should similarly seek medical advice before application.

How often to use based on hair type

For dry scalps, daily application is generally safe. However, if you have an oily scalp, limit usage to 1-2 times weekly. Those with fine or naturally oily hair should begin with weekly treatments and adjust accordingly. If your hair becomes greasy quickly, decrease frequency; if still dry, increase application.

Patch testing for allergies

Prior to full application, conduct a patch test:

  • Apply 3-4 drops of marula oil to your inner forearm
  • Wait 24 hours to observe any reaction
  • If redness, itching, or irritation occurs, discontinue use immediately

Avoiding oily buildup on scalp

To prevent unwanted buildup that can clog follicles and potentially lead to issues like dandruff or seborrheic dermatitis:

  • Apply primarily to hair ends rather than roots
  • Use sparingly – start with small amounts
  • Adjust usage based on your hair’s response
  • Store in a cool, dark place to maintain efficacy

Conclusion

Marula oil stands out as a remarkable natural solution for those seeking healthier, stronger hair. This ancient African beauty secret delivers exceptional results through its unique composition of fatty acids, vitamins, and antioxidants. Therefore, adding marula oil to your hair care routine can transform dry, damaged locks into nourished, vibrant tresses.

Your hair deserves the multiple benefits this versatile oil provides—deep hydration, enhanced strength, improved scalp health, and protection against environmental stressors. Additionally, marula oil’s lightweight texture makes it suitable for various hair types without causing heaviness or buildup when used appropriately.

Whether you choose to apply marula oil as a pre-shampoo treatment, leave-in conditioner, scalp massage oil, or ingredient in DIY masks depends entirely on your specific hair needs. Consequently, you might need to experiment with different application methods to discover what works best for your unique hair texture and concerns.

Remember to start with small amounts, especially if you have fine or naturally oily hair. Afterward, you can adjust the frequency based on how your hair responds. Most importantly, perform a patch test before full application to ensure you don’t experience any adverse reactions.

Marula oil ultimately offers a natural, effective way to support hair growth while maintaining overall hair health. Though relatively new to global markets, this time-tested oil has earned its reputation as a powerful hair elixir for good reason. Try incorporating marula oil into your hair care regimen and experience the transformative benefits firsthand.

FAQs

Q1. Can marula oil promote hair growth? Marula oil can support hair growth by nourishing the scalp, strengthening hair strands, and creating an optimal environment for healthy hair. Its rich composition of fatty acids, vitamins, and antioxidants helps improve overall hair health, which can contribute to better growth.

Q2. How long should I leave marula oil in my hair? The duration can vary depending on your hair type and needs. For a quick treatment, leave it on for at least 30 minutes before washing. For deeper conditioning, you can leave it overnight. Experiment to find what works best for your hair.

Q3. How often should I use marula oil on my hair? The frequency of use depends on your hair type. For dry scalps, daily application is generally safe. If you have an oily scalp or fine hair, limit usage to 1-2 times weekly. Adjust based on how your hair responds.

Q4. Can marula oil make my hair look greasy? While marula oil is lightweight, using too much can lead to a greasy appearance, especially for those with fine or naturally oily hair. Start with small amounts, focusing on the ends rather than the roots, and adjust the quantity based on your hair’s response.

Q5. How can I incorporate marula oil into my hair care routine? There are several ways to use marula oil: as a pre-shampoo treatment, leave-in conditioner, scalp massage oil, or in DIY hair masks. You can also mix it with other hair products or essential oils for enhanced benefits. Choose the method that best suits your hair needs and preferences.

Almond Oil Benefits for Hair: Natural Hair Nourishment

0
Almond Oil Benefits for Hair Natural Hair Nourishment

Healthy hair isn’t just about luck. It’s about care, consistency, and the right ingredients. One of the simplest yet most effective ones is almond oil. For centuries, people have used it to maintain strong, shiny, and soft hair.

Almond oil delivers nutrients like biotin, fatty acids, and Vitamin E directly to the scalp and strands. These elements strengthen hair, reduce breakage, and protect it from daily damage. Whether used for a soothing scalp massage or as a lightweight leave-in conditioner, almond oil continues to prove why it belongs in every hair routine.

Why Almond Oil Deserves a Spot in Hair Car

Hair care routines have become complicated. From sprays to serums, the shelves are overflowing. Yet, many still face dullness, dryness, and thinning. That’s why almond oil has made a quiet comeback. It’s simple, effective, and works for nearly every hair type.

A Glimpse into Its Roots

Ancient Egyptians, Greeks, and Persians used almond oil in their grooming rituals. They valued it as a natural conditioner long before commercial products existed. Historical texts mention how it was used to soothe scalps, add shine, and reduce breakage. This old wisdom still holds true today.

What Makes It Stand Out

Almond oil comes in two main forms — sweet and bitter. Sweet almond oil is the safe, nourishing version often used for beauty care. It’s rich in vitamin E, omega fatty acids, and minerals like zinc and magnesium. Bitter almond oil, however, isn’t meant for topical or internal use because it can contain toxins if not processed correctly.

Sweet almond oil is light and easily absorbed. It doesn’t leave the scalp greasy, which makes it ideal for both daily and weekly care.

How Almond Oil Works on Hair

Hair health starts at the scalp. Almond oil nourishes from the root, improving blood circulation and moisture balance. Its small molecular structure helps it penetrate deep into the hair shaft instead of just coating the surface.

Studies in the Journal of Cosmetic Science show that oils rich in monounsaturated fats, like almond oil, improve strand elasticity and reduce breakage. Another report in the International Journal of Trichology notes that regular scalp massage with almond oil can reduce hair fall by improving follicle strength. So, it’s not just a folk remedy. Science supports it.

Top Benefits of Almond Oil for Hair

redfinz new images

1. Restores Moisture and Softness

Dry hair breaks easily. Almond oil solves that. It seals moisture inside the hair shaft, keeping strands hydrated. Vitamin E acts as a natural conditioner, while omega fatty acids form a thin layer that protects against dryness.

For those living in dry or cold climates, applying almond oil twice a week can help maintain softness and prevent frizz.

2. Strengthens Weak Strands

Weak strands lead to split ends and breakage. Almond oil’s nutrients help repair and rebuild the hair structure. Magnesium, found in almonds, is known to improve hair elasticity and resistance.

A clinical study by the National Center for Biotechnology Information (NCBI) linked magnesium deficiency with hair fall. Almond oil helps address that issue directly through scalp absorption.

3. Boosts Hair Growth

The scalp is like soil — it needs nourishment to grow healthy strands. Almond oil increases blood flow, which brings more oxygen and nutrients to the roots.

People who massage their scalp with almond oil twice a week often notice thicker growth within 6–8 weeks. That’s not magic — it’s biology. Regular stimulation wakes up dormant follicles, and vitamin B7 (biotin) helps in new strand formation.

4. Reduces Hair Fall and Breakage

Hair fall can result from stress, diet, or poor scalp health. Almond oil addresses all three. It nourishes the follicles, reduces inflammation, and helps balance scalp oils.

It also reduces protein loss from hair strands, which is a common cause of breakage. According to data published in Dermatologic Therapy, plant-based oils rich in linoleic and oleic acids significantly reduce protein loss, keeping strands strong.

5. Fights Dandruff and Dry Scalp

Flaky scalp is often caused by dehydration or buildup. Almond oil gently loosens dead skin cells and moisturizes the scalp. Its antibacterial properties help reduce dandruff-causing microbes.

Consistent use keeps the scalp clean and comfortable. It’s a simple, natural fix for people tired of harsh anti-dandruff shampoos.

6. Adds Shine and Smoothness

Almond oil doesn’t just treat — it beautifies. The oil coats strands lightly, giving them a natural glow. Unlike silicone-based serums, it doesn’t weigh hair down.

Even a small amount after styling can boost shine. Vitamin E and fatty acids make the hair reflective and glossy under light.

7. Repairs Split Ends

Split ends happen when the protective cuticle layer wears down. Almond oil fills in those tiny gaps, sealing the ends temporarily. Over time, this reduces further splitting.

Hair stylists often recommend trimming split ends first, then using almond oil regularly to prevent them from coming back. It’s preventive care in a bottle.

8. Shields from Sun and Pollution

Every day, the hair faces dust, UV rays, and smoke. Almond oil acts as a protective coat against these factors. Its antioxidants neutralize harmful molecules that damage strands.

In regions with high UV exposure, applying a thin layer before stepping out can protect against dryness and color fading.

9. Helps Prevent Premature Graying

Gray hair isn’t just about age. It’s often tied to oxidative stress and loss of pigment cells. Almond oil’s antioxidants help slow this process.

Vitamin E and copper content maintain melanin production, which gives hair its natural color. While it can’t reverse graying, it may delay its onset with regular use.

10. Improves Scalp Health

Healthy hair starts at the root. Almond oil improves scalp texture and balances natural oils. Its lightness ensures pores stay clear.

A 5-minute scalp massage increases oxygen flow and nutrient delivery. People who stick to this routine often notice better volume and thickness over time.

How to Use Almond Oil the Right Way

There’s no single “perfect” way to apply almond oil. What matters is consistency and proper technique.

  1. Warm a few tablespoons of almond oil until it’s slightly above room temperature.
  2. Apply directly to the scalp using fingertips.
  3. Massage gently in circular motions for 5–10 minutes.
  4. Leave on for 45 minutes or overnight under a shower cap.
  5. Rinse with a mild shampoo.

This method ensures deep absorption and maximum effect.

DIY Hair Masks with Almond Oil

For dry hair: Mix almond oil with honey and yogurt.
For frizz control: Combine almond oil with coconut oil and a few drops of lavender oil.
For faster growth: Blend almond oil with castor oil and a little rosemary oil.
For dandruff: Mix almond oil with aloe vera gel and a few drops of lemon juice.

Each combination targets a specific problem while keeping the process natural and safe.

How Often Should Almond Oil Be Used?

Twice a week is ideal for most hair types. People with oily scalps can limit it to once a week. For dry or chemically treated hair, three times weekly may help restore balance.

Leaving the oil overnight isn’t mandatory. Even 45 minutes is enough for visible improvement with consistent use.

Almond Oil vs. Other Hair Oils

redfinz new images

Coconut Oil vs. Almond Oil

Coconut oil penetrates deeper but can be heavy for fine hair. Almond oil, being lighter, works better for everyday use. It’s less likely to clog pores or cause buildup.

Argan Oil vs. Almond Oil

Argan oil is richer but more expensive. Almond oil offers similar smoothness at a lower cost, with added benefits like scalp nourishment and vitamin B content.

Castor Oil vs. Almond Oil

Castor oil supports thick growth but is sticky. Almond oil balances texture and shine without the heaviness, making it more versatile.

Choosing the Right Almond Oil

Look for cold-pressed sweet almond oil. It’s extracted without heat, keeping nutrients intact. Avoid refined oils that may have lost vitamins during processing.

A good indicator of quality is the label — it should list Prunus amygdalus dulcis as the main ingredient, with no added preservatives or fragrance.

Possible Side Effects and Precautions

Almond oil is generally safe. However, anyone allergic to nuts should do a patch test first. Apply a small drop to the inner elbow and wait 24 hours. If no redness or irritation occurs, it’s safe to use.

Also, avoid using it on a dirty scalp. Oil traps dirt, which can cause buildup and irritation if not cleaned properly.

Expert Opinions and Real Results

Trichologists agree that natural oils like almond oil can complement medical treatments for hair loss. While it’s not a miracle cure, it supports scalp health, which is key for long-term improvement.

Many users report softer texture and easier detangling within two weeks of regular use. After a month, hair feels stronger and looks more vibrant.

Conclusion

Almond oil doesn’t promise overnight magic. It offers steady, visible progress. With vitamins, minerals, and fatty acids working together, it supports every part of hair health — from root strength to shine.

For anyone tired of chemical-heavy products, almond oil brings back simplicity and results. It’s a quiet reminder that sometimes, the best solutions are the oldest ones.

Best Toddler Floor Bed Styles That Work for Growing Kids

0
Best Toddler Floor Bed Styles That Work for Growing Kids

Finding the right bed after a crib feels tricky. Most toddler beds are too tall or bulky. That makes it harder for small kids to climb in and out. A toddler floor bed fixes this. It sits close to the ground and gives your child independence and safety.

What Is a Toddler Floor Bed?

A toddler floor bed is a bed that sits on or just above the floor. It allows toddlers to climb in and out safely, reducing fall risks and encouraging independence. Parents often use them when a child grows too big for a crib but isn’t ready for a regular bed.

These beds promote freedom of movement. Kids get to explore their space without barriers. The idea comes from the Montessori approach, which supports self-reliance and safe independence. A floor bed is simple, but the impact on confidence is clear.

Why Do Parents Like Floor Beds?

Parents like floor beds because they’re low, safe, and easy to set up. The main reason is that a child can move freely without falling from height. Many families also choose them to make bedtime less stressful and more child-friendly.

They work in small or large rooms. They cost less than full frame beds and are simple to clean. They give toddlers more control over their sleep, which helps with routines. Most importantly, they keep kids safe while letting them learn independence.

Style 1: Basic Mattress-on-Floor Bed

redfinz new images

This is the simplest option. It’s just a mattress placed directly on the floor, making it affordable, safe, and easy to use. With no frame or rails, there are no hard edges to worry about, and toddlers can climb in with no trouble.

It’s a practical choice for smaller spaces or families on a budget. Cleaning and moving the mattress is simple. While plain, it does the job well and gives toddlers the freedom they need. Sometimes less is more, and this style proves that.

Style 2: House Frame Floor Bed

This style looks like a little house. It’s a wooden frame built low to the ground, giving the bed a playful and cosy feel. The frame can be decorated with soft fabric, string lights, or even curtains, making the bed feel like a room inside a room.

Kids often find comfort in this style. It creates a secure spot without needing rails. The height remains low enough for safety while still adding a sense of fun. A house frame floor bed blends function with a homelike touch.

Style 3: Floor Bed with Rails

Some toddlers roll a lot while sleeping. A floor bed with rails solves this by keeping them from sliding off while still staying low to the ground. This way, parents don’t worry about falls but still give kids freedom to climb in and out.

The best part is flexibility. Many designs allow the rails to be removed as the child grows. That means the same bed can last for years, making the transition smoother from crib to bed. It’s practical, safe, and adaptable.

Style 4: Teepee Style Floor Bed

This bed takes the form of a tent. The wooden frame is shaped like a teepee, turning bedtime into an adventure while staying close to the floor. Children who enjoy themed or playful spaces often love this design.

It’s more than a bed—it feels like a hideout. Adding cushions, soft rugs, or fairy lights makes it even more inviting. The teepee style blends safety with imagination, giving kids both comfort and creativity in their room.

Style 5: Platform Frame Floor Bed

Not every parent wants the mattress flat on the floor. A platform frame raises it slightly, allowing air to flow underneath and keeping the mattress fresh. It offers a little more structure without losing the safety of a low height.

This style often uses simple wooden slats. It’s tidy, stable, and practical. Parents who like clean lines and a little more order in the bedroom often choose this option. It strikes a balance between function and comfort.

How to Pick the Right Floor Bed for Your Toddler

redfinz new images

The right choice depends on space, sleep habits, and safety needs. If your child moves a lot at night, a floor bed with rails is best. For small rooms, a mattress-only or platform style works better. Larger rooms can handle themed designs like house frames or teepees.

Check materials for safety and durability. Solid wood with non-toxic finishes is ideal. Think about whether you want a bed that can grow with your child. Most parents weigh budget, space, and personality when deciding. The right bed balances safety and independence.

Safety Tips for Floor Beds

A floor bed is only safe when the room is safe. Parents should babyproof outlets, secure furniture to walls, and keep small items out of reach. This prevents risks since a child has free movement in the room.

Ventilation is also important. If the mattress sits directly on the floor, lift it occasionally to air it out. Use firm mattresses that fit snugly in the frame. Floor beds are safe, but only if parents prepare the space carefully.

What Age Is Best for a Floor Bed?

The best age for a floor bed is usually 18 months and older. Most toddlers move out of the crib when they start climbing or outgrowing it, and a floor bed makes that change easier. Younger babies may not be ready for the freedom a floor bed gives.

Some families switch earlier, especially with Montessori-style nurseries. Others wait until closer to age three. It depends on the child’s readiness, room setup, and comfort. What matters most is creating a safe environment where your toddler can rest securely.

Final Thoughts

Switching from a crib to a bed feels like a big step. A toddler floor bed makes it easier and safer. With six styles to pick from, parents can choose one that fits their child’s personality, habits, and room size.

The goal is simple: safe sleep and growing independence. A floor bed lets kids feel in control while giving parents peace of mind. Whether you keep it basic or add playful frames, the right bed makes bedtime smoother for both child and parent.

What Is a Closet Organizer System and How It Works

0

Did you know the diy closet organizer industry reached a staggering $7.93 billion in 2023 and is projected to grow to $15.85 billion by 2032?

This remarkable growth isn’t surprising when you consider how a well-designed closet system can significantly increase your home’s value. A closet organizer system is essentially a combination of rods, shelves, drawers, shoe racks, and other accessories built into your closet to maximize space and functionality.

When you invest time in creating an organized closet, you’re not just decluttering – you’re actually adding real value to your home. Furthermore, having proper closet organizers makes daily organization simple and saves you valuable time when getting ready since all your items are easier to find.

Whether you’re considering premade closet systems or planning to build closet shelves yourself, understanding what a closet system is and its components is the first step toward transforming your storage space. In this guide, we’ll explore everything from closet system components to DIY closet organizer plans that can help you take control of your home and your closet!

What Is a Closet Organizer System?

redfinz new images

A closet organizer system serves as the backbone of effective storage within your living spaces. Unlike basic storage solutions, a well-designed closet system transforms cluttered areas into functional, accessible spaces where everything has its designated place.

Definition and purpose

A closet organizer system is a comprehensive storage solution that includes a combination of rods, shelves, drawers, shoe racks, and various accessories built into your closet. This integrated set of components works together to create an efficient system for storing and retrieving clothing, accessories, and household items.

The primary purpose of a closet organizer extends beyond mere storage—it’s about creating order and accessibility in your daily life. An effective system utilizes every inch of available space, ensuring that each item has its designated spot. Consequently, finding what you need becomes quick and straightforward, eliminating the frustration of digging through piles of clothing or searching for missing items.

Moreover, a proper closet system helps extend the lifespan of your garments by protecting them from unnecessary damage. Hanging clothes remain wrinkle-free, while dedicated drawers shield delicate items from being crushed or misshapen.

How it differs from regular shelving

Traditional closet setups typically feature what industry professionals call the “rod and shelf” configuration—a single shelf above a rod stretching from one end of the closet to another. Although this basic arrangement has been standard in many homes for decades, it represents an inefficient use of vertical space.

In contrast, closet organizer systems offer several distinct advantages:

  • Customization: Unlike fixed shelving, closet systems can be tailored to accommodate specific storage needs, with components placed at optimal heights and configurations.
  • Adaptability: Many modern systems feature adjustable components that can be reconfigured as your storage requirements change over time.
  • Efficiency: By incorporating multiple hanging areas, varied shelf depths, and specialized storage solutions, closet systems maximize every available inch of space.
  • Preservation: The materials and design of quality closet systems help prevent damage to clothing items—no more wire marks pressed into folded garments.

Additionally, closet systems create visual organization through uniformity. Rather than having everything exposed as with wire shelving, many systems incorporate drawers and doors that conceal contents, presenting a cleaner, more sophisticated appearance.

Common components in a closet system

The effectiveness of a diy closet organizer system stems from its thoughtfully designed components that work together to address various storage needs. Depending on your requirements, a comprehensive closet system might include:

  • Hanging rods at different heights—typically with top rods at 84 inches for longer items and bottom rods at 42 inches for shorter garments
  • Adjustable shelving for folded clothes and accessories
  • Pull-out drawers for smaller items
  • Specialized storage for shoes, belts, ties, and scarves
  • Valet rods for outfit planning
  • Hampers for laundry management
  • Jewelry trays and drawer dividers

The arrangement of these components depends largely on what you need to store. For instance, if you have numerous purses and folded items, shelves and drawer space might be priorities in your closet design. Alternatively, if your wardrobe consists primarily of hanging clothes, you’ll want to incorporate more rod space at appropriate heights.

Ultimately, the beauty of a well-designed closet system lies in its ability to be personalized according to your specific needs. Whether you opt for a premade closet system or build your own diy closet shelving, the goal remains the same—creating an organized, efficient space that simplifies your daily routine.

Types of Closet Organizer Systems

redfinz new images

Choosing the right type of closet organizer system depends on your space, budget, and storage needs. Each system offers distinct advantages based on how it’s constructed and installed.

Modular systems

Modular closet organizers offer flexibility through interchangeable components that work together to create a customized storage solution. These systems feature standardized parts that can be arranged in various configurations to fit your specific space. The primary benefit is adaptability—you can add, remove, or rearrange components as your storage needs evolve.

Most modular systems include a variety of elements such as:

  • Adjustable shelving
  • Hanging rods at different heights
  • Drawers and cabinets
  • Specialized storage accessories (shoe racks, tie racks, etc.)

Unlike built-in options, modular systems can move with you, making them ideal for renters or those who plan to relocate. They typically come in prefabricated sizes but can often be cut to your exact measurements with the right tools and skills.

Custom-built systems

For those seeking a perfect fit with premium finishes, custom-built closet systems offer a tailored approach. These systems are designed specifically for your space after a professional measures your closet and discusses your needs. The result is a solution that maximizes every inch while perfectly complementing your home’s esthetic.

Custom solutions typically include a consultation with a closet designer who creates personalized plans considering factors like corner accessibility, light fixtures, outlets, and other structural elements that might be overlooked in DIY designs. This expert guidance helps prevent design flaws that could occur when important structural details aren’t properly addressed.

The investment in custom systems generally includes professional installation and warranties, with prices ranging from around $1,000 for basic options to $5,000+ for high-end designs.

Freestanding and wall-mounted options

The installation method significantly impacts both functionality and esthetics of your closet system.

Wall-mounted systems are suspended from a steel rail fastened securely to wall studs, creating a floating appearance. These systems offer several distinct advantages:

  • No need to remove existing baseboards or carpeting
  • Easier floor cleaning underneath
  • Minimal modifications to existing structures
  • Visual appeal with a contemporary, floating look

Floor-based systems sit directly on the floor and are anchored to walls for stability. These systems provide:

  • Greater weight capacity for heavier items
  • Deeper shelving options (up to 24″ vs 14″ maximum in wall-mounted systems)
  • A built-in furniture appearance
  • Opportunity for decorative elements like crown molding and base trim

The choice between these options often depends on both practical considerations and style preferences. Floor-based systems require removing baseboards and sometimes carpet, plus they need special cutouts for outlets and vents.

Premade closet systems vs DIY closet systems

Premade closet organizers provide ready-to-install solutions with standardized dimensions. Popular options like IKEA’s PAX system (starting around $200) offer online planning tools and various components, making them accessible for budget-conscious homeowners. These systems typically require assembly but come with instructions and standardized parts.

Conversely, DIY closet systems allow for complete personalization but demand carpentry skills or professional help. Building from scratch lets you choose exact materials and dimensions but requires proper tools and mounting knowledge to ensure the system doesn’t pull away from the wall when loaded with heavy clothing.

The cost difference between custom and DIY isn’t always as significant as expected. While high-end custom systems can reach thousands of dollars, the added expense often includes design expertise, professional installation, and warranties that might outweigh the savings of the DIY route, especially for those without advanced home improvement skills.

Benefits of Using a Closet Organizer

redfinz new images

Beyond merely storing items, an organized closet transforms your daily routine and living environment. Installing a diy closet organizer offers numerous advantages that extend far beyond simple storage.

Improved organization and accessibility

A properly organized closet creates designated spots for everything you own, making it dramatically easier to find what you need when you need it. This strategic organization streamlines your morning routine, eliminating the frustration of digging through crowded drawers or tangled clothing. Indeed, well-designed closet systems allow you to locate and access your belongings quickly, kickstarting your day with positivity and efficiency.

The psychological benefits are equally important—a cluttered closet can lead to unnecessary stress, whereas an organized space contributes to mental clarity and a sense of calm in your home. Primarily, this organization helps you maintain order throughout your day-to-day life by making it simpler to put things away properly.

Better use of space

Closet organizer systems excel at maximizing every available inch—particularly vertical space that typically goes unused in standard closets. Through multi-tiered shelving, double hanging rods, and specialized storage solutions, a diy closet system can effectively triple your storage capacity.

Adjustable components allow you to customize heights and configurations based on your specific needs, eliminating wasted space and ensuring efficient storage for items of all shapes and sizes. Pull-out drawers, shoe racks, and specialized hooks transform awkward corners and tight spaces into functional storage areas that keep your belongings neatly arranged.

Increased home value

Custom closets have become increasingly desirable features for potential homebuyers. In competitive real estate markets, well-designed storage solutions can help your home stand out, potentially leading to quicker sales and higher offers. Custom closet installations typically offer a return on investment (ROI) of 50-60%, depending on materials and design.

Many buyers perceive custom closets as luxurious features that bring elegance to any home. Therefore, even budget-friendly closet upgrades can add a touch of sophistication that most traditional homes in the same price range lack.

Enhanced esthetics and design

A thoughtfully designed closet contributes significantly to your home’s visual appeal. Modern closet systems offer diverse style options—from sleek, contemporary designs to traditional, rustic looks—that complement your existing décor.

High-quality materials like solid wood or premium metal finishes further elevate the perceived value and visual impact of your storage spaces. Additional design elements such as glass-fronted cabinets, LED lighting, and decorative hardware transform utilitarian closets into stylish focal points that enhance your overall interior design.

Ultimately, a well-organized closet creates visual calmness through uniformity, with matching hangers, coordinated bins, and consistent spacing between elements—turning formerly chaotic spaces into showcases of order and intention.

DIY vs Professional Installation

Deciding between a DIY approach and professional installation for your closet system largely depends on your skills, budget, and specific needs. The right choice varies based on your situation and expectations.

When to consider DIY closet organizer systems

DIY closet projects make the most sense in several specific scenarios. Primarily, they’re ideal if you’re renting and need a solution that isn’t permanently anchored to walls. Likewise, DIY works well for those with tight budgets who still want to improve their storage situation. Many homeowners choose the DIY route because they enjoy the personal satisfaction of building something themselves—the pride in saying “I built that!” becomes part of the reward. Additionally, those with specific customization needs sometimes find that creating their own system allows for unique adaptations that premade systems don’t offer.

Tools and skills needed for DIY closet shelving

Successfully building closet shelves requires both proper tools and basic carpentry skills. Essential tools include:

  • Measuring tape and level for accurate dimensions
  • Drill and screws for assembly and mounting
  • Circular saw or miter saw for cutting shelving materials
  • Stud finder to locate wall supports
  • Pocket hole jig for creating strong joints

Beyond tools, you’ll need skills like accurate measuring, straight cutting, and understanding wall structure for proper mounting. The ability to read and follow detailed plans is crucial, as is patience—DIY closet projects typically take 8-20+ hours depending on complexity and experience level.

Advantages of hiring professionals

Professional installation offers notable benefits, especially for complex closets. Expert designers optimize layouts based on experience with thousands of closets. In fact, they often identify storage solutions that DIYers might overlook. Professional work typically features higher quality materials and craftsmanship, subsequently resulting in systems that withstand heavy use without sagging or breaking. Furthermore, most professional installations include warranties and guarantees, offering peace of mind that DIY projects cannot provide. Above all, hiring professionals saves significant time—what might take a homeowner several weekends can be completed by professionals in a single day.

Cost and time comparison

The financial difference between DIY and professional installation varies considerably. Basic DIY wire shelving might cost $150-$400, whereas mid-range laminate systems run $500-$1,500, not including necessary tools. Professional custom closets typically start around $1,000 for basic designs and can exceed $5,000 for premium systems. However, the true cost comparison must consider time investment. While professional installation typically completes in hours, DIY projects often stretch across multiple weekends, especially for novices encountering unexpected challenges. Regardless of cost differences, both approaches have merits—DIY offers satisfaction and savings, while professional installation provides convenience, expertise, and often superior results.

Cost and Planning Considerations

redfinz new images

Planning a closet organizer requires careful consideration of costs and materials. Understanding these aspects helps you create an efficient storage solution while staying within budget.

How much does it cost to build a small closet?

The price for small closet organizers varies widely. Prefabricated systems for small reach-in closets typically cost between $500-$1,500, while DIY kits range from $200-$1,000. Meanwhile, custom solutions for small spaces start around $1,000.

Budgeting for materials and labor

Labor costs comprise a significant portion of professional installation, ranging from $200-$1,600. Carpenter rates typically run $40-$100 per hour. For DIY projects, anticipate spending $50-$100 plus on supplies, plus the cost of necessary tools.

Choosing between wood, laminate, and metal

Material selection dramatically impacts both esthetics and durability:

  • Wire systems: Most affordable ($500-$1,500) but may catch on fabrics
  • Melamine/laminate: Mid-range option ($1,000-$2,500) offering good durability and easy cleaning
  • Solid wood: Premium choice ($2,000-$5,000) providing superior durability and classic appeal

Using closet system components efficiently

Selecting components based on storage needs maximizes functionality. Basic hanging rods ($10-$25) offer economical storage, whereas shelving ($15-$60 per shelf) works best for folded items. Consider splurging on key elements while economizing on less visible components.

Conclusion

Investing in a closet organizer system transforms more than just your storage space. Through careful planning and implementation, you can create a functional area that saves time, reduces stress, and potentially increases your home’s value. Whether you choose a modular system, custom-built solution, or decide to tackle a DIY closet shelving project, the benefits extend far beyond basic organization.

As you consider your options, remember that each type of system offers distinct advantages. Modular systems provide flexibility and adaptability, while custom-built options maximize every inch of available space. Similarly, wall-mounted designs create a modern floating appearance, whereas floor-based systems offer greater weight capacity and deeper storage options.

The decision between DIY and professional installation ultimately depends on your skills, budget, and time constraints. Although DIY projects cost less initially, professional installation provides expertise, warranties, and significantly reduces the time investment required.

How to Fold Clothes to Avoid Wrinkles in Expensive Outfits

0
How to Fold Clothes to Avoid Wrinkles in Expensive Outfits

I’ve ruined expensive shirts before just by folding them wrong. Sharp creases made them look worn before I even put them on. Clothes wrinkle because folds trap tension in the fabric, and some materials crease more than others. In this guide, I’ll show you the exact folding and packing methods I use to keep clothes smooth. These steps work at home and when traveling. By following them, you’ll save time, protect delicate fabrics, and always look presentable.

Why Clothes Wrinkle After Folding?

redfinz new images

Clothes wrinkle after folding because sharp bends create stress points in the fibers. These points lock the fabric in place until heat or moisture releases them. Cotton and linen crease the fastest, while polyester, wool blends, and some synthetics hold their shape better.

Fabric Types That Wrinkle Easily

Cotton is breathable but its natural fibers bend easily, which is why shirts and trousers wrinkle quickly. Linen is even more prone to deep creases because of its stiff texture.

Fabrics That Resist Wrinkles

Polyester and spandex blends bounce back into shape, making them good options for travel. Wool blends resist wrinkles too, as their fibers spring back naturally.

Everyday Analogy

Think of paper. Fold it once and a line appears. That line stays until you press it out. Clothes behave the same way.

redfinz new images

Best Folding and Packing Techniques to Keep Clothes Smooth

Rolling clothes is one of the easiest ways to keep them smooth while saving suitcase space. Instead of creating sharp folds, rolling forms soft curves that don’t trap deep creases. It works best for t-shirts, dresses, casual wear, and gym outfits. Here’s the process: lay the item flat, smooth out any wrinkles, fold sleeves inward, and roll tightly from the bottom up. Rolled clothes also fit neatly into packing cubes, making travel easier.

Bundle Wrapping: Protects Delicate Items

Bundle wrapping is perfect when you’re packing delicate fabrics like silk or linen. This technique reduces folds by layering clothes around a bulky core, such as a sweater or jacket. Place heavier items inside, then wrap lighter, more fragile clothes on the outside. I rely on bundle wrapping for my silk shirts when I travel—they consistently arrive wrinkle-free.

KonMari Folding Method: Perfect for Storage

At home, the KonMari folding method keeps clothes both neat and wrinkle-free. Clothes are folded into upright rectangles, so they stand vertically in drawers. This reduces crushing from stacked piles and makes it easy to see every piece at a glance. To do it: fold lengthwise, fold again into a rectangle, then stand upright.

Using Tissue Paper and Plastic Dry Cleaning Bags

Friction is one of the biggest causes of wrinkles. Placing tissue paper between clothes or slipping delicate garments into dry cleaning bags reduces that friction. The tissue cushions folds, while the plastic prevents fabrics from pressing into each other. I tried this with a silk dress, and it stayed perfectly flat.

How to Pack Specific Items Without Wrinkles

How to Pack Specific Items Without Wrinkles

Shirts and Blouses

Shirts and blouses wrinkle quickly if folded carelessly, but a small adjustment makes a big difference. Always button them before folding this keeps the fabric aligned and prevents shifting. Lay the shirt flat, smooth it out with your hands, and fold each sleeve straight across the back. Next, fold the shirt lengthwise into thirds so it stays flat and compact. This method avoids deep creases on the front panel, keeping collars and cuffs crisp.

Step-by-step folding guide for shirts and blouses:

  1. Button up the shirt completely.
  2. Lay it face down on a flat surface.
  3. Fold sleeves inward across the back.
  4. Fold the shirt lengthwise into thirds.
  5. Place flat on top of heavier clothing or in a packing cube.

Pants and Trousers

Pants and trousers often develop harsh horizontal creases when folded incorrectly. The trick is to reduce the number of folds. Start by folding pants lengthwise so the seams align. From here, fold them once or twice depending on how much space you have. If your luggage is tall enough, a single fold is best—it minimizes creases along the legs. For wool trousers or dress pants, slip a sheet of tissue paper between the folds for extra protection.

Pro tip: Place pants at the bottom of your suitcase so they stay flat under lighter items.

Dresses and Formal Wear

Dresses require special care because they come in so many fabrics and lengths. Soft, casual dresses like cotton or jersey can be rolled to save space without trapping deep wrinkles. For more structured or formal gowns, layering tissue paper inside folds prevents creases. Expensive or delicate pieces, such as silk or satin dresses, should go in garment bags for maximum protection.

Dry cleaning professionals emphasize this step. According to the Dry Cleaning & Laundry Institute, garment bags are one of the most effective ways to prevent wrinkles during travel, especially for evening gowns and formal wear. If you’re flying, consider a carry-on garment bag with a hanging option to keep dresses untouched until you arrive.

Quick Wrinkle Fixes at Your Destination

redfinz new images

Unpack and Hang Clothes Fast

The best way to stop wrinkles after a trip is to unpack as soon as you arrive. Hanging clothes right away lets gravity work to release minor creases. A shirt left in a suitcase for hours will always look worse than one quickly moved to a hanger.

Use Steam from a Shower

Steam is one of the easiest wrinkle fixes. Hanging clothes in the bathroom while running a hot shower loosens fabric tension, letting folds relax naturally. I’ve saved more than a few shirts this way before heading into last-minute meetings.

Pro tip: Keep some space between clothes and the shower to avoid water spots.

Wrinkle-Release Spray

Wrinkle-release spray softens fibers, making small creases fade fast. It’s best for light wrinkles on cotton, blends, or travel knits—not for deep-set folds. Just spray lightly, smooth the fabric with your hands, and let the piece air dry for a few minutes.

Portable Travel Steamer

A compact travel steamer is the most reliable way to remove wrinkles quickly. It works well on cotton, silk, and linen without damaging fibers. I always pack mine for business trips—it’s saved me before client dinners and formal events.

According to a recent travel gear survey, portable steamers rank among the top five best-selling travel gadgets, showing how many travelers rely on them for fast fixes.

Storing Clothes Properly at Home

redfinz new images

Flat Surface Folding

Always fold clothes on a flat, clean surface. It keeps edges aligned and prevents uneven pressure that causes wrinkles. A bed or table works better than folding straight from a laundry basket.

Don’t Overfill Drawers

Stuffed drawers press clothes together until deep creases form. Leaving space allows air to circulate and fabrics to settle naturally. Think of it like stacking pancakes—too many, and the ones at the bottom get squashed.

Use Dividers and Boxes

Drawer dividers and storage boxes keep stacks separated. This reduces shifting, keeps piles from toppling, and prevents pressure wrinkles. It also makes grabbing what you need easier without disturbing the rest.

How to Fold Clothes to Avoid Wrinkles

The best ways to avoid wrinkles are rolling clothes or using bundle wrapping. Rolling works well for shirts and casual clothes. Bundle wrapping is better for delicate fabrics like silk.

To prevent wrinkles, fold clothes with as few creases as possible or roll them tightly. Smooth out wrinkles before folding, fold sleeves back, and use tissue paper if needed. After unpacking, hang clothes or use a wrinkle spray to remove any leftover creases.

How to Stop Clothes from Wrinkling

To reduce wrinkles choose wrinkle-resistant fabrics and avoid overloading your washer or dryer. Use the right cycle settings remove clothes as soon as they’re dry and hang or fold them right away. Store clothes with enough space in your closet. For quick wrinkle removal use a wrinkle-release spray or hang clothes in a steamy bathroom.

Conclusion

Keeping clothes wrinkle-free isn’t complicated—it’s about using the right method for the right fabric. Rolling helps for travel, bundle wrapping protects delicate items, and KonMari folding works best for drawers at home. Adding tissue or plastic layers gives extra protection when needed.

If you treat your clothes with care from the start, you’ll avoid the frustration of ironing later. I’ve found that once you start folding and packing this way, your outfits always look ready to wear. Try these techniques, and your clothes will thank you.

how to make 100 percent cotton workout clothes

0
Considerations for 100% Cotton Workout Clothes

Many people choose 100% cotton workout clothes because the fabric is soft, breathable, and comfortable for everyday wear. Cotton isn’t the best option for high-intensity workouts since it absorbs sweat and dries slowly, but it works well for yoga, stretching, or casual gym sessions.

This guide gives you step-by-step instructions to sew your own cotton workout clothes at home, from choosing the right pattern to finishing the garment. With the right fabric and simple sewing techniques, you can create pieces that are comfortable, practical, and suited for light exercise.

Step 1: Choose the Right Pattern

redfinz new images
Cotton vs. Synthetic: Why the natural choice may not be cotton

Options for Workout Clothes

The first step is selecting a pattern. Common choices include a T-shirt, tank top, shorts, or leggings. Each piece offers a different level of coverage and movement, so choose based on your workout style.

Where to Find Patterns

Beginner-friendly sewing patterns are widely available online or at local sewing shops. Many brands label patterns as “easy” or “beginner,” making them a safe starting point.

Why Pattern Choice Matters

The right pattern ensures comfort and freedom of movement. Workout clothes should fit close to the body without restricting flexibility, especially during stretching or bending.

Step 2: Select the Best Cotton Fabric

redfinz new images

Types of Cotton Fabric

Not all cotton works the same for workout clothes. Quilting cotton is sturdy and soft but has almost no stretch, so it feels restrictive during exercise. Lightweight cotton is breathable and airy, but it can be too thin and wear out quickly. Jersey knit cotton is the best choice because it stretches with movement, recovers its shape, and feels soft against the skin, making it more suitable for workout garments.

Why Jersey Knit Works Best

Jersey knit cotton moves with your body, making it more practical for workouts than woven fabrics. It also feels softer against the skin, which adds comfort during exercise.

Tips for Buying Quality Fabric

Check fabric weight before purchase. Medium-weight jersey knit with good elasticity is ideal. Always buy from trusted sewing stores to avoid stiff or poor-quality cotton.

Step 3: Prepare the Fabric Before Sewing

redfinz new images

Pre-Wash to Prevent Shrinking

Cotton fabric almost always shrinks after the first wash. Pre-washing the fabric in cold water ensures the finished workout clothes keep their proper size. Dry it fully before moving to the next step.

Iron for Smooth Cutting

Wrinkled fabric makes cutting inaccurate. Iron the cotton on a medium setting to smooth out creases. A flat surface makes the pattern pieces more precise.

Lay Fabric Flat for Accuracy

Spread the fabric evenly on a large table or cutting mat. Keep edges aligned and free of folds. A flat base prevents uneven shapes when cutting pattern pieces.

Step 4: Cut the Fabric Accurately

Accurate cutting is essential in sewing. Crooked cuts or ignored markings can cause poor fit, uneven seams, and wasted fabric. With the right tools and methods, you can cut fabric pieces that align perfectly and sew together smoothly.

Follow the Pattern Markings Carefully

Pattern markings guide the entire project. Place your pattern on fabric with the grainline arrow parallel to the fabric’s edge to prevent twisting or distortion. Pin or use weights to secure it. Transfer notches, darts, and fold lines with tailor’s chalk, washable pens, or small snips in the seam allowance. Always check that you’re cutting mirrored pieces where needed—this avoids mistakes like two left sleeves.

Use Sharp Fabric Scissors or a Rotary Cutter

Sharp cutting tools give clean edges. Reserve fabric scissors only for fabric, not paper. For straight lines or knit fabrics, a rotary cutter with a cutting mat and ruler provides precise results. Cut steadily and avoid rushing to prevent jagged edges. For slippery fabrics, place tissue paper underneath to reduce shifting. Good lighting ensures accurate cuts and visibility of markings.

Tips for Keeping Edges Clean

Neat edges reduce fraying and make sewing easier. Handle cut pieces gently and keep them flat until sewing. Use pinking shears for cotton or linen, or finish edges with a zigzag stitch or serger for durability. Always cut on a flat, stable surface with fabric pressed smooth. Match your edge-finishing method to the fabric type: heavy fabrics need secure finishes, while knits may only need trimming.

Considerations for 100% Cotton Workout Clothes

redfinz new images

Comfort and Breathability

Cotton feels soft against the skin and lets air flow, which makes it comfortable for long wear. It’s a natural choice for people who prefer breathable fabrics.

Sweat Absorption

Cotton absorbs sweat quickly but doesn’t dry fast. During high-intensity workouts, this can leave clothes feeling heavy and damp. That makes it less suitable for activities where you’ll sweat a lot.

Best Uses and Alternatives

100% cotton works best for yoga, stretching, or casual exercise. For running, cardio, or strength training, blends like cotton with spandex are better since they add stretch and improve sweat control.

Conclusion

Making 100% cotton workout clothes is simple if you follow the right steps. Choose a suitable pattern, pick quality cotton like jersey knit, prepare the fabric, cut carefully, and sew with strong seams. Each step helps create clothes that fit well and feel comfortable.

Cotton offers softness and breathability, but it doesn’t handle sweat well. It’s best for low-impact activities like yoga, stretching, or casual exercise where comfort matters more than performance.

Don’t be afraid to experiment with patterns and fabrics. Trying different cotton types or blending fabrics can help you design workout clothes that match both your style and your needs.

Black Hair Dye Stained Entire Bathroom

0
Black Hair Dye Stains from Your Entire Bathroom

Dealing with a black hair dye stained entire bathroom can be frustrating. Hair dye pigments are highly concentrated and can bond quickly with porcelain, tiles, and grout.

 Once they dry, they become tougher to clean, especially in bathrooms with textured or porous surfaces.

This guide from redfinz.com shares reliable, safe, and tested cleaning methods to remove stubborn dye marks from sinks, bathtubs, tiles, and more. 

You’ll also learn what causes these stains, how to prevent them, and which household products deliver the best results.

Whether you’re tackling a fresh spill or trying to lift old marks, these solutions work effectively on both ceramic and acrylic surfaces. 

Before starting, always test a small area and wear gloves to protect your hands. Let’s explore how to clean up hair dye in the bathroom quickly and safely while keeping your fixtures spotless.

For more detailed surface-specific cleaning guidance, see this expert article from Bathroom City.

How to Clean Up Hair Dye in Bathroom

Black Hair Dye Stained Entire Bathroom

You can clean up hair dye in the bathroom by using non-abrasive cleaners such as vinegar, baking soda, rubbing alcohol, or hydrogen peroxide. These ingredients lift dye stains without scratching or dulling the surface. Always test a hidden spot first.

When cleaning, use soft sponges or cloths instead of metal brushes. Avoid harsh scrubbing because it can cause permanent surface damage. Combine equal parts of white vinegar and baking soda paste for a safe, homemade cleaning solution. Apply it to the stained area for 10–15 minutes, then rinse with warm water.

If the stain remains, use a cotton ball soaked in rubbing alcohol or hydrogen peroxide and dab gently until the pigment fades. Always wear gloves and keep the bathroom fan on for proper ventilation.

These cleaning methods work well on tiles, sinks, and tubs, making them the best way to maintain shine without using strong bleach sprays.

These home remedies work effectively without strong chemicals, saving both money and your bathroom’s finish.

7 Quick Fixes for Different Surfaces

Each bathroom surface reacts differently to dye. A cleaner that works on tiles may not suit an acrylic tub or granite counter. Below are seven quick fixes tailored for each material. These simple techniques use common household products and avoid harsh chemicals.

Follow the steps carefully for the best results and minimal surface wear. Let’s see how to remove hair dye stains effectively from every area — from sinks and tubs to metal fixtures — using home-safe products you already own.

1. Sink – Use Baking Soda and Alcohol

Bathroom sinks often absorb stains quickly, especially porcelain types. To learn how to get black dye off sink, mix baking soda with warm water to create a mild scrub. Gently apply it to the stained area with a soft sponge or a Scrub Daddy pad. Let it sit for five minutes.

If the stain is still fresh, rinse the sink with cold water first before scrubbing. This helps prevent the dye from setting deeper into the porcelain.

Next, dampen a cotton ball with rubbing alcohol and wipe in circular motions. This helps lift excess dye without harming the surface. Avoid using straight bleach or any harsh cleaner on a porcelain sink, as it may cause dullness or permanent marks.

If stains persist, apply a small amount of toothpaste or soft scrub and rinse thoroughly. Using old towels to dry prevents streaks and keeps the sink glossy.

For routine cleaning, switch to gentle dish soap or washing up liquid to maintain surface shine and prevent new stains.

2. Bathtub – Try Hydrogen Peroxide Mix

If you’re wondering how to remove black hair dye from bathtub, the safest approach is a hydrogen peroxide solution. Mix equal parts hydrogen peroxide and warm water in a spray bottle. Apply directly to the stained area and let it sit for 10 minutes.

Scrub gently using a soft sponge or Scrub Daddy, focusing only on affected areas. Avoid using steel wool or abrasive pads, which can dull the acrylic finish. For stubborn stains, repeat the process and rinse with hot water afterward.

If you have an enamel or ceramic tub, you can add a small amount of Bar Keepers Friend or barkeepers friend for deeper cleaning. Always rinse thoroughly and dry with a clean cloth to restore shine.

Using protective mats in your tub before dyeing hair is a good idea to prevent future stains.

3. Tiles – Use Vinegar and Baking Soda

For anyone asking how to get hair dye off bathroom tiles, a simple vinegar and baking soda combo works wonders. Sprinkle baking soda over the stained area, then spray with white vinegar until it fizzles. Let it sit for 10 minutes before scrubbing gently with a soft sponge.

This reaction loosens color particles without harming the tile glaze. You can also try a mild hair dye remover on tough tile stains, but always test it first to avoid dulling the glaze. For stubborn stains, repeat once more, but avoid leaving vinegar on marble for long periods as it can etch the surface.

If you have tough stains, use a bit of lemon juice or toothpaste as a final polish. Regular maintenance after every dye session keeps tiles spotless and shiny.

4. Grout – Apply Oxygen Bleach Paste

Grout tends to trap pigment deeper than other surfaces. To remove hair dye stain from tiles grout lines, make an oxygen bleach paste using baking soda and little water. Apply it with an old toothbrush and let it rest for 15 minutes.

Scrub gently and rinse using hot water. Avoid using metal brushes to prevent scratches. This cleaning method keeps grout lines bright without weakening the sealant.

You can also use a small amount of toilet bowl cleaner for older, stubborn stains, but test first to avoid damage.

5. Shower Walls – Use Non-Abrasive Bathroom Cleaner

People often ask, does black hair dye stain shower walls? Yes, it can if not cleaned immediately. Spray a non-abrasive bathroom cleaner or a mix of dish soap and hydrogen peroxide on the stained surface. Wait five minutes, then wipe with a soft sponge.

Avoid bleach sprays unless necessary because they can affect sealants. For semi-permanent hair color splashes, repeat cleaning twice.

Rinse with warm water and dry completely. Regular cleaning after each hair coloring helps prevent buildup and keeps bathroom surfaces looking new.

6. Countertops – Use Magic Eraser or Dish Soap Mix

Removing black hair dye stains from bathroom countertop using Magic Eraser and dish soap mix

Countertops, especially bathroom counters, can stain from dye drips. The best way to remove them is with a Mr Clean magic eraser or a dish soap and baking soda paste.

Dampen the eraser with warm water, rub gently over the mark, then rinse. This technique works on non-porous surfaces such as quartz, laminate, or granite. Avoid harsh abrasives that could remove polish.

If the stain lingers, dab a cotton ball with rubbing alcohol. For any remaining marks, add a few drops of nail varnish remover on a cotton pad to lift leftover dye. Always test a small corner first, then reapply if needed. Dry using old towels to keep the counter glossy.

Preventive cleaning immediately after coloring delivers the best results every time.

7. Faucets and Metal Fixtures – Rubbing Alcohol Wipe

For chrome or stainless fixtures, apply a few drops of rubbing alcohol to a clean cloth and wipe gently. It removes dye spots instantly and restores shine.

Avoid bleach spray or steel wool, which can scratch metal. Always dry immediately to prevent calcium deposits or water spots.

This quick fix keeps faucets and handles clean while protecting their polished finish.

Cost of Hair Dye Stain Removal

Cleaning products for hair dye stains are affordable and widely available. A basic kit using hydrogen peroxide, baking soda, white vinegar, and dish soap costs under $20. Professional-grade cleaners like Bar Keepers Friend or soft scrub are slightly higher but last for months.

Costs depend on surface type and stain age. Acrylic bathtubs and porcelain sinks may require extra steps, while tile and grout respond faster.

Most stains can be lifted with everyday household products, making this the easiest way to keep your bathroom fresh without hiring professionals.

Prevention Tips for Next Time

Preventing stains saves time and effort. Always wear gloves and cover surfaces with old towels or plastic sheets before coloring. Applying a thin layer of washing up liquid or petroleum jelly on sink edges helps repel color.

Clean up immediately after rinsing your hair using warm water and mild soap. Installing protective mats in your bathroom floor and tub can also help.

Here’s a quick comparison:

Method Effectiveness Suitable Surface
Baking soda paste ★★★★☆ Tiles, counters
Hydrogen peroxide mix ★★★★★ Bathtub, grout
Dish soap + vinegar ★★★★☆ Shower walls, sinks

Small, consistent care habits keep your bathroom looking spotless every time.

For more ideas on maintaining or upgrading your bathroom, check out our detailed guide on remodeling a small bathroom.

Final Thoughts

Accidents happen, but cleaning a black hair dye stained entire bathroom doesn’t have to be stressful. With the right cleaning methods and everyday household products, you can restore every surface safely.

Stay consistent, act quickly, and keep your cleaning routine simple. Whether you use hydrogen peroxide, rubbing alcohol, or a gentle baking soda paste, each method offers reliable stain removal for lasting results.

For more CleaningTips and practical home guides, explore our latest posts on redfinz.com — your trusted source for smart, tested home care ideas.

11 Expert Ways to Remove Blood from Your Carpet: A Complete Guide

0
11 Expert Ways to Remove Blood from Your Carpet A Complete Guide

How to  Remove Blood from Your Carpet: A Complete Guide

Without making it a scene straight out of a crime drama. Blood stains may seem insurmountable, but they’re easily eradicated with just a few easy steps. No special equipment or cleaners are needed – simply items from around your home and local cleaners will do.

Follow these practical tips and you’ll quickly gain control of stubborn blood stains without spending extra money on tools; cold water, pantry staples and cleaners should do just fine! Be patient; pick your method carefully and work step-by-step toward success! Your carpet can look fresh again! Take each step carefully and it will soon return to life.

How To Get Blood Out Of Carpet

How To Get Blood Out Of Carpet

1. Blot with Cold Water

  • Get yourself a clean white cloth or paper towel.
  • Soak the bread in cold ice-cold water.
  • Never reach for hot water.
  • Press firmly on the stain,
  • Lift the cloth straight up.
  • Switch to a dry area of the cloth as blood transfers.
  • Repeat until the stain looks much lighter.

2. Mix Dish Soap and Cold Water

You’ll see how to clean blood out of carpet without harsh chemicals in this step.

  • Add 1 teaspoon of light dish detergent to 2 cups of cold water.
  • Pour the mixture in a spray can or dampen up a cloth.
  • Spray or wipe the stain, but not wet.
  • Wipe using a clean towel until the blood is raised.
  • Blot in plain cold water to remove soap.

3. Apply Hydrogen Peroxide

This fizzy trick shows how to clean blood stains from carpet when soap alone can’t handle dried spots.

  • Test a drop of 3% hydrogen peroxide in a hidden corner.
  • Once it stays color-true, pour a small amount onto the stain.
  • Watch the bubbles break up blood proteins for 3–5 minutes.
  • Blot with a clean cloth
  • Rinse thoroughly with cold water.
  • Dab the spot with a paper towel to dry as quickly as possible.
  • Do this for 60 to 120 seconds.
  • Dry the spot by pressing a paper towel firmly
  • Do it for 1–2 minutes.

4. Use a Baking Soda Paste

  • Create a thick paste by mixing 3 parts baking soda with 1 part cold water into a thick mixture.
  • Apply the paste evenly over the stain.
  • Let it sit for 30–60 minutes until fully dry.
  • Scrape off residue with a spoon or a blunt knife.
  • Vacuum the powder
  • Blot away any damp bits.

5. Spray Vinegar and Water

11 Expert Ways to Remove Blood from Your Carpet A Complete Guide

  • Combine equal parts white vinegar and cold water in a spray bottle.
  • Mist the stained area
  • Let it soak for 10–15 minutes.
  • Blot with a clean cloth, re-spraying if needed.
  • Rinse by misting cold water
  • After that, blot dry.
  • Fluff the fibers with your fingers once it completely dries.

6. Try an Ammonia Solution

  • Wear gloves. After that, open the window for optimal airflow.
  • Combine one tablespoon of clear ammonia with 1/2 cup of water.
  • Instead of pouring directly onto a stain, dabbing should be employed.
  • Use a clean cloth to blot up until the stain has vanished.
  • Rinse it thoroughly with cold water to get rid of any trace of ammonia scent.

7. Treat with Cornstarch or Salt

  • Stir cornstarch or table salt with just enough water to form a paste.
  • Cover the stain completely with the paste.
  • Let it dry for several hours.
  • Vacuum up the powder, which now holds the blood.
  • Dab any leftover dampness with cold water and blot dry.

8. Apply an Enzyme Cleaner

  • Choose a pet-stain enzyme cleaner—these target protein stains.
  • Spray directly onto the stain per label directions.
  • Hold off for 10-15 minutes as enzymes break down blood.
  • Blot or rinse away the residue using cold water.
  • Repeat if the stain still shows.

9. Sprinkle Meat Tenderizer

You’ll learn how do you remove blood stains from a carpet using a kitchen staple.

  • Dampen the stain lightly with cold water.
  • Sprinkle unflavored meat tenderizer over it.
  • Let it rest for 15–20 minutes so enzymes can work.
  • Blot the powder and stain with a clean cloth.
  • Rinse by dabbing cold water, then blot dry.

10. Use a Commercial Carpet Stain Remover

  • Pick a spot cleaner labeled safe for protein stains.
  • Shake the bottle well and apply per instructions.
  • Lightly scrub with a soft brush if needed.
  • Rinse by blotting with cold water to remove the cleaner.
  • Press a dry towel on the spot for a few minutes to soak up moisture.

11. Call Professional Cleaners

  • Search for carpet pros with top ratings in your area.
  • Ask if they use hot water extraction for deep stains.
  • Confirm they apply enzyme boosters for blood removal.
  • Schedule a deep-clean session.
  • Examine the results and request additional improvements if needed.

 Table: 11 Smart Ways to Remove Blood from Carpet

Below are 11 effective methods to tackle blood stains on carpet using common household items or professional help. Each method lists what to use, the key steps, and how to dry the area.

No. Method Main Ingredient Key Steps Drying
1 Blot with Cold Water Cold water Blot stain with cold wet cloth, lift & repeat until lighter Blot with dry cloth
2 Dish Soap Solution Dish soap + cold water Apply mix, blot until clean, rinse with cold water Blot dry
3 Hydrogen Peroxide 3% Hydrogen peroxide Test area, pour on stain, fizz 3–5 mins, blot & rinse Dab with paper towel
4 Baking Soda Paste Baking soda + water Spread paste, dry 30–60 mins, scrape off, vacuum Blot damp areas
5 Vinegar Spray Vinegar + water Mist stain, wait 10–15 mins, blot, rinse with water Blot & fluff when dry
6 Ammonia Solution Ammonia + water Dab with cloth, blot until clean, rinse thoroughly Air dry or blot
7 Cornstarch or Salt Paste Cornstarch or salt Apply paste, let dry, vacuum, blot dampness Blot dry
8 Enzyme Cleaner Enzyme spray Spray, wait 10–15 mins, blot or rinse Blot until dry
9 Meat Tenderizer Unflavored tenderizer Sprinkle on wet stain, wait 15–20 mins, blot & rinse Blot dry
10 Carpet Stain Remover Commercial cleaner Apply per label, scrub if needed, rinse Press towel to dry
11 Professional Cleaners Expert service Book pro cleaning with enzyme/steam options Based on service method

How to Keep Your Carpet Stain-Free | Expert Prevention Tips

  • Act Immediately: The quicker the better, the faster you will have a chance to remove a stain completely.
  • Always Cold Water: It is always remembered that heat is the enemy of a bloodstain.
  • Blot, Not Rub: Blotting picks the stain up; pushing it in with your finger.
  • Test Cleaning Solutions: It is always better to test the cleaner on some corner of the carpet where it cannot be seen first to be sure it is not going to give discoloration.
  • An example is a Carpet Protector: Once the cleaning person has completed his job, ask him to apply a stain protector. This is an invisible shield which aids in repelling spills and more time is taken to clean them.

FAQs 

Can you get dried blood out of a carpet?

Yes, but it takes more work.

  • Scrape off with a spoon or a dull knife any flaky part of the stain that has dried.
  • Vacuum up the debris.
  • Moisten the stain using a cleaning solution such as vinegar-water mixture or hydrogen peroxide and then carry out a procedure of blotting.

What is the best homemade blood stain remover?

The most desirable remover is situation specific.

  • To treat fresh stains on any variety of carpet, an easy mixture of cold water and weak dish soap is the most secure and frequently the most efficient one.
  • On harder-to-clean synthetic carpets of light color, 3 per cent hydrogen peroxide is perhaps the strongest homemade cleaner.

Will OxiClean remove blood from carpet?

Yes, OxiClean and others of this sort are good with blood stains.

  • Oxygen cleaners cause degradation of the stains of organics by releasing bubbles that destroy the stain.
  • Use the specific instructions of the product when mixing the solution.
  • Check it out on a non-delicate area at first because it is too strong to some sensitive materials.

How long does it take for a bloodstain to become permanent?

A blood stain may start to solidify within 15 minutes.

  • Drying rate is affected by such factors as temperature and humidity in the room.
  • The sooner you do it, the more chances you have to clean 100 per cent of the stain.

Start Winning Against Stubborn Spots

A splash of blood does not necessarily spell doom on your carpet. You can easily get rid of virtually any spot by moving fast and selecting the appropriate approach to your circumstance. Keep in mind the golden rules: do not forget to act fast, use cold water and always blot, but never rub. These professional suggestions and some patience will help you easily overcome this popular domestic issue and ensure your floors are always clean.