Wednesday, March 18, 2026

How to Get Expo Marker Out of Clothes

0
How to Get Expo Marker Out of Clothes

Getting the Expo marker out of clothes isn’t as simple as tossing them in the wash. The ink is alcohol-based, which means it sinks deep into fabric instead of rinsing away with water. That’s why regular soap and water often fail. In this guide, you’ll learn proven ways to remove Expo marker stains from different fabrics, plus smart prevention tips to keep future messes at bay. With the right approach, you can save your favourite clothes instead of throwing them out.

Why Expo Marker Stains Are Hard to Remove

Expo markers use alcohol-based ink, not water-based. Water-based ink sits on the surface and rinses out with ease, but alcohol-based ink clings to fibres and sinks deep into the fabric. That’s why soap and water barely touch the stain. Regular washing often sets the colour instead of removing it.

The real trick is acting quickly before the ink bonds to the fibres. Fresh stains respond best to simple solutions, while old ones need stronger cleaners. If you wait too long, the ink becomes stubborn and can permanently change the look of the fabric. Acting fast gives you the best chance of saving your clothes.

Quick and Effective Methods to Remove Expo Marker

redfinz new images

Rubbing Alcohol

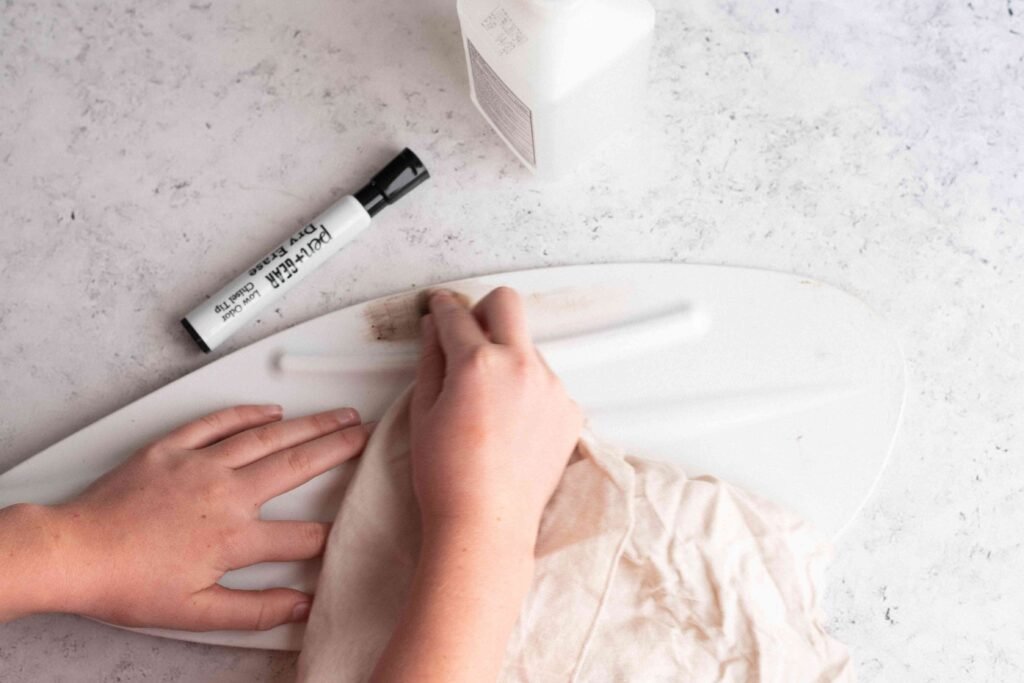
Rubbing alcohol is often the first choice for removing Expo marker stains. Place a paper towel or clean cloth under the fabric to stop the ink from spreading. Soak a cotton ball with alcohol and dab gently at the stain. You’ll see the colour transfer onto the cloth as the ink breaks down. Keep blotting with fresh cotton until no more colour lifts. Rinse thoroughly with cold water before putting the item in the wash.

Hand Sanitizer

Hand sanitiser works almost the same way because of its alcohol content. Apply a drop or two onto the stained spot and spread it evenly. Leave it for a minute, then blot with a damp cloth. This method is perfect when you’re on the go and don’t have rubbing alcohol nearby.

Hairspray

Hairspray is another quick fix. Spray enough to wet the stained area, blot gently, and rinse under cold water. Follow with a normal wash to remove any leftover residue.

Natural and Gentle Stain Removal Options

redfinz new images

Vinegar and Dish Soap Mix

A simple mix of white vinegar and dish soap can lift Expo marker stains without harsh chemicals. Combine one part vinegar with one part mild dish soap and two parts cold water. Dab the mixture onto the stain using a cloth, pressing gently to avoid spreading the ink. Blot until the colour starts fading, then rinse with cold water. This works well on cotton and polyester, but always test on delicate fabrics first.

Lemon Juice

Lemon juice can help on light fabrics where stronger cleaners might damage colour. Squeeze fresh lemon juice directly onto the stain, let it sit for five minutes, then blot with a damp cloth. Rinse thoroughly with cold water to avoid yellowing. This is best for white shirts or pale-coloured fabric.

Toothpaste

Toothpaste acts as a mild abrasive that works best on fresh or small stains. Apply a pea-sized amount directly to the mark, rub gently with your fingers or a soft cloth, and leave it for ten minutes. Rinse with cold water until the paste is gone. Avoid coloured or gel toothpaste, as they may cause new stains.

Stronger Solutions for Old or Set-in Stains

redfinz new images

Commercial Stain Removers

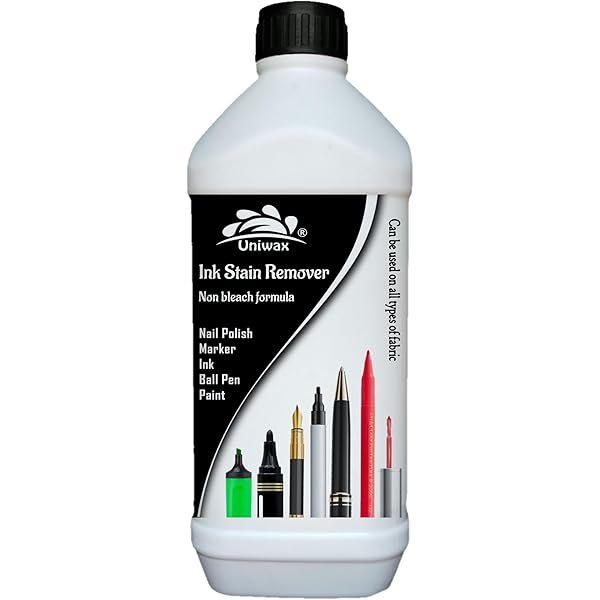
Old Expo marker stains often need heavy-duty cleaners. Products like OxiClean, Shout, or Zout are designed to target deep-set pigments.

Start by laying the stained clothing on a flat surface. Spray or apply the remover directly to the stained spot. Let it sit for at least five minutes to give the formula time to work.

Next, gently rub the fabric together or blot with a clean cloth. Rinse under cold water to lift away the loosened ink. Wash the item according to its care label. Always check before drying, because heat will lock in any leftover stain. If the mark remains, repeat the process until it fades.

Baking Soda and Vinegar Paste

Baking soda and vinegar make a foamy paste that helps loosen old stains. Mix three parts baking soda with one part vinegar until you get a thick, spreadable paste.

Apply the paste directly to the stain. Work it in gently with your fingers or a soft brush. Avoid scrubbing too hard, as baking soda can roughen delicate fabrics.

Leave the paste on the fabric for fifteen minutes. The bubbling reaction breaks down the marker pigments. Rinse with cold water and check the results. Repeat if the stain is still visible.

Oxygen Bleach (For Whites Only)

Oxygen bleach is a last option for white fabrics. It’s less harsh than chlorine bleach but still powerful enough for tough stains.

Fill a basin or sink with cold water. Add the correct amount of oxygen bleach following the package directions. Stir to dissolve it evenly.

Place the stained clothing into the mixture and make sure it’s fully submerged. Soak for at least an hour. For heavy stains, leave it overnight.

After soaking, rinse thoroughly with cold water and wash the item as usual. Don’t use oxygen bleach on coloured fabrics, as it can fade them. Always read the care label first, since some fabrics like silk or wool aren’t bleach-safe.

Oxygen bleach can restore white shirts, uniforms, and bedsheets that look ruined. But treat it as a last step after trying gentler methods.

What NOT to Do

Don’t Use Hot Water

Hot water makes Expo marker stains worse. It causes the ink to set deeper into the fibres, making removal nearly impossible. Always stick to cold water when rinsing or soaking stained clothes.

Don’t Dry Until the Stain Is Gone

Heat from a dryer will lock in any remaining ink. Once that happens, even strong cleaners won’t help. Always check the fabric before drying. If you can still see colour, repeat the cleaning steps first.

Don’t Scrub Too Hard

Scrubbing may seem like a quick fix, but it forces the ink deeper into the fabric. It can also damage delicate fibres. Instead, blot gently with a cloth or dab with cotton soaked in cleaning solution. Patience works better than force.

Prevention Tips

redfinz new images

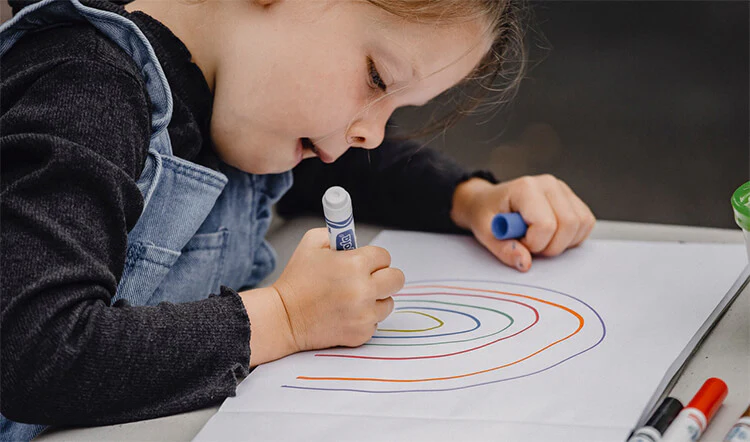
Keep Markers Away from Kids

Kids often use markers without thinking about stains. Store Expo markers out of their reach or give them washable alternatives. This small step saves you from endless stain removal.

Wear Protective Clothing

If you’re using Expo markers often, wear old clothes or an apron. One layer of protection is easier to clean than your favourite shirt. Think of it as a shield against accidental slips.

Choose Washable Markers When Possible

For home, school, or casual use, pick washable markers instead of Expo markers. They’re designed to rinse out with soap and water. Choosing the right tool up front is the easiest way to prevent ruined clothes.

Conclusion

Expo marker stains might look permanent, but the right method can save your clothes. Quick action is key, since fresh stains respond faster to cleaning. Rubbing alcohol, hand sanitizer, vinegar mixes, and stronger removers all play a role depending on the fabric and stain age.

Patience matters just as much as the cleaner you choose. Rinse with cold water, blot gently, and avoid heat until the stain is gone. Even tough stains on white fabrics can often be lifted with oxygen bleach if you follow directions carefully.

The best approach is prevention. Keep markers away from kids, wear protective clothing, and switch to washable markers when you can. With these habits, you’ll spend less time scrubbing and more time enjoying clothes that look clean and fresh.


How to Stitch a Princess Wedding Dress with Sleeves

0
Princess Wedding Dress with Sleeves

How to Stitch a Princess Wedding Dress with Sleeves Step by Step

Every bride wants a princess wedding dress that fits perfectly. Sewing one with sleeves means focusing on the bodice neckline and skirt.

Satin or lace works great for that voluminous look. Whether you choose puff sleeves long sleeves or detachable sleeves the dress should highlight your natural waistline and silhouette.

This step-by-step guide shows you how to stitch a princess-style gown with elegance and ease. You’ll create a timeless look fit for your special day.

What is Waistline in a Dress?

The waistline is where the top of the dress meets the skirt. It’s usually the narrowest part of the body and helps shape the dress. Common waistline styles include natural waistline empire waistline and drop waistline. Each one creates a different look and feel.

What is Silhouette in a Dress?

The silhouette is the overall shape or outline of the dress. It’s how the dress looks from a distance. For example a princess silhouette has a fitted bodice and a full skirt. An A-line silhouette is shaped like the letter A with a gradual flare from the waist.

Choosing the Right Fabric for Your Princess Wedding Dress

Choosing the Right Fabric for Your Princess Wedding Dress

  • The fabric sets the tone for the whole dress. It controls the shape the structure and the way it moves. Picking the right one matters more than most think.
  • Every princess wedding dress starts with fabric. It builds the silhouette adds weight or flow and helps the gown hold its shape. A well-chosen fabric highlights the waistline the neckline and the full skirt without needing extra support.
  • Satin is smooth and heavy so it gives a strong shape. It works well for formal princess gowns with long trains and fitted bodices. Lace adds soft detail and looks timeless on sleeves bodices or even layered skirts.
  • Tulle is light and sheer which makes it ideal for a voluminous skirt. It creates a soft fairytale effect without making the gown feel heavy. Using layers of tulle adds volume while keeping the dress easy to wear.
  • You want your fabric to match the dress style and the wedding setting. Indoor weddings suit satin and lace. Outdoor weddings work better with lighter fabrics like tulle or chiffon.
  • Some brides mix fabrics for contrast. A satin bodice with a tulle skirt can give balance. Lace sleeves with a plain satin base can show off detail without overdoing it.
  • Choosing fabric is not just about look. It’s about how the dress moves how it fits and how you feel on your big day.

Best Fabrics for Princess Wedding Dress: Satin Lace and Tulle

Best Fabrics for Princess Wedding Dress Satin Lace and Tulle

Satin is thick smooth and holds shape. It’s perfect for ball gowns with strong structure. It works well for fitted bodices and full skirts. Lace is soft and detailed. It adds texture to sleeves bodices and overlays.
It suits brides who want a classic bridal look. Tulle is light and sheer. It’s best for adding skirt volume without heaviness. Layering tulle gives a soft fairytale effect.

How Fabric Affects the Princess Dress Silhouette and Skirt Volume

Heavy fabrics shape the dress while light fabrics build volume.
Satin defines the waistline and gives structure.
Tulle creates a fuller skirt without stiffness.
Lace adds detail and softness without bulk. Choose based on look comfort and how the dress should move.

How to Stitch Princess Wedding Dress: Step-by-Step Guide

 Stitch Princess Wedding Dress

Stitching a princess wedding dress takes focus but it’s easier when you break it into parts. Start with a good pattern then move through the bodice sleeves and skirt one step at a time.

Preparing the Pattern for Princess Wedding Dress with Sleeves

Use a simple printed pattern designed for gowns with sleeves.
Cut out the pieces for the bodice sleeves and skirt.
Make sure the pattern matches your size and style.

Sewing the Fitted Bodice and Natural Waistline

Start by sewing the bodice panels together.
Use straight lines to shape the waistline and neckline.
The bodice should fit close to the body without gaps.

Attaching Puff Sleeves and Long Sleeves to Princess Wedding Dress
Puff sleeves give a soft rounded look.
Long sleeves offer full arm coverage and suit cooler weather.
Pin sleeves carefully before stitching to avoid puckering.

Creating the Voluminous Skirt: Using Tulle and Satin
Cut large panels of satin for the base.
Layer tulle on top for fullness and flow.
Gather the top edge of the skirt to fit the waist.

How to Finish Seams Neatly for a Professional Look

Trim loose threads after sewing.
Use zigzag stitches or bias tape to stop fraying.
Press all seams flat to keep the dress clean and sharp.

How to Attach an Overskirt to a Princess Wedding Dress

How to Attach an Overskirt to a Princess Wedding Dress

An overskirt adds extra volume and drama to a princess wedding dress. It can be worn for the ceremony then removed for the reception. If made right it blends with the dress and doesn’t pull on the bodice.

Step-by-Step Method to Attach Detachable Overskirts

  • Start by making the overskirt using tulle satin or lace.
    The top edge should match the waist of the dress.
    Gather or pleat it to control the volume.
  • Add small loops or hooks along the inside of the overskirt.
    Sew matching snaps buttons or ribbons to the waistband of the main dress. These should be hidden but easy to reach.
  • Try it on before the wedding day to check how it hangs.
    Make sure the back falls evenly and the train stays in line.

Tips for Keeping the Overskirt Secure Without Damaging the Bodice

  • Don’t stitch the overskirt directly into the bodice.
    Use soft hooks buttons or ribbons that don’t pull or tear the fabric.
    Avoid metal pins or zippers near delicate lace or satin.
  • If the bodice is tight add support fabric inside the waistline.
    This spreads the weight of the skirt and keeps the dress balanced.
    Keep the overskirt light so it moves well and stays in place.
  • An overskirt adds extra volume and drama to a princess wedding dress. It can be worn for the ceremony then removed for the reception. If made right it blends with the dress and doesn’t pull on the bodice.

Understanding the Difference Between A-Line and Princess Wedding Dresses

Both A-line and princess wedding dresses are popular bridal styles. They may look similar at first but they fit and flow differently. Knowing the difference helps you choose the right gown for your shape and setting.

Comparing the Silhouette and Design Elements

An A-line dress flares out slowly from the waist.
It forms a shape like the letter A.
The skirt is smooth and less full than a ball gown.

A princess dress has a fitted bodice and a full voluminous skirt.
It often uses tulle satin or lace for structure and flow.
The seams run from the shoulder down to the hem creating a sleek outline.

Princess-style gowns feel more formal and dramatic.
A-line dresses are simpler and suit both big and small weddings.

Which Style Suits Your Wedding Day and Body Shape

A-line wedding dresses flatter most body types.
They highlight the waist and give balance without adding bulk.
Great for outdoor or beach weddings where comfort matters.

Princess gowns suit brides who want a royal look.
They work best for tall or medium-height frames.
The full skirt and fitted bodice create a strong hourglass shape.

Choose the one that matches your body your setting and your dream wedding style.

How to Stitch a Princess Wedding Dress Easy for Beginners

How to Stitch a Princess Wedding Dress Easy for Beginners

You don’t need to be a pro to sew a princess wedding dress. With basic sewing skills and the right pattern you can create a gown that fits well and looks beautiful. Start small and take each step slowly.

Basic Sewing Skills Needed for Princess Wedding Dress

Learn how to thread a machine and sew in straight lines.
Practice turning corners and sewing curves around the neckline and armholes.
Know how to pin fabric and press seams flat with an iron.

You’ll also need to gather fabric and attach layers.
This helps shape the skirt and sleeves.
Use simple tools like scissors measuring tape and fabric chalk.

Using Pre-Made Patterns and Simple Cuts

Choose a beginner-friendly pattern made for gowns.
Look for styles with a fitted bodice and basic skirt.
Avoid patterns with too many panels or sharp angles.

Follow the size chart and cut each piece carefully.
Label the pieces to avoid mix-ups.
Stick to easy fabrics like cotton blends before trying lace or satin.

How to Stitch a Frock for Beginners Step by Step

Start with the bodice and join the front and back.
Attach the skirt at the waist with straight stitches.
Add sleeves last and hem the bottom.

Finish by pressing seams and checking the fit.
This gives the dress a neat clean look.
Your first dress may not be perfect but it will teach you everything you need.

Fixing and Altering Wedding Dresses

Small damage or fit issues don’t mean the dress is ruined.
You can fix tears adjust seams and still keep the dress looking like new.
All it takes is care the right tools and steady hands.

How to Stitch a Ripped Princess Wedding Dress

First check where the fabric is ripped.
If it’s near a seam unpick the area around it.
Use small straight stitches to rejoin the fabric without pulling too tight.

For lace or tulle place a layer of netting behind the tear.
Then sew carefully along the edges.
This helps hide the repair and stops the rip from growing.

Techniques to Repair and Reinforce Seams

Use matching thread to avoid visible repairs.
Double-stitch weak spots around the waistline and bodice.
Zigzag or overlock the edges to stop fraying.

If the dress feels tight open the seam slightly and add a small panel.
This gives extra room without changing the look.
Always press the seams flat after sewing to keep the shape clean.

Tips to Maintain the Dress’s Beauty After Alterations

Store the dress on a wide hanger to protect the shoulders.
Keep it in a garment bag away from light and moisture.
Steam instead of ironing to remove wrinkles without damaging lace or satin.

Check beads buttons and zippers before the big day.
A quick fix now can save trouble later.
Handle the dress with care and it will stay picture-perfect.

FAQS

what is lilac wedding dress?

A lilac wedding dress is a light purple bridal gown, perfect for modern, romantic weddings. It symbolizes grace, renewal, and individuality, standing out from traditional white. Shades range from soft lavender to deep violet, fitting spring or bold wedding themes. Styles often feature 3D flowers, tiered skirts, or long trains for a unique look.

what is a cupcake wedding dress?

A cupcake wedding dress is a dessert made by arranging cupcakes into the shape of a bridal gown. Each cupcake is frosted to blend into the design, creating the look of a full dress. It’s often used as a centrepiece or served at bridal showers and weddings.

what is a cocktail wedding dress?

A cocktail wedding dress strikes a balance between formal and casual. It’s shorter than a floor-length gown but more polished than everyday wear. Usually knee- or midi-length, it’s made from fabrics like satin or velvet for both style and comfort.

what is a black mermaid wedding dress?

A black mermaid wedding dress is a fitted gown that hugs the body and flares below the knee, styled like a mermaid’s tail. Its black color makes a bold, sophisticated statement, breaking from traditional white gowns.

Conclusion

A princess wedding dress isn’t just a look it’s a feeling.
From the bodice to the skirt every stitch adds to the moment.
When done right the dress fits your style your body and your day. You don’t need to be an expert. Start with simple patterns and basic fabric.
Work step by step and stay patient.

Whether you’re sewing from scratch fixing seams or adding details the key is care. Pick fabric that matches the design.
Use clean lines and strong stitches. The result is a dress made with heart. One that fits like it should and looks how you always pictured. That’s what makes it yours.

How Long Is a Toilet Paper Roll?

0
Bathroom toilet paper length

Toilet Paper Roll Length Explained

A standard toilet paper roll is typically about 4.5 inches wide and unrolls to around 90 to 100 feet in length. However, this can vary depending on the brand, number of sheets, and ply thickness. Jumbo and mega rolls may contain more than 1,000 sheets and extend well beyond 200 feet, making them ideal for high-use households.

Standard Dimensions of a Toilet Paper Roll

There is no universal standard for toilet paper roll dimensions, and sizes vary depending on the brand, region, and intended use.

Common Household Roll Sizes (North America)

In North America, a typical household toilet paper roll measures between 3.7 to 4.5 inches in width, with a roll diameter of 4 to 5 inches and a core diameter around 1.6 inches. Each sheet is roughly 4.5 by 4 inches, and most rolls contain 150 to 500 sheets, resulting in an average unrolled length of 75 to 150 feet.

Internationally, especially in Europe, sheet sizes may differ slightly, often measuring 10–12 cm wide. Commercial and jumbo rolls for high-traffic areas are larger, sometimes reaching 9 inches wide with diameters over 10 inches and larger cores. Additionally, coreless varieties exist for efficiency.

Dimensions can vary due to ply count, sheet quantity, roll tightness, and materials used (e.g., bamboo, recycled fibers). These factors not only affect size but also influence how long a roll lasts and how well it fits standard dispensers.

3. Factors That Affect Toilet Paper Roll Length

Factors That Affect Toilet Paper Roll Length

3.1 Sheet Count

The total length of a toilet paper roll largely depends on how many sheets it contains. More sheets mean a longer roll. Most packaging lists the sheet count, so checking this can help you compare rolls accurately. Standard rolls may have 150–350 sheets, while jumbo or mega rolls can exceed 1,000.

3.2 Ply Count

Ply refers to the number of layers in each sheet. Common options include 1-ply, 2-ply, and 3-ply. The more layers, the thicker the paper—offering more softness and strength—but thicker paper takes up more space. So, even if two rolls are the same size, a 3-ply roll will usually have fewer sheets and a shorter total length than a 1-ply roll. You trade length for comfort.

3.3 Roll Size Variants

Toilet paper comes in sizes like standard, jumbo, mega, and coreless. Jumbo and coreless rolls are more common in public restrooms and businesses, offering longer use between changes. Standard and mega rolls are better suited for home use.

3.4 Sheet Size and Density

The size and thickness of each sheet also change the total roll length. Compact rolls may have smaller or thinner sheets, so even if the roll looks large, it may not last as long as traditional options.

4. How to Use Toilet Paper More Efficiently

4. How to Use Toilet Paper More Efficiently

Folding vs. Crumpling

You can use toilet paper more wisely by folding it instead of crumpling. Folding covers more area and uses fewer sheets. Taking just a small amount, like 2 to 4 squares, is usually enough and helps avoid wasting paper

Choosing the Right Ply

The thickness of the toilet paper matters too. Thicker paper, like 2-ply or 3-ply, means you need fewer sheets each time compared to thinner paper. Even if thicker paper costs a bit more, it can last longer. Using the right amount and the right type of toilet paper helps the roll last longer and still feels comfortable.

The Role of Storage and Handling

Keeping toilet paper rolls dry and clean is essential to maintain their quality. Moisture can weaken the paper, making it tear easily, while dirt can make it unhygienic to use. Proper storage, such as in a cool, dry place or in a sealed container, helps extend the roll’s usability and prevents waste.

When buying in bulk, store extra rolls off the floor and away from humidity to keep them fresh and ready for use when needed. Good storage habits save money and reduce the chance of needing to replace damaged rolls.

Smart Toilets: The Eco-Friendly Alternative

Bidets use a gentle water spray to clean after using the toilet, which greatly reduces the need for toilet paper. This leads to less waste and saves money over time.

Features of Modern Smart Toilets

Modern smart toilets often feature warm water washing and air drying capabilities, providing added comfort and enhanced hygiene without relying on paper.

Environmental and Hygiene Benefits

By reducing toilet paper use, smart toilets help protect trees and minimize landfill waste. They also provide a cleaner, more refreshing experience compared to paper alone.

Choosing the Right Toilet Paper for Your Home

Choose roll sizes based on how many people use it—larger households need bigger or longer rolls to avoid frequent replacements. Smaller homes can stick with standard rolls to save space and reduce waste.

Balance comfort, cost, and convenience. Thicker rolls (2-ply or 3-ply) are softer but cost more and may run out faster. Thinner rolls (1-ply) last longer and cost less but feel rougher.

Check brand reputation and reviews to ensure quality and durability. Consider eco-friendly options if you want to reduce environmental impact. Pick a toilet paper that fits your household size, budget, and comfort preferences.

Quick Answer?

How long is a roll in feet or meters?

A typical toilet paper roll is about 100 to 150 feet (30 to 45 meters) long. Length varies by brand, paper thickness and sheet size. Larger “mega” rolls can be over 300 feet (90 meters) while smaller rolls are shorter.

What’s the difference between ply counts?

Ply count is the number of strands twisted together to make a single thread used in fabric. Higher ply counts, like 2-ply or 3-ply, create stronger, more durable, and often softer threads than a 1-ply thread. This added strength helps the fabric hang better, resist wrinkles, and have clearer stitch details.

Are smart toilets worth it?

Yes, smart toilets can be worth it for many homes. They use less toilet paper, help save water, and improve hygiene with features like bidet washing and air drying. They also offer comfort with heated seats and hands-free flushing. However, they cost more upfront, need electricity, and may require more maintenance. If you value comfort and efficiency, they’re a good investment.

Conclusion: Understanding Toilet Paper Roll Length

A typical toilet paper roll ranges from 90 to 150 feet (30 to 45 meters) in length, depending on sheet count, ply thickness, and sheet size. Larger rolls like mega or jumbo versions can exceed 300 feet, making them ideal for busy households. Factors such as ply (1-ply vs. 2-ply), roll tightness, and storage all affect how long a roll lasts.

Choosing the right toilet paper means balancing comfort, cost, and convenience. Thicker rolls feel softer but may run out faster, while thinner ones last longer. Smart storage and proper usage habits help reduce waste and improve overall value over time. Discover more related topics at Redfinz.


Best Hair Colors for Dark and Brown Skin Tones

0
hair shades for brown skin

Finding the best hair color for dark and brown skin tones is all about balance, undertones, and style. Whether you have deep, medium, or light brown skin, choosing the right hair color can highlight your natural beauty and bring warmth or contrast to your complexion. From jet black and chestnut brown to rose gold and platinum blonde, the options are endless if you understand your skin’s undertones and personal style.

Understanding Skin and Undertones

Before choosing your perfect hair color, it’s essential to know your skin undertone. People with warm undertones usually have golden or peach hues, while cool undertones lean toward pink or blue. Neutral undertones fall somewhere in between. Recognizing this difference helps you match the right shade for your complexion and avoid tones that clash. Your hairstylist can help you identify your undertone and recommend hair shades that enhance your facial features and natural color.

Best Hair Colors for Dark Skin Tones

Hair Colors for Brown Skin Tones 

Dark skin tones are incredibly versatile when it comes to hair shades. Deep browns, warm browns, and rich chocolate tones bring out the glow of darker skin. If you love bold colors, try auburn hair color, cherry red, or even dark red. These create contrast without overpowering your features. Jet black hair and blue-black shades deliver a strong, sleek, natural look that suits both men and women. For those who want a softer touch, mocha brown or chestnut brown adds dimension and warmth.

Hair Colors for Dark Skin with Warm Undertones

If your skin tone has golden undertones, the best hair color choices are warm hues that match your glow. Golden brown, caramel highlights, and honey blonde bring brightness and radiance. You can also try copper red or light auburn for a modern twist. For extra depth, add lowlights in dark chocolate or warm brown. These tones enhance darker skin tones without looking artificial, creating a sun-kissed, natural beauty effect.

Hair Colors for Dark Skin with Cool Undertones

Cool undertones work best with ashy shades and cooler hues. Try ash brown, cool brown, or ashy blonde for a smooth contrast. Blue-black and jet black are timeless options that make skin look luminous. Jewel tones like violet, emerald, or burgundy can make a bold statement while keeping balance with cool skin tones. If you prefer something softer, mocha or mushroom brown shades work beautifully.

Best Hair Colors for Brown Skin Tones

Brown skin tones range from light caramel to deep mocha, which opens up endless possibilities for hair color. Warm tones such as golden brown, honey blonde, and chestnut create a radiant finish, while cool shades like ash brown and cool brown give an elegant, neutral effect. Medium brown and dark brown hair colors blend well with most undertones. To experiment, consider rose gold or copper red for a fresh, modern look.

Highlights and Lowlights for Brown Skin

hair shades for brown skin

Adding highlights or lowlights can transform your look without a complete color change. Caramel highlights and blonde shades offer brightness to brown skin tones, while lowlights in chocolate tones or dark red provide contrast. If you want to go lighter, try blonde highlights or platinum blonde ends for a playful yet sophisticated finish. For subtlety, opt for golden hues or soft bronze highlights that add depth and light reflection to your hair.

Hair Colors for Black Women

Black women have rich skin tones that pair beautifully with a wide variety of hair colors. From natural black and dark chocolate to vibrant red hair color, the possibilities are endless. Golden undertones glow with warm browns, while cool tones pop with ash or jet black hair. Blonde shades like honey, golden blonde, or even platinum blonde can look stunning with the right balance. For a natural look, mocha brown or auburn hair color gives life and texture without being overpowering.

Haircuts and Hair Type Considerations

Hair Colors for Brown Skin Tones 

Your haircut and hair type play a big role in how a new hair color looks. Curly hair, long hair, and wavy textures hold color differently from straight hair. Layered haircuts show off color transitions like highlights and lowlights better, while shorter cuts emphasize bold colors. Deep conditioning treatments are essential for all hair types, especially when using dye. They help maintain hair health and shine, keeping your new hair color vibrant.

How to Choose the Right Shade

Selecting the right shade isn’t just about following trends. It’s about understanding your skin shade, undertones, and facial features. Warm tones like golden brown, caramel, or copper red suit those with yellow or golden undertones. Cool undertones match well with ash brown, jet black, or even platinum blonde. Neutral undertones can experiment with both warm and cool shades. Always discuss your hair ideas with a professional hairstylist before making a color change to ensure your final look complements your complexion.

Hair Color Trends and Bold Choices

Hair color trends are constantly evolving. Today’s bold colors include jewel tones, rose gold, and cool brown blends. These shades create dimension and personality while celebrating darker skin tones. Some people love making a bold statement with vivid colors like orange hair or cherry red, while others prefer more natural hair color shades such as dark brown or golden hues. Whatever you choose, ensure it matches your personal style and confidence.

Maintaining Healthy Hair After Coloring

Hair health should never be ignored after coloring. Use deep conditioning treatments weekly to protect against dryness. Choose sulfate-free shampoos and conditioners made for colored hair. Avoid excessive heat styling and always protect your strands from sun exposure. For darker skin tones, hair tends to be more prone to dryness, so moisturising regularly keeps your color fresh. Maintaining the right skincare routine also enhances your hair’s appearance, ensuring your skin and hair glow together.

Natural Look vs. Bold Statement

Some prefer a natural look with subtle brown tones, while others love bold colors that stand out. Natural hair color shades like chocolate, chestnut brown, and dark chocolate suit everyday wear and minimal maintenance. For those who love to experiment, go for a bold statement with copper red, dark red, or even orange hair. You can always balance the vibrancy with soft lowlights or warm undertones for a polished effect.

Hair Extensions and Modern Color Techniques

Hair extensions offer a chance to try new colors without long-term commitment. You can mix different hair colors such as blonde shades, mocha brown, or ash brown extensions to experiment with tones. Hair extensions also let you explore long hair styles or new highlights like caramel or gold tones without bleaching your natural hair. Many hairstylists use this method to showcase brand new hair color trends safely.

Choosing Hair Colors Without Bleach

If you prefer not to use bleach, opt for semi-permanent dyes in natural colors such as auburn hair color, chocolate tones, or medium brown. These shades enhance your skin’s undertones and add shine. Henna is another natural option for those who want to maintain a healthy, natural beauty routine. It’s safe for most hair types and gives a warm reddish hue that flatters darker complexions.

Hair Color for Different Skin Tones

For deep skin tones, dark brown hair, jet black, and blue-black colors work beautifully. For medium skin tones, golden brown, copper red, or rose gold add brightness. Pale skin and fair skin tones pair well with ashy blonde or light auburn for soft contrast. Each shade brings out the unique qualities of your skin color and eye color, enhancing facial features naturally.

Finding Inspiration for a New Hair Color

Finding Inspiration for a New Hair Color

If you’re looking for a brand new hair color idea, start by browsing the latest hair color trends in the United States or globally in countries like Vietnam, where fashion and beauty inspiration often combine traditional and modern looks. Many hairstylists recommend trying caramel highlights or golden hues for a fresh, modern twist. Consider your lifestyle, hair type, and personal style before choosing the perfect shade.

Matching Hair Color with Eye Color

Your eye color also plays a part in choosing your perfect hair color. Brown eyes pair beautifully with warm browns and dark chocolate shades. Hazel eyes look radiant with copper red or chestnut brown. Blue or green eyes pop with cool brown or ash blonde shades. Always choose a tone that complements both your skin undertone and eye color for a harmonious look.

Caring for Colored Hair

After coloring, maintain your hair with gentle care. Deep conditioning is crucial for restoring moisture. Use leave-in treatments, avoid over-washing, and apply oils to keep your strands healthy. If you have curly hair or textured hair, hydration is even more important to prevent breakage. Regular trims and proper haircuts maintain shape and remove damaged ends, keeping your color vibrant.

Popular Modern Shades

Modern trends include shades like mocha brown, dark red, golden brown, and copper red. Many people are experimenting with platinum blonde and ashy blonde for a bright contrast. Warm brown and cool brown remain timeless options for darker skin tones. For an elegant touch, try lowlights in chocolate tones or golden undertones that enhance shine under natural light.

Choosing Colors for Different Hair Types

Straight, wavy, or curly hair reacts differently to dyes. Curly hair tends to absorb more pigment, creating deeper color results. Straight hair shows reflection and shine better with lighter shades like blonde or light auburn. Long hair provides room for gradient styles, while short cuts display bold colors like cherry red or blue-black with confidence. Understanding your hair type helps you achieve a consistent and beautiful finish.

Experimenting Safely at Home

If you color your hair at home, always follow directions carefully. Avoid applying dye to dirty or damaged hair, and never skip the strand test. Use gloves and protect your skin with petroleum jelly to prevent staining. In case of dye on the skin, remove it gently using olive oil or coconut oil instead of harsh chemicals. Maintaining both hair and skincare routines ensures lasting color and comfort.

The Role of a Professional Hairstylist

The Role of a Professional Hairstylist

A professional hairstylist understands color theory, skin undertones, and the right shade for your facial features. They can help you blend warm tones with cool tones, suggest modern highlights, and recommend products that protect hair health. Consulting an expert ensures even results and reduces the risk of damage, especially if you’re experimenting with blonde shades or red hair color.

Combining Fashion and Hair Color

Hair color complements your wardrobe and personal style. Bold shades like cherry red or orange hair work well with neutral outfits, while warm browns and caramel tones blend easily with earthy tones. Jewel tones like amethyst or emerald in your clothes highlight cool undertones in your hair, creating harmony between your look and fashion choices.

Skincare and Hair Color Balance

Skincare and hair color go hand in hand. Healthy skin enhances your hair’s overall appearance. Regular exfoliation, hydration, and sun protection make your skin glow, which in turn complements your hair color. Matching your skincare products to your skin shade and undertones ensures an even, natural finish across your look.

Building Confidence with the Right Hair Color

Choosing the right hair color is not only about appearance but confidence. When your hair complements your skin’s undertones, you naturally feel more attractive. Whether you go for a bold statement like platinum blonde or a natural color like dark chocolate, the goal is to highlight your best features and express your individuality.

Final Thoughts and Related Articles

The best hair colors for dark and brown skin tones celebrate diversity, warmth, and individuality. From jet black and auburn to golden brown and rose gold, there’s a perfect match for everyone. Remember to maintain your hair health with deep conditioning and the right products. Explore different hair colors to find what reflects your personality best. For more hair ideas, trends, and beauty inspiration, check out related articles from top hairstylists and beauty experts worldwide.

Styleline Stonemeade Living Room Assembly Guide

0
Styleline Stonemeade Living Room Assembly Guide

Introduction to Styleline Stonemeade Living Room

The Styleline Stonemeade living room set is designed for easy setup and everyday comfort. It comes modular, which means most pieces fit through doorways and hallways without hassle.

If you’re assembling the Styleline Stonemeade for the first time, this guide gives you every step. From unpacking to arranging it in your room, everything’s covered. Whether it’s a sofa, loveseat, or ottoman, you’ll find clear steps to get it done right the first time.

What Is the Styleline Stonemeade Living Room Set?

The Styleline Stonemeade living room collection, part of Signature Design by Ashley, offers comfortable seating with durable construction. Upholstered in soft polyester fabric, the set typically includes a sofa and loveseat designed for daily use. Its strong corner-blocked frame and platform foundation help maintain shape and prevent sagging.

Key Features and Best Uses

The furniture features resilient foam cushions that provide firm yet comfortable support. Some models include reversible seats and fixed back cushions for convenience.

This collection suits modern and transitional homes, balancing style with lasting comfort. It’s a practical choice for those wanting reliable, easy-care living room furniture.

What’s Included in the Box?

What Is the Styleline Stonemeade Living Room Set?

Typical Items You’ll Find

When you unpack your Styleline Stonemeade living room set, expect to see all the key parts needed to put your furniture together.’

Sofa Frame

The sofa frame is the backbone of your furniture. It’s usually made from solid wood with corner blocks for extra strength. This frame supports the cushions and keeps the sofa stable over time. The design prevents sagging and ensures durability.

Back and Seat Cushions

You’ll find seat and back cushions designed for comfort and support. The seat cushions often have high-resiliency foam that holds shape well. Many are reversible, so you can flip them to extend their life.

Accent Pillows

Accent pillows come with the set for added comfort and style. These small cushions match the main upholstery and can be moved around to fit your preference.

Legs and Hardware

The legs, typically wood or plastic, come detached to protect them during shipping. You’ll also get screws, bolts, and an Allen wrench or other tools needed for assembly. All hardware required to attach legs and secure cushions should be included.

Optional Items (Ottoman, Loveseat)

Depending on your purchase, you might also get an ottoman or loveseat. These pieces match the sofa’s style and provide extra seating or a place to rest your feet.

Check for These Before You Begin

Before you start assembly, check all items carefully. Look for missing cushions, legs, or hardware. Missing parts will delay your setup.

Also, inspect the sofa frame and cushions for any damage from shipping. Bent frames or torn fabric will affect your furniture’s quality.

Having everything in good shape from the start will make assembly smooth and hassle-free.

Tools Needed for Assembly

What Is the Styleline Stonemeade Living Room Set?

What’s Included in the Assembly Kit

The Styleline Stonemeade set usually comes with an Allen wrench. This tool fits the bolts needed to join parts like the sofa frame and legs. It’s designed to handle the most basic steps of assembly without requiring extra tools.

Recommended Tools to Have on Hand

While the Allen wrench covers the basics, a few additional tools make assembly easier and faster.

  • Phillips-head screwdriver: Needed for some screws or bolts not covered by the Allen wrench. It provides better grip for tightening.

  • Rubber mallet: Optional but useful for gently tapping frame pieces together without causing damage.

  • Soft-tip power drill: This can speed up screwing parts together but requires caution to avoid overtightening.

  • Measuring tape: Handy for checking the fit of your furniture before full assembly.

  • Clean cloth: Helps keep surfaces clean and protects the furniture during assembly.

Why Extra Tools Matter

Having these extra tools ready helps reduce frustration during assembly. The Allen wrench alone can work, but a screwdriver and mallet make securing parts more precise and less time-consuming. A power drill speeds up the job if you’re comfortable using one.

How to Assemble the Styleline Stonemeade Set (Step-by-Step)

How to Assemble the Styleline Stonemeade Set (Step-by-Step)

Step 1 – Unbox and Organize

Clear space. Unbox all parts carefully. Lay everything out where you can see it. Group screws, bolts, and tools together. Spread all parts out where you can easily see them.

Step 2 – Assemble the Frame

Attach the base to the armrests first. Use the bolts and Allen wrench included. Don’t tighten bolts fully at first. Make sure parts line up right. Then tighten bolts firmly but don’t overtighten.

Step 3 – Install the Backrest

Slide the backrest brackets into the base slots. Press down gently to lock. If it’s stuck, check for dirt or packaging pieces and clean them for an easy fit.

Step 4 – Attach the Legs

Turn the sofa on its side or back. Screw or twist the legs on. Use the Allen wrench or screwdriver. Set the sofa upright and check if it sits level. Tighten legs if needed to prevent wobbling.

Step 5 – Add Cushions and Pillows

Place seat cushions on the base. Some stick with Velcro, some just sit there. Add back cushions next. Arrange accent pillows last. Make sure everything fits snug with no gaps.

Common Assembly Issues (And How to Fix Them)

Styleline Stonemeade Set

Why won’t the backrest slide in?

Dust or misalignment usually causes this. Clean the slots and brackets gently. Check if the parts line up correctly. Try sliding again after clearing any dirt or debris.

Why is the frame unstable?

Loose or uneven bolts often make the frame shaky. Go over every bolt and tighten them firmly but don’t overtighten. Also, check that all legs touch the floor evenly. Adjust legs if needed to stabilize.

What if cushions feel stiff?

Cushions can feel firm right out of the box. Let them rest for 24 to 48 hours to soften naturally. You can also fluff them by hand to help speed up the process.

How to Position Your Stonemeade Set in Any Room

How to Position Your Stonemeade Set in Any Room

Best Layouts for Small Spaces

Keep the sofa slightly off the walls to make the space feel more open. Positioning the Styleline Stonemeade set toward the center helps the room feel balanced and easy to move through.

Large Room Layouts

Divide the space into clear zones. Set up areas for seating, TV, and reading to organize the room. Use the ottoman as a central anchor piece that ties the seating arrangement together. Add layered lighting — overhead, floor, and table lamps — to create warmth and focus in each zone.

Styling Tips for Your Stonemeade Living Room

The Styleline Stonemeade furniture set pairs well with soft, earthy interiors. To match its neutral tones, go with modern living room styles that feel clean and comfortable.

Match with Earth Tones and Metals

Use shades like tan, sage green, and matte black. These blend naturally with a beige sofa. Add materials like linen, raw wood, and chunky knits to warm up the space. Stick to two tones with one bold accent.

Decor Accessories That Work

Choose low-pile rugs in neutral or dusty colors. Hang abstract wall art to add interest without clutter. Use warm LED lamps (2700K–3000K) for soft lighting. Keep things simple, but let texture and contrast guide the look.

How to Clean and Maintain Your Stonemeade Set

Proper care keeps your Stonemeade furniture looking new and lasting longer. Follow a simple routine to protect fabric, cushions, and frames from wear.

Weekly and Monthly Tasks

Vacuum the fabric weekly using an upholstery brush attachment to remove dust and debris. Rotate the seat and back cushions every month to prevent uneven wear. Every two months, check and tighten all bolts and screws to keep the frame stable.

Frequently Asked Questions

How long does the Stonemeade assembly take?

The Stonemeade loveseat doesn’t need assembly. You just unpack it and it’s ready to use. No tools or setup are required, so you can enjoy it right away.

Can one person assemble it alone?

Yes, but having two people helps with lifting, aligning parts, and reducing setup time.

Rosboxar Gift Ideas That Actually Make People Smile

0
Rosboxar preserved rose gift

Top Rosboxar Gift Ideas That Make People Smile

Rosboxar gift ideas make it easy to show you care. These flower boxes feature preserved roses that stay fresh and beautiful for months. They take the guesswork out of giving luxury rose gifts that don’t wilt quickly.

Rosboxar boxes suit many occasions like birthdays, anniversaries, or just because. These preserved rose gift boxes feel personal and thoughtful without being too much. Explore more articles on Redfinz.

Preserved roses keep their color and shape for up to a year. That means your gift lasts well beyond the special moment. Rosboxar gift ideas help you give flowers that stay beautiful, not fade away.

What Is Rosboxar?

rosebox

Rosboxar is a brand known for its preserved rose gift boxes that last much longer than fresh flowers. These boxes hold roses treated to keep their natural beauty for months or even a year. Unlike regular bouquets. Rosboxar uses preserved roses that stay fresh and keep their color for a long time..

This makes Rosboxar gifts more than just flowers. They become lasting keepsakes. The flower box gift set looks elegant and timeless.

Each box feels like a small treasure perfect for someone who values thoughtful, lasting presents. Forever roses like the ones in Rosboxar boxes carry meaning beyond the usual.

They stand for enduring love friendship or appreciation. Because of this Rosboxar gift ideas suit anniversaries birthdays or special moments when you want to say something that stays.

People choose Rosboxar because it combines beauty with longevity. It is a way to give flowers without worrying about them fading in days. If you want a gift that is simple elegant and meaningful Rosboxar fits the bill.

Why Choose Rosboxar Gifts?

Why Choose Rosboxar Gifts

Rosboxar gifts are special because the roses last much longer than fresh flowers. These preserved rose boxes make great romantic floral keepsakes.

The roses stay fresh for months so your gift keeps its charm for a long time. People choose Rosboxar gifts for many reasons. They work well for birthdays, anniversaries, Valentine’s Day, or just to show you care. 

The personalized rose box gifts can even include a special message to make it more personal. The biggest plus is the long-lasting roses. They don’t wilt or lose color quickly like normal flowers. This makes the gift feel more valuable and meaningful.

Rosboxar gifts are perfect if you want a nice, classy present that lasts. They are for anyone who likes flowers but doesn’t want them to die fast. If you want a gift that stays beautiful, Rosboxar is a smart choice.

Preserved Rosboxar Features

Rosboxar uses preserved roses that keep their natural look for months. These flowers are real but go through a special process to stay fresh and soft longer than fresh roses. That means no wilting or losing color quickly.

Each Rosboxar box is carefully designed to showcase these forever roses in a stylish way. The flower box gift set is made to feel luxurious yet simple. It fits perfectly on a desk, shelf, or bedside table as a beautiful decoration.

The preserved roses don’t need water or sunlight. This makes them easy to care for and last much longer than regular flowers. The boxes come in different colors and styles so you can pick the perfect one for the person you’re gifting.

People love Rosboxar because it gives the beauty of flowers with less worry. These long-lasting roses make a thoughtful gift that stays fresh and bright for months.

Fresh Rosboxar Care Tips

  • No water or sunlight needed.
  • Keep roses in a cool, dry place away from heat and moisture.
  • Dust gently with a soft cloth when needed.
  • Avoid touching petals roughly to prevent damage.
  • Do not spray water or any liquid on the roses.
  • Close the box when not in use to protect from dust.

Following these simple steps keeps your Rosboxar roses fresh and beautiful for months.

Top 12 Rosboxar Gift Ideas

Find the best Rosboxar gift ideas with preserved roses that stay fresh for months. Perfect for birthdays, anniversaries, and special moments. Give lasting luxury rose gifts that truly impress.

1. Best Rosboxar Gifts for Her

The best Rosboxar gifts for her are elegant boxed roses that show you care. These premium rose gifts online suit moms, wives, girlfriends, or friends who like simple and beautiful things. 

A preserved rose gift box with soft colors fits any room and adds a nice touch. A red roses bouquet for a girlfriend is a perfect choice for birthdays or just because. 

2. Affordable Rosboxar Gifts for Birthdays

Affordable Rosboxar gifts for birthdays make thoughtful presents without breaking the bank. Flower box gift sets with preserved roses offer a fresh look that lasts longer than fresh flowers. These gift boxes combine style and value. They are perfect for friends or coworkers when you want to give something meaningful but budget-friendly.

3. Rosboxar Anniversary Gift Box Ideas

Rosboxar anniversary gift box ideas focus on romantic floral keepsakes. Personalized rose box gifts can include names, dates, or sweet messages to make anniversaries extra special.

Forever rose gift boxes are a classic way to say “I love you” and show commitment. The long-lasting roses help keep the memory alive well beyond the day.

4. Unique Rosboxar Gift Options

Unique Rosboxar gifts come with flower boxes that include message cards or can be made in custom colors.These gifts stand out because they feel personal and one-of-a-kind. A forever rose gift box with a handwritten note adds warmth and thoughtfulness. Brands like Venus et Fleur and RoseBox NYC offer similar unique floral gifts. Unique gift choices from Rosboxar suit those who want to surprise with something different.

5. Luxury Rosboxar Flower Gifts

Luxury Rosboxar flower gifts have preserved roses in a beautiful box. These rose gifts come in nice packaging that fits special occasions. The flower box gift set looks stylish and feels special. It’s perfect for someone who likes quality and wants a flower gift that lasts.

6.Rosboxar Mother’s Day Gift Boxes

Rosboxar Mother’s Day gift boxes are great for showing love and thanks. These preserved rose gift boxes blend beauty with lasting meaning. Moms will enjoy the elegance of forever roses that stay fresh much longer than regular flowers. The flower box gift set feels personal and thoughtful, making Mother’s Day special without any hassle.

7. Rosboxar Valentine’s Day Gift Ideas

Rosboxar Valentine’s Day gift ideas focus on romance and lasting impressions. A preserved rose gift box with red or deep pink roses creates a romantic floral keepsake. These premium rose gifts online express love without the worry of wilting flowers. Personalized touches can make the gift even more special.

8. Rosboxar Thank You Gifts

Rosboxar Thank You Gifts

Rosboxar thank you gifts offer a simple way to show appreciation. Budget-friendly flower box sets with preserved roses express gratitude elegantly. The long-lasting roses add sincerity and thought to any gesture. These gifts fit well for colleagues, teachers, or friends.

9. Rosboxar Get Well Soon Gifts

Rosboxar get well soon gifts bring comfort without the worry of maintenance. Preserved rose gift boxes add color to any space and boost mood.These forever roses require no water and keep looking fresh, making them ideal for someone recovering or resting at home.

10 . Rosboxar Wedding Gift Ideas

Rosboxar wedding gift ideas include preserved roses that last long after the big day. Personalized rose box gifts with the couple’s names or wedding date add a special touch. These romantic floral keepsakes are perfect for celebrating love and memories.

FAQS

What makes Rosboxar different from a regular bouquet?

Rosboxar stands out because it comes in stylish boxes or domes. The presentation turns flowers into lasting keepsakes.

How long does a preserved Rosboxar last?

Preserved Rosboxar roses can last 1 to 3 years with proper care. High-quality roses may keep their color and shape for up to 8 years. To ensure they stay fresh, avoid direct sunlight, water, and high humidity.
Taking these simple steps helps maintain their beauty and extends the life of your gift.

Can I make a Rosboxar myself?

Yes, you can create a Rosboxar at home using a box, floral foam, and preserved roses. It’s a simple DIY project that lets you customize colors and styles. Making your own Rosboxar adds a personal touch to your gift.

Is it suitable for corporate gifts?

Yes, Rosboxar works well as a corporate gift. It looks neat and classy. It’s a nice way to thank clients or celebrate work milestones.

Conclusion

Rosboxar gifts offer a fresh way to show you care with flowers that last. Their preserved roses stay beautiful for months, making every gift meaningful and memorable. Whether it’s for a special occasion or just to brighten someone’s day, Rosboxar delivers lasting smiles without the usual hassle.

https://youtu.be/Aq86i-Qt1AQ?si=y5viDAsuGaeutksV

Fixtures Interior Design Plan

0
Fixtures Interior Design Plan

Fixtures Interior Design Plan: Essential Guide for Modern Homes

Fixtures are the backbone of any Fixtures Interior Design Plan. They are the permanent elements that make a space functional, stylish, and livable. From lighting fixtures like chandeliers to plumbing fixtures like sinks, these components play a crucial role in shaping the look and feel of a home. Unlike furniture or decor, fixtures are built into the structure, making them a long-term investment in your space.

When planning a Fixtures Interior Design Plan, choosing the right fixtures is essential. They not only enhance a room’s usability but also add to its visual appeal. For example, a well-placed lighting fixture can transform a dull room into a cozy retreat, while a stylish sink can elevate the look of a bathroom.

Whether you’re designing a modern home or renovating an old one, understanding the role of fixtures is key to creating a beautiful and practical space.

Types of Fixtures in Interior Design Plan

Fixtures are permanent elements that bring functionality and style to any interior design plan. Fixtures can be grouped into three key categories:

  • Lighting fixtures: These are one of the most essential elements in a Fixtures Interior Design Plan. They not only brighten up a space but also set the mood. For example, a chandelier adds elegance, while recessed lights create a modern, clean look.
  • Plumbing Fixtures: Sinks, faucets, bathtubs, and toilets fall under this category. While they serve practical purposes, their design can elevate a room’s aesthetic. A sleek faucet or a farmhouse sink can transform a kitchen or bathroom.
  • Built-in Fixtures: Cabinets, shelves, and countertops are examples of built-in fixtures. They save space, improve organization, and blend seamlessly into the room’s design. Custom-built options can match any style, from modern to traditional.

Choosing the right fixtures ensures a balance of functionality and aesthetics, making your home practical and visually appealing.

How to Choose the Right Fixtures

Match Fixtures to Your Design Style

When planning an interior design plan, it is important to choose fixtures that align with your overall style. For a modern look, opt for sleek, minimalist designs like matte black faucets or geometric lighting. Traditional spaces, on the other hand, pair well with classic chandeliers or vintage-inspired sinks.

Focus on Material and Finish

The fixtures’ material and finish significantly affect their durability and appearance. Stainless steel and brass are popular for plumbing fixtures due to their longevity, while matte finishes like brushed gold or black add a contemporary touch. For lighting, consider materials like glass or metal that complement your decor.

Prioritize Functionality

While looks matter, how well something works is just as important. For example, choose kitchen fixtures that make cooking easier, such as range hoods and under-cabinet lighting. In bathrooms, waterproof lighting and easy-to-clean surfaces are practical choices.

By balancing style, material, and functionality, you can select fixtures that enhance your space’s look and usability.

Fixtures for Different Rooms

Fixtures interior design plans Different Rooms

Kitchen Fixtures

The kitchen is a hub of activity, so its fixtures must be functional and stylish. Key fixtures include range hoods, under-cabinet lighting, and durable sinks. For example, a farmhouse sink adds charm, while under-cabinet lighting makes food prep easier. Choose materials like stainless steel for longevity and a polished look.

Bathroom Fixtures

Bathrooms require fixtures that combine practicality with elegance. Vanity lights, waterproof lighting, and sleek faucets are essential. A wall-mounted mirror cabinet not only saves space but also adds storage. Opt for water-resistant materials and finishes that resist tarnishing, ensuring your bathroom stays fresh and functional.

Living Room Fixtures

Fixtures like ceiling lights and window fixtures in the living room set the tone. A statement chandelier can become the room’s focal point, while recessed lighting offers a subtle glow. Combining ambient and task lights, layered lighting creates a cozy and inviting atmosphere.

By selecting the right fixtures for each room, you can enhance functionality and aesthetics, making your home a comfortable and stylish space.

Trends in Fixtures for Interior Design Plans

Trends Fixtures Interior Design Plans for chairs Smart Home Fixtures

Technology is transforming the way we use fixtures in our homes. Bright fixtures, like touchless faucets and automated lighting systems, are becoming increasingly popular. These innovations not only add convenience but also improve energy efficiency. For example, motion-sensor lights can save electricity, while smart thermostats optimize heating and cooling.

Sustainable Fixtures

Eco-friendly designs are a growing trend in interior design plans. Low-flow plumbing fixtures, such as water-saving faucets and toilets, help conserve water. Using energy-efficient lighting, such as LED bulbs, helps cut down on electricity usage. Reclaimed materials are also used to create unique, environmentally friendly fixtures that add character to a space.

Matte Finishes and Industrial Styles

Matte black and brushed gold finishes dominate modern designs, offering a sleek and sophisticated look. Industrial-style fixtures, like exposed pipes and Edison bulbs, are also in demand for their raw, edgy appeal. These trends combine functionality with bold aesthetics, making them perfect for contemporary homes.

By incorporating these trends, you can create a stylish, modern, and sustainable home that reflects the latest interior design innovation.

FAQs About Fixtures in Interior Design Plan

What Are Fixtures in Interior Design?

Fixtures are permanent elements built into a space, such as lighting, plumbing, and built-in cabinets. Unlike furniture, they are fixed and contribute to functionality and aesthetics in an interior design plan.

What Are the 7 Elements of Interior Design?

The seven elements are space, line, form, light, color, texture, and pattern. These principles create balanced, functional, and visually appealing spaces. Fixtures, like lighting and built-in shelves, play a key role in enhancing these elements.

What Are Fittings and Fixtures?

Fixtures are permanent elements built into a space, such as lighting, plumbing, and built-in cabinets, and are a key part of any Fixtures Interior Design Plan. For example, a wall-mounted mirror is a fixture, but a freestanding mirror is a fitting. Understanding this difference is crucial for design and property planning.

What Is FF&E in Interior Design?

FF&E stands for Furniture, Fixtures, and Equipment. It includes movable items like chairs (furniture), semi-permanent elements like lighting (fixtures), and functional items like appliances (equipment). FF&E is essential for creating functional and stylish interiors.

These FAQs provide a quick guide to understanding the role of fixtures and related concepts in interior design.

Conclusion

Fixtures are the unsung heroes of any Fixtures Interior Design Plan, blending functionality with aesthetics to create spaces that are both beautiful and practical. From lighting and plumbing to built-in cabinets, these permanent elements play a vital role in shaping the look and feel of your home. Choosing the right fixtures can enhance usability, boost property value, and reflect your personal style.

If you’re planning a renovation or redesign, don’t forget to consider accessibility. For tips on creating inclusive spaces, explore our guide on How to Make a Bedroom Accessible for Disabled Adults. For more inspiration on modern fixture trends, check out this comprehensive guide by Elle Decor on Interior Design Ideas. Thoughtful fixture selection, combined with innovative design strategies, ensures your home is stylish and functional for everyone.

Creative Staircase Design Ideas

0
Staircase Design Ideas
Stairwell Berlin

Creative Staircase Design Ideas for Modern Homes

A staircase is more than just a way to move between floors; it’s a key design element that can enhance the look and functionality of a home. The right staircase design ideas can make a small space feel open, add elegance to modern interiors, or create a striking focal point in a grand home.

There are countless styles, from sleek floating stairs to classic wooden designs. Whether you’re renovating an old staircase or planning a new one, selecting the perfect design depends on space, materials, and personal style. For inspiration on how staircases can complement interior aesthetics, explore ideas from greenery interior design and other modern home concepts.

This guide explores various staircase styles, from space-saving solutions to luxury designs and decoration ideas that add character to any home.

Modern Staircase Design Ideas for Small Spaces

Modern Staircase Design Maximizing space is essential in compact homes, and choosing the right modern staircase design ideas for small spaces can make a significant difference. A well-planned staircase design enhances aesthetics and functionality, ensuring a seamless flow within the home.

Space-Saving Staircase Styles

  • Switchback Stairs: These U-shaped stairs require less space than straight staircases, making them ideal for limited-space staircase design in modern homes.
  • Floating Stairs: Their open design creates an airy feel, making small areas appear larger while adding a modern staircase aesthetic.
  • Alternating Tread Stairs: With a staggered step pattern, these stairs save space while ensuring easy movement. They are perfect for staircases in small apartments.

Smart Storage Solutions

Incorporating storage beneath the staircase is a clever way to optimize space in small home stairs design. Some creative solutions include:

  • Built-in Cabinets & Drawers: Utilizing the under-stairs area for extra storage helps keep small interiors clutter-free.
  • Bookshelves & Decorative Displays: Transforming the stairwell into a stylish bookshelf or display unit adds function and character.
  • Staircase with Seating or Workspace: Creating a cozy reading nook or a mini home office setup under the stairs maximizes functionality in modern stairways.

Consider stairway wall ideas such as accent walls or decorative wainscoting for additional impact to create a visually appealing transition between levels. With the right staircase renovation ideas, even the smallest home can have a stylish and practical staircase.

Wooden Staircase Design Ideas for Homes

Wooden Staircase Design

Wooden staircases remain timeless, offering warmth, durability, and versatility. Wood seamlessly blends with various interior styles, whether for a traditional or modern home staircase design. From classic wooden staircases to contemporary floating designs, the right choice can enhance aesthetics and functionality.

Types of Wooden Staircases

  • Straight Wooden Stairs: A simple yet elegant choice, perfect for minimalist staircase design and modern interiors.
  • Curved Wooden Stairs: Ideal for grand entryways, adding a touch of sophistication to luxury staircase designs.
  • Floating Wooden Stairs: Features open risers for a sleek, modern staircase design, creating a spacious and airy feel.
  • Spiral Wooden Stairs: A space-saving option that combines aesthetic appeal with practicality, making it ideal for apartments and compact homes.

Wood Finishes and Enhancements

The choice of wood finish significantly impacts the staircase’s durability and overall look:

  • Rich, Dark Finishes: Oak and walnut provide a luxurious feel and are often used in traditional wooden staircase designs.
  • Lighter Wood Tones: Maple and birch create a fresh, modern aesthetic that suits contemporary home designs.

For added elegance, staircase railings design ideas such as metal or glass railings can introduce a stylish contrast. Incorporating staircase carpet design ideas with runners or soft textures enhances safety and comfort while adding a decorative touch.

Whether opting for a rustic farmhouse aesthetic or a sleek modern staircase design, wooden staircases remain a preferred choice for homeowners due to their timeless charm and adaptability.

Spiral Staircase Design Ideas for Apartments

Spiral Staircase Design

Spiral staircases are a perfect blend of functionality and aesthetics, making them an excellent choice for apartments with limited space. Their compact design serves as a stylish alternative to traditional staircases while enhancing the overall architectural appeal of the interior.

Benefits of Spiral Staircases

  • Space-Saving Design: Their small footprint maximizes floor space, making them ideal for compact apartments and lofts.
  • Stylish Appeal: Available in various materials such as wood, metal, and glass, they complement different interior styles.
  • Versatile Placement: Spiral staircases can be installed in corners, mezzanines, or as a secondary staircase, adding flexibility to the layout.

Material and Railing Choices

Staircase Railing Design

The choice of materials and railings significantly impacts the look and functionality of spiral staircases:

  • Glass Staircase Design Ideas: Glass steps or railings paired with metal frames enhance light flow, making small spaces feel more open.
  • Wooden Staircase Design Ideas: Wooden spiral stairs with natural finishes create a cozy and rustic ambience.
  • Metal Spiral Stairs: Industrial-style black staircase ideas with sleek metal railings add a bold, modern touch.

To further enhance their appeal, incorporating staircase lighting design ideas such as LED strips under each step or wall-mounted lights can create a contemporary and inviting atmosphere.

Spiral staircases maximize apartment functionality and serve as striking focal points, adding character and elegance to any living space.

Floating Staircase Design Ideas for Interiors

Floating Staircase DesignFloating staircases are a modern architectural marvel, perfect for open-concept interiors. By eliminating bulky supports, they create a sleek and airy look, making them a popular choice for contemporary homes. Their minimalist appeal enhances space, allowing natural light to flow freely.

Features of Floating Staircases

  • Minimalist Aesthetic: Open risers create a light and spacious atmosphere.
  • Varied Materials: Available in wood, metal, glass, or hybrid combinations for different styles.
  • Customizable Railings: This style pairs well with frameless glass, slim metal bars, or wooden railings for a refined look.

Enhancing Floating Staircases

To elevate the design, incorporating staircase lighting design ideas such as LED strips under each step or recessed wall lighting can enhance depth and ambience. For a bold statement, pairing black staircase ideas with neutral walls creates a striking visual contrast.

Floating staircases are more than just a functional element—they add sophistication and modernity to any interior, seamlessly blending with contemporary design trends.

Luxury Staircase Design Ideas for Villas

Luxury Staircase Design A grand staircase can transform a villa into a stunning masterpiece, blending architectural elegance with refined craftsmanship. Luxury staircases emphasize premium materials, intricate details, and bold design elements that leave a lasting impression.

High-End Materials for Luxury Stairs

  • Marble Staircases: A timeless and sophisticated choice, often seen in classic and modern villa designs.
  • Glass and Metal Combinations: A sleek, contemporary aesthetic, perfect for open-concept luxury homes.
  • Hardwood with Ornate Railings: Classic elegance featuring carved wooden bannisters or wrought-iron detailing.

Design Enhancements for a Luxurious Look

To elevate grandeur, staircase wall design ideas such as decorative panels, wainscoting, or artistic murals add a refined touch. Plush carpet runners in rich colors enhance comfort and elegance, while statement lighting, like chandeliers or embedded step lights, creates a dramatic ambience.

A luxury staircase is more than a pathway between floors—it symbolizes sophistication and grandeur, defining the villa’s overall aesthetic.

Outdoor Staircase Design Ideas for Gardens

Outdoor Staircase Design

Outdoor staircases serve as functional pathways and aesthetic enhancements for gardens, patios, decks, or terraces. The right staircase design seamlessly integrates with the landscape, ensuring durability while complementing the natural surroundings.

Durable Materials for Outdoor Stairs

  • Stone and Concrete: Highly durable and weather-resistant, ideal for garden pathways and terraces.
  • Wood with Protective Coating: A natural and warm look that blends with greenery but requires regular maintenance.
  • Metal Staircases: Sleek and modern, perfect for industrial-style exteriors with corrosion-resistant finishes.

Decorative and Functional Enhancements

Enhancing outdoor staircases with Trendy Stair Railing Styles, such as wrought iron or frameless glass railings, adds safety and sophistication. Solar-powered step lights or embedded LED lighting improve nighttime visibility while creating an inviting ambience.

Outdoor staircases should be designed harmoniously with the garden’s overall theme to maintain a cohesive look. This ensures a smooth and stylish transition between different levels of the landscape.

Staircase Decoration and Renovation Ideas

A staircase is more than just a functional element—it’s an opportunity to elevate home décor and create a visually appealing focal point. Whether giving an old staircase a modern update or adding decorative touches, the right design choices can breathe new life into any space.

Decorative Elements for Staircases

  • Modern Staircase Wall Accents: Add character with wainscoting, wallpaper, or framed art. Statement walls enhance the visual appeal of staircases.
  • Staircase Carpet Design Ideas: Runners and patterned carpets bring warmth, comfort, and noise reduction while adding a decorative touch.
  • Modern Lighting Ideas for Stairs: LED strips, pendant lights, and recessed lighting enhance aesthetics and improve safety, making the staircase stand out.

Renovation Ideas for Old Staircases

  • Painting & Refinishing: A fresh coat of paint or refinishing wooden stairs can give them a modern, polished look.
  • Upgrading Railings: Replacing outdated railings with sleek metal, glass, or wooden balustrades transforms the staircase’s style.
  • Tile and Trim Enhancements: Marble or patterned tiles on stair risers add a striking visual effect. Stair trim molding or black-and-white stair paint can create a timeless, elegant look.

Staircases can enhance a home’s overall aesthetic while maintaining practicality and durability by incorporating a combination of functional upgrades and stylish decorations.

Conclusion

A well-designed staircase can elevate any space, seamlessly blending style and functionality. Whether you’re maximizing small spaces with modern designs, embracing luxurious staircases in grand homes, or enhancing outdoor landscapes, the right staircase can make a bold architectural statement.

The possibilities for customization are endless, from premium materials to decorative accents like staircase lighting and stylish railings. Even existing staircases can be transformed through renovation ideas, such as wall enhancements, tile finishes, and updated railings, breathing new life into your home’s design.

For more staircase inspiration, materials, and renovation tips, explore Elle Decor for expert insights and design ideas.

FAQs

Which type of staircase is best for a home?

The best staircase depends on space, style, and functionality. Straight staircases are simple and practical, while spiral staircases maximize space in tiny homes. For a modern touch, floating stairs create an open feel, while curved staircases add elegance to spacious interiors.

What are the staircase trends for 2025?

Minimalist designs, open risers, and mixed materials like glass and metal are leading trends. Sustainable wood, bold black staircases, and integrated LED step lighting are also gaining popularity for a sleek and stylish look.

How can I make my staircase more interesting?

Enhance your staircase with decorative elements like gallery walls, wainscoting, or statement wallpaper. Adding a carpet runner, stylish railings, or LED lighting can add character and sophistication.

How do I design the perfect staircase for my home?

When designing a staircase, consider space, materials, and aesthetics. Space-saving stairs work well in compact homes, while luxurious materials like marble or hardwood suit grand interiors. Adding modern railings and lighting ensures both functionality and style.

What FF&E Meaning?

0

What FF&E Meaning? Furniture, Fixtures, and Equipment Guide

FF&E, which stands for Furniture, Fixtures, and Equipment, is widely used in construction, interior design, and project management. It refers to the movable or semi-movable items that make a space functional and visually appealing. Whether it’s the cozy chairs in a hotel lobby, the sleek lighting in an office, or the medical equipment in a hospital, FF&E plays a crucial role in shaping the user experience.

This guide will explain what FF&E means, why it’s essential, and how it’s used across different industries. From procurement to installation, you’ll learn everything you need about FF&E in simple, easy-to-understand terms. For more ideas on how fixtures can transform interior spaces, check out this Fixtures in Interior Design Plans guide. Let’s dive in!

What is FF&E?

FF&E, or Furniture, Fixtures, and Equipment, refers to the movable or semi-movable items that furnish a space. These items are not permanently attached to the building’s structure, making them easy to replace or upgrade. Let’s break down each component of FF&E to understand it better.

Furniture 

Furniture includes chairs, tables, sofas, beds, and desks. These pieces are essential for creating functional and comfortable spaces. For example, lobby chairs and guest room beds are FF&E in a hotel.

Fixtures 

Fixtures are items attached to the building but can be removed without causing damage. Examples include lighting fixtures, plumbing fixtures, and built-in cabinets. In an office, lighting fixtures and bathroom sinks are part of FF&E.

Equipment 

Equipment refers to movable machinery or tools used in a space. This can range from kitchen appliances in a restaurant to medical equipment in a hospital. For instance, a hotel’s kitchen equipment or a hospital’s MRI machines are considered FF&E.

FF&E is a critical part of any interior design or construction project. It ensures that a space is not only functional but also visually appealing. Whether it’s a cozy café or a modern office, FF&E plays a key role in defining the look and feel of the environment.

Importance of FF&E in Interior Design 

office FF&E

FF&E is vital in interior design, transforming empty spaces into functional and visually appealing environments. Whether it’s a hotel, office, or healthcare facility, the right FF&E can make all the difference. Here’s why FF&E is so essential:

Enhances Functionality 

FF&E ensures that a space meets its intended purpose. For example, ergonomic chairs and desks in an office improve productivity, while comfortable beds and sofas in a hotel enhance guest comfort. Without the right FF&E, a space may look good but fail to serve its users effectively.

Creates Aesthetic Appeal 

FF&E adds personality and style to a space. These elements, from modern lighting fixtures to elegant furniture, help designers create a cohesive look. For instance, a luxury hotel might use high-end FF&E to create a sophisticated atmosphere.

Supports Brand Identity 

FF&E can reflect a brand’s identity in commercial spaces. A trendy café might use quirky furniture and fixtures to attract young customers, while a corporate office might opt for sleek, professional designs. FF&E helps businesses communicate their values through design.

Improves User Experience 

FF&E directly impacts how people experience a space. Comfortable furniture, well-placed lighting, and functional equipment make users feel at ease. For example, the right FF&E can make patients feel more relaxed and cared for in healthcare facilities.

In short, FF&E is the backbone of any successful interior design project. It bridges the gap between aesthetics and functionality, ensuring that spaces are beautiful and practical.

FF&E vs. OS&E: What’s the Difference? 

FF&E vs. OS&E 

FF&E and OS&E are two terms often used in construction and interior design. While they sound similar, they refer to different things. Let’s break down the differences between Furniture, Fixtures, and Equipment (FF&E) and Operating Supplies and Equipment (OS&E).

What is FF&E? 

As discussed, FF&E includes movable or semi-movable items like furniture, lighting fixtures, and equipment. These items are not permanently attached to the building and can be replaced or upgraded easily. Examples include office chairs, hotel beds, and medical equipment.

What is OS&E? 

OS&E, or Operating Supplies and Equipment, refers to items used for a business’s day-to-day operations. These are typically smaller, consumable items that need frequent replacement. Examples include cleaning supplies, stationery, and kitchen utensils.

Key Differences 

  • FF&E: Larger, durable items not permanently attached (e.g., furniture, fixtures, machinery).
  • OS&E: Smaller, consumable items used for daily operations (e.g., paper, cleaning products).
  • Budgeting: FF&E is usually a capital expense, while OS&E is an operational expense.

Understanding the difference between FF&E and OS&E is crucial for effective project planning and budgeting. While FF&E focuses on long-term investments, OS&E deals with short-term operational needs.

FF&E Procurement Process 

The FF&E procurement process is critical in any construction or interior design project. It involves planning, sourcing, and purchasing the right furniture, fixtures, and equipment to meet the project’s needs. Here’s a step-by-step breakdown of how FF&E procurement works:

Step 1: Planning and Budgeting 

The first step is to define the project’s requirements and set a budget. This includes identifying the types of furniture, fixtures, and equipment needed, as well as their quantities and quality standards. For example, a hotel project might require durable furniture for guest rooms and stylish lighting for common areas.

Step 2: Sourcing and Vendor Selection 

Next, the project team identifies suppliers or vendors who can provide the required FF&E items. This involves comparing prices, quality, and delivery timelines. Many projects work with specialized FF&E procurement companies to streamline this process.

Step 3: Customization and Design 

In some cases, FF&E items may need to be customized to fit the project’s design theme. This could involve selecting specific fabrics, finishes, or dimensions. For instance, a luxury resort might opt for custom-made furniture to create a unique look.

Step 4: Logistics and Installation 

Once the FF&E items are ready, they must be transported to the project site and installed. This step requires careful coordination to ensure timely delivery and proper installation. Many FF&E procurement services include logistics and installation support.

Step 5: Quality Control and Handover 

The final step is to inspect the FF&E items for quality and functionality. Any issues are addressed before the project is handed over to the client. This ensures the space is ready for use and meets all design and operational requirements.

Following a structured procurement process, project teams can ensure that the right FF&E items are selected, delivered, and installed on time and within budget.

Examples of FF&E in Different Industries 

FF&E is used across various industries to create functional and visually appealing spaces. Here are some examples of how FF&E is applied in different sectors:

Hospitality Industry 

FF&E in hotels and resorts includes items like guest room furniture, lobby seating, restaurant tables, and kitchen equipment. For example, a luxury hotel might use high-end sofas, chandeliers, and custom-made beds to create a premium guest experience.

Healthcare Industry 

Hospitals and clinics rely on FF&E to provide comfort and functionality. This includes patient beds, medical equipment, waiting room chairs, and lighting fixtures. The right FF&E can improve patient comfort and streamline healthcare operations.

Office Spaces 

FF&E in corporate offices includes ergonomic chairs, desks, conference tables, and lighting fixtures. Modern offices often use stylish furniture and energy-efficient lighting to create a productive and inviting work environment.

Retail Industry 

Retail stores use FF&E to enhance the shopping experience. This includes display shelves, checkout counters, fitting room furniture, and lighting. For example, a boutique might use elegant fixtures and comfortable seating to attract customers.

Educational Institutions 

Schools and universities use FF&E to create functional learning spaces. This includes classroom furniture, library shelves, lab equipment, and cafeteria tables. Durable and ergonomic FF&E is essential for supporting students and staff.

These examples show how FF&E plays a crucial role in shaping the functionality and aesthetics of spaces across various industries.

FF&E in Construction Projects 

FF&E Construction 

FF&E is a key component of construction projects, especially in commercial and residential developments. It ensures that a building is structurally sound, fully equipped, and ready for use. Here’s how FF&E fits into the construction process:

Planning and Design Phase

During the planning phase, architects and designers work together to select FF&E items that align with the project’s goals. This includes choosing furniture, fixtures, and equipment that match the building’s design theme and functional requirements. For example, a modern office building might feature sleek furniture and energy-efficient lighting.

Budgeting and Scheduling 

FF&E is a significant part of the project budget. Construction teams create detailed FF&E schedules to ensure that items are ordered, delivered, and installed on time. Proper planning helps avoid delays and cost overruns.

Installation and Handover 

Once the construction is complete, FF&E items are installed to make the space functional. This includes setting up furniture, installing lighting fixtures, and placing equipment. The final step is a thorough inspection to ensure everything is in place and working correctly.

Role in Site Plans 

FF&E is often included in site plans to show where each item will be placed. This helps contractors and designers visualize the final layout and adjust as needed. For example, a hospital site plan might show the location of patient beds, medical equipment, and waiting area furniture.

By integrating FF&E into the construction process, project teams can create functional and aesthetically pleasing spaces.

Tips for Managing FF&E Projects 

Managing FF&E projects can be challenging, but with the right strategies, you can ensure a smooth process from start to finish. Here are some practical tips to help you succeed:

Start Early 

Begin planning for FF&E as early as possible. This includes identifying requirements, setting a budget, and creating a timeline. Early planning helps avoid last-minute delays and ensures that all items are delivered on time.

Work with Experienced Suppliers 

Choose reliable FF&E suppliers with experience in your industry. Whether you need furniture for a hotel or equipment for a hospital, working with trusted vendors ensures high-quality products and timely delivery.

Prioritize Quality Over Cost 

While staying within budget is essential, don’t compromise on quality. Durable and well-designed FF&E items may cost more upfront but will save money in the long run by reducing maintenance and replacement costs.

Use FF&E Procurement Software 

Consider using specialized software to manage FF&E procurement. These tools can help you track orders, manage budgets, and coordinate logistics more efficiently.

Communicate Clearly with Stakeholders 

Effective communication is key to managing FF&E projects. Keep all stakeholders, including designers, contractors, and clients, informed about progress and any changes to the plan.

Plan for Contingencies 

Unexpected issues can arise during FF&E projects, such as delivery delays or damage during transportation. Always have a contingency plan and budget to handle such situations.

Following these tips can streamline the FF&E process and ensure your project is completed on time, within budget, and to the highest standards.

Frequently Asked Questions 

Here are answers to some of the most common questions about FF&E:

What is the difference between FF&E and OS&E? 

FF&E (Furniture, Fixtures, and Equipment) includes movable or semi-movable items like furniture, lighting, and machinery. On the other hand, OS&E (Operating Supplies and Equipment) refers to smaller, consumable items used for daily operations, such as cleaning supplies, stationery, or kitchen utensils.

What is an example of an FF&E package? 

A FF&E package typically includes all the furniture, fixtures, and equipment needed for a specific project. For example, a hotel FF&E package might include guest room furniture (beds, chairs, tables), lobby seating, restaurant tables, kitchen equipment, and lighting fixtures.

What does FFE stand for? 

FFE stands for Furniture, Fixtures, and Equipment. It’s another way of referring to FF&E; both terms mean the same thing.

What FF&E and capex difference? 

Capex (Capital Expenditure) refers to funds to acquire or upgrade physical assets like buildings or machinery. FF&E, on the other hand, FF&E is a subset of capex that specifically covers movable or semi-movable items like furniture, fixtures, and equipment. While all FF&E falls under capex, not all capex is FF&E.

Conclusion

FF&E, or Furniture, Fixtures, and Equipment, is crucial in construction, interior design, and project management. From creating functional spaces to enhancing aesthetic appeal, FF&E plays a vital role in shaping how we experience buildings and interiors.

Whether it’s the cozy furniture in a hotel, the ergonomic chairs in an office, or the specialized equipment in a hospital, FF&E ensures that spaces are practical and visually appealing. By understanding the FF&E procurement process, its importance in different industries, and how it differs from OS&E and capex, you can make informed decisions for your projects.

If you’re planning a construction or interior design project, don’t overlook the importance of FF&E. With careful planning and the right strategies, you can create beautiful, fully functional spaces tailored to your needs. Explore this collection of Creative Staircase Design Ideas for more creative design ideas. Additionally, check out House Beautiful for more inspiration on interior design and FF&E ideas.

Bathroom Renovation While Living in the House

0
Bathroom Renovation

Bathroom Renovation While Living in the House: Is It Hard?

Is renovating a bathroom while living in the house hard? Discover practical tips, cost considerations, and strategies to minimize disruptions during your remodel.

Renovating a bathroom while living in your house may seem daunting, but with the right approach, it can be a smooth and rewarding process. Whether tackling a small bathroom upgrade or a complete overhaul, strategic planning is key. In this guide, we address common concerns and provide actionable steps to make your bathroom renovation while living in the house as stress-free as possible.

In What Order Do You Renovate a Bathroom?

Renovating a bathroom involves a structured process to ensure efficiency and quality results. Here is the ideal order:

Planning and Budgeting:

  • Decide on the layout and design.
  • Choose materials, fixtures, and a renovation team.
  • Set a realistic budget with contingencies for unexpected costs.

Demolition:

  • To prepare the area, take out the outdated cabinets, tiles, and fixtures.

Plumbing and Electrical Work:

  • Update or relocate plumbing and electrical lines to accommodate new designs.

Flooring and Wall Finishes:

  • Install durable flooring and wall tiles or apply paint.

Fixture Installation:

  • Add the toilet, sink, shower, and other bathroom essentials.

Lighting and Accessories:

  • Install lighting fixtures and add accessories like mirrors and storage solutions.

Final Touches:

  • Clean the area, seal fixtures, and conduct a final inspection.

How Does a Bathroom Renovation Start?

  • The first step in a bathroom remodel is creating a detailed plan. This includes assessing your current bathroom, setting a budget, and deciding on design elements.

Consider:

  • The desired level of elegance and utility.
  • The materials and fixtures within your budget.
  • Hiring professionals or deciding on DIY elements.

The Step-by-Step Guide to Bathroom Renovation

Bathroom Renovation While Living in the House

Renovating a bathroom while living in the house requires a phased approach:

Prepare Temporary Solutions:

  • Install a sink for cleaning in the kitchen.
  • Use a portable shower or gym facilities for bathing.

Work in Sections:

  • Divide the project into manageable parts to maintain some bathroom functionality.

Hire Reliable Contractors:

  • Communicate your needs and living arrangements to minimize disruptions.

Focus on Key Areas First:

  • Begin with essential fixtures like the toilet and sink.

Keep Your Routine Flexible:

  • Adjust your schedule to accommodate construction hours.

How Do You Live During a Bathroom Renovation?

Living through a renovation requires adaptability and preparation. Here are some suggestions to help you handle it:

Establish Temporary Facilities:

  • Set up a temporary wash station or rent a portable toilet if necessary.

Limit Dust and Noise:

  • Use plastic sheeting and air filtration systems.
  • Schedule noisier tasks during the day when disruptions are less intrusive.

Maintain Open Communication:

  • Provide your contractor with regular updates and progress reports.

Can You Live in a House When It Is Being Renovated?

Yes, you are allowed to remain in your home while updating your bathroom and other areas. It necessitates meticulous preparation and communication, though. Set priorities:

  • Creating a clear renovation timeline.
  • Setting boundaries to minimize disruptions.
  • Using alternative facilities when necessary.

Can I Renovate My Bathroom on My Own?

Renovating your bathroom yourself is possible, especially for minor updates like painting or replacing fixtures. However, tasks involving plumbing and electrical work often require professional expertise to meet safety and code standards. Before making a choice, take your budget, time, and skill level into account.

What Is the Hardest Part of Bathroom Renovation?

Bathroom Renovation While Living in the House

The most challenging aspects of bathroom renovation include:

Plumbing and Electrical Adjustments:

  • These require precision and compliance with regulations.

Living with Disruptions:

  • Managing daily routines without a fully functional bathroom.

Staying on Budget:

  • Unforeseen issues, such as hidden water damage, can escalate costs.

Small Bathroom Renovation While Living in the House

Renovating a small bathroom presents unique challenges but also opportunities:

Maximize Space:

  • Use space-saving fixtures and vertical storage solutions.

Opt for Light Colors:

  • Bright hues create an illusion of a larger area.

Focus on Essentials:

  • Prioritize functionality over aesthetics.

Bathroom Renovation While Living in House Cost

Renovations to bathrooms can vary in price depending on:

Scope of Work:

  • Full remodels cost more than cosmetic updates.

Material Quality:

  • High-end materials increase expenses.

Labor Costs:

  • Professional services can range from $50 to $150 per hour.

Expect to spend between $5,000 and $15,000 for an average renovation while living in the house.

Bathroom Remodel Ideas

Install Walk-In Showers:

  • Ideal for small bathrooms to save space.

Add Floating Vanities:

  • Enhance storage and modernize the look.

Use Statement Tiles:

  • Create a focal point with unique patterns or colors.

How to Renovate a Bathroom When You Only Have One

Renovating your only bathroom requires creative solutions:

  • Coordinate with contractors to keep the toilet accessible for as long as possible.
  • Set up temporary shower options like portable units or gym memberships.
  • Plan renovations during a time when disruptions will be minimal.

Choosing Bathroom Renovation Companies

When selecting a contractor, consider:

Experience and Reviews:

  • Look for specialists with a proven track record.

Transparent Pricing:

  • Ensure no hidden fees in the quote.
  • Timeline Commitment: Choose contractors who respect deadlines and minimize delays.

Final Thoughts

Renovating a bathroom while living in your house doesn’t have to be overwhelming. Is it hard? Not necessarily, if you have proper planning, clear communication, and a focus on minimizing disruptions. Temporary arrangements, phased approaches, and professional support can significantly reduce stress.

By investing in planning and setting realistic expectations, you’ll navigate the process more smoothly and enjoy the rewarding outcome of a beautiful, functional bathroom tailored to your needs.